

Glenn Are
-
Posts
532 -
Joined
-
Last visited
-
Days Won
2
Content Type
Profiles
Forums
Gallery
Downloads
Blogs
Events
Forum articles
Posts posted by Glenn Are
-
-
-
-
-
-
Pussa opp denna også


-
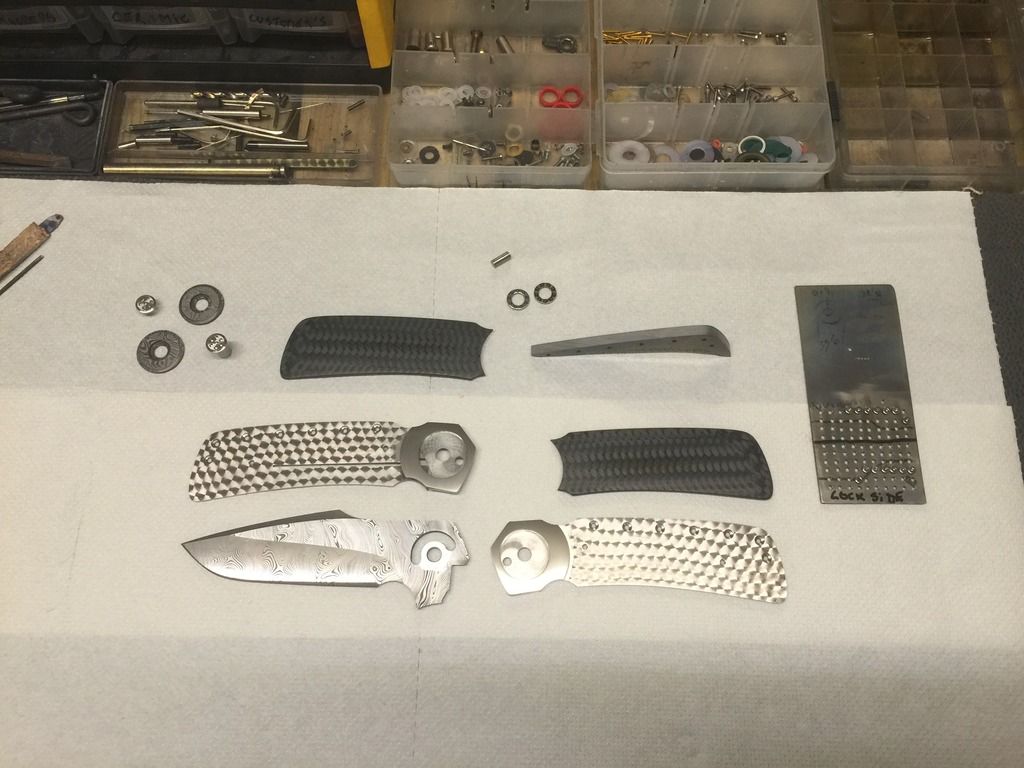
some pics from assembly and a couple pics right before I shipped it
-
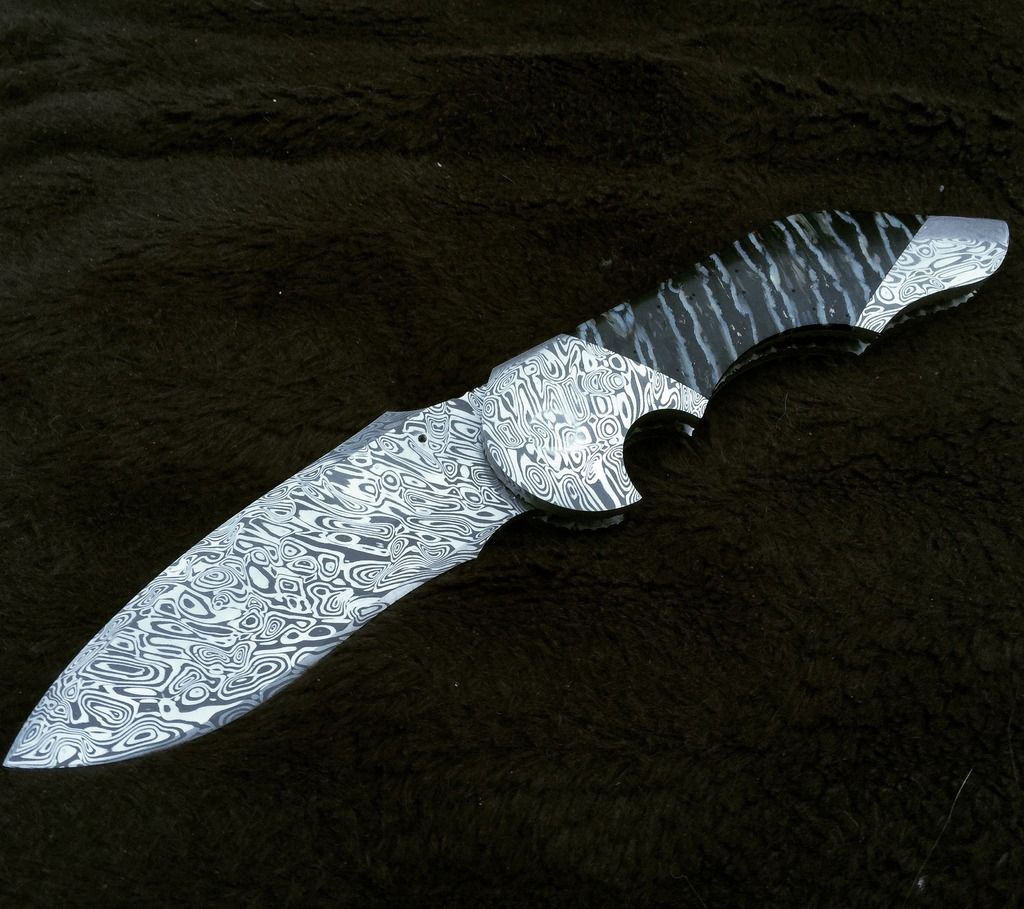
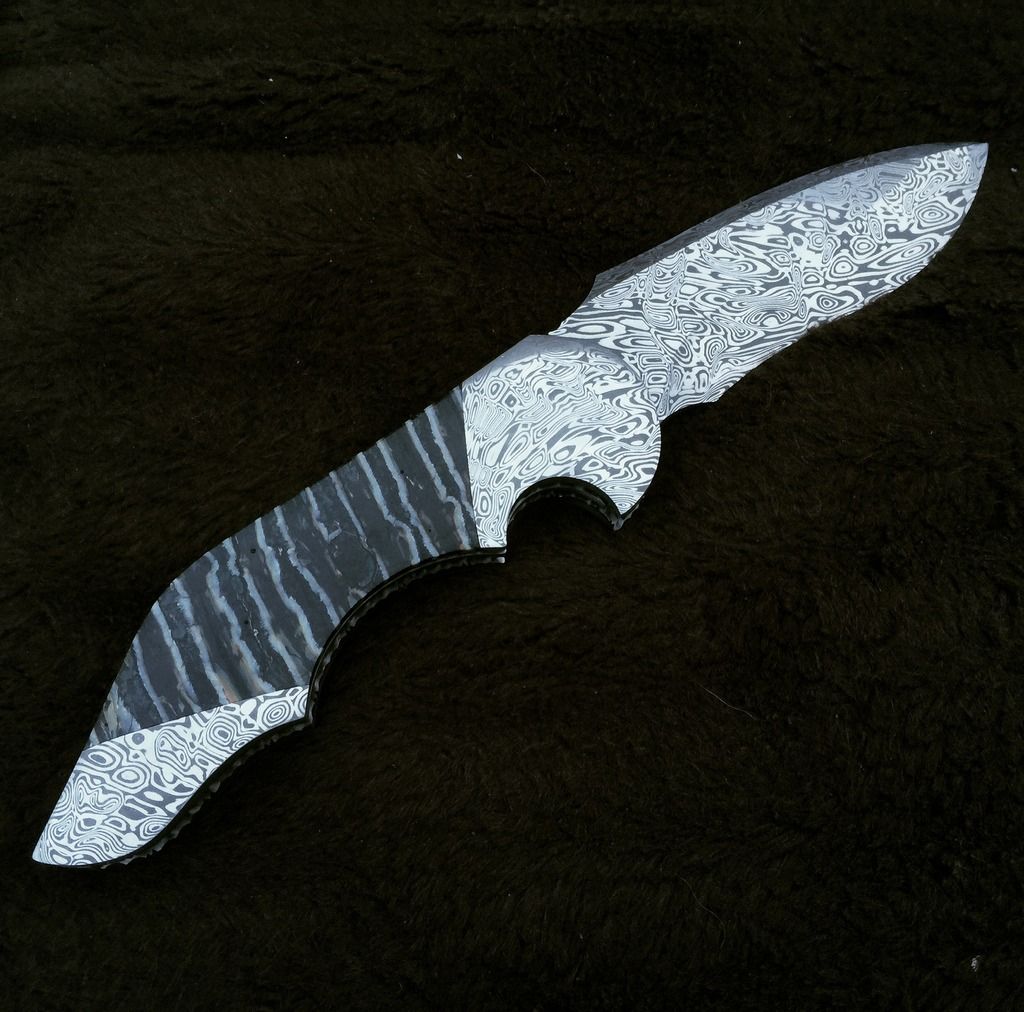
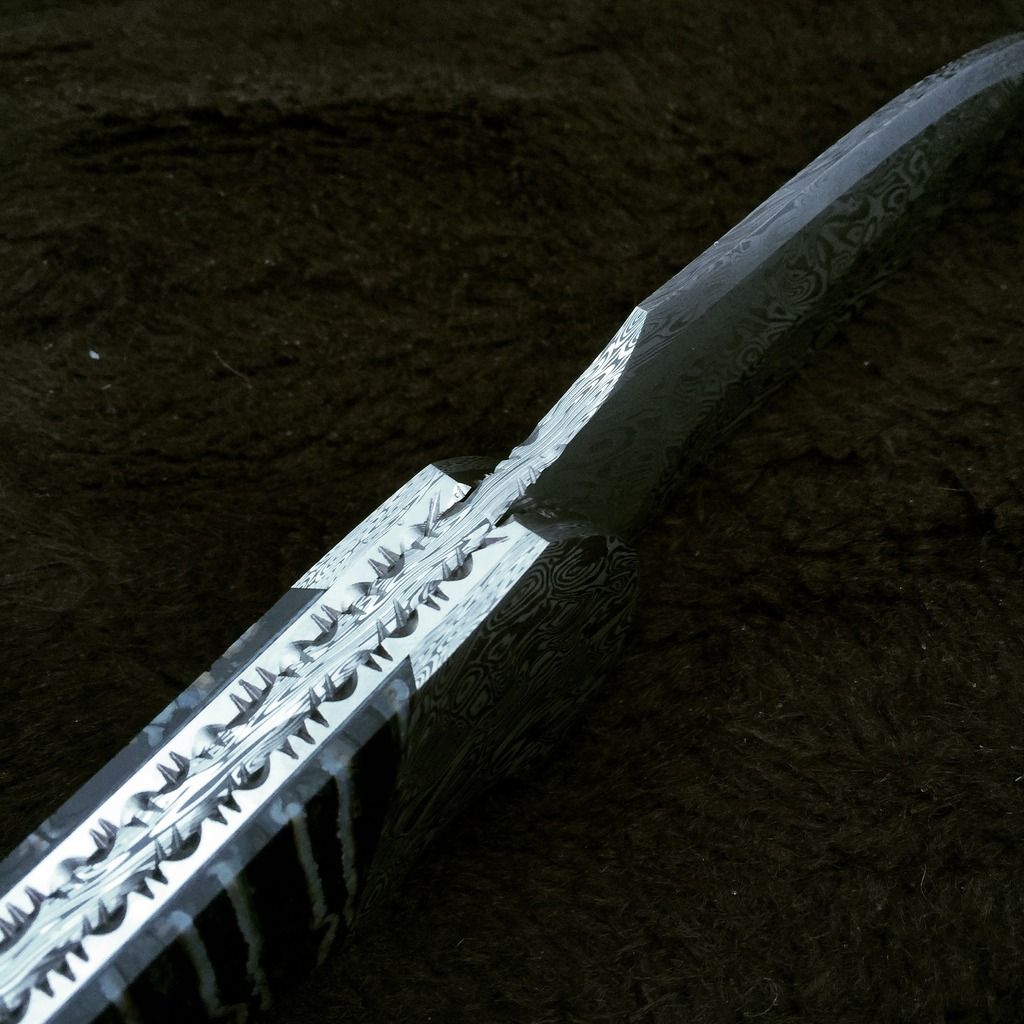
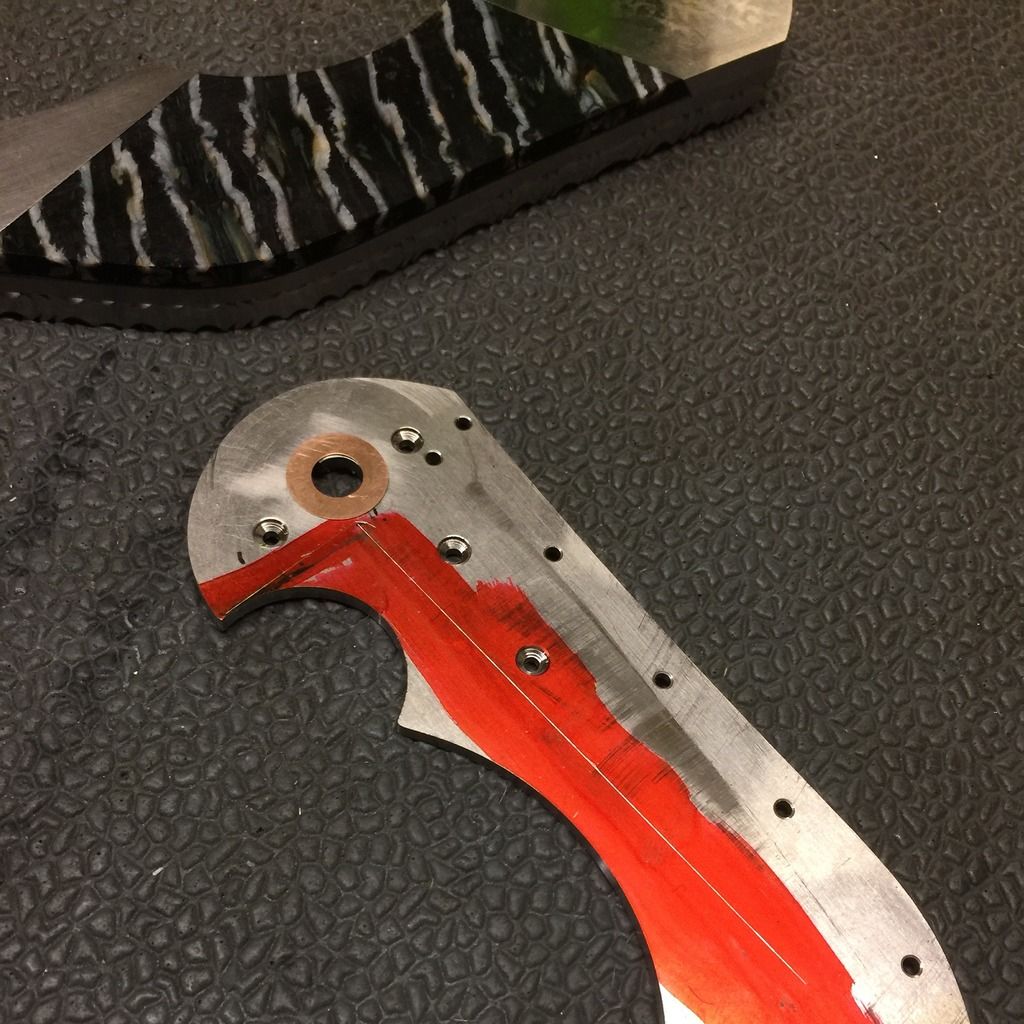
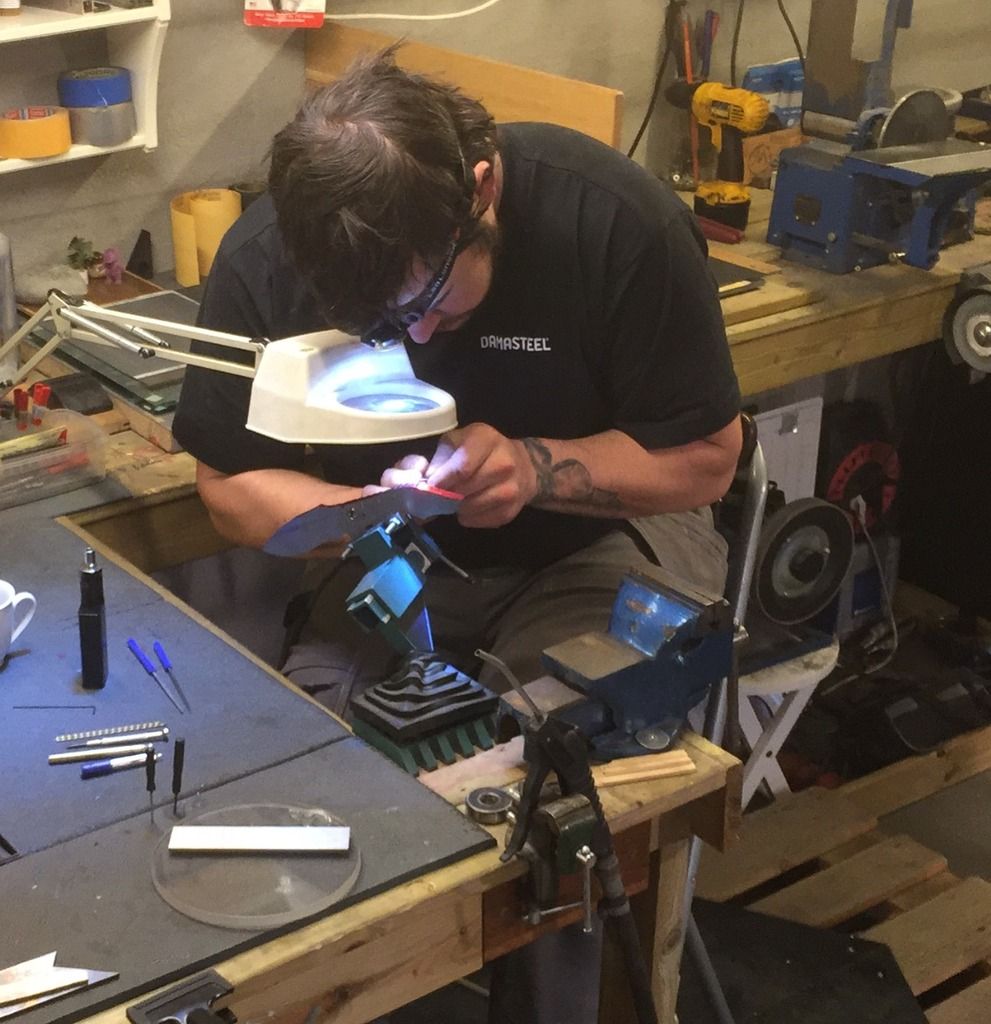
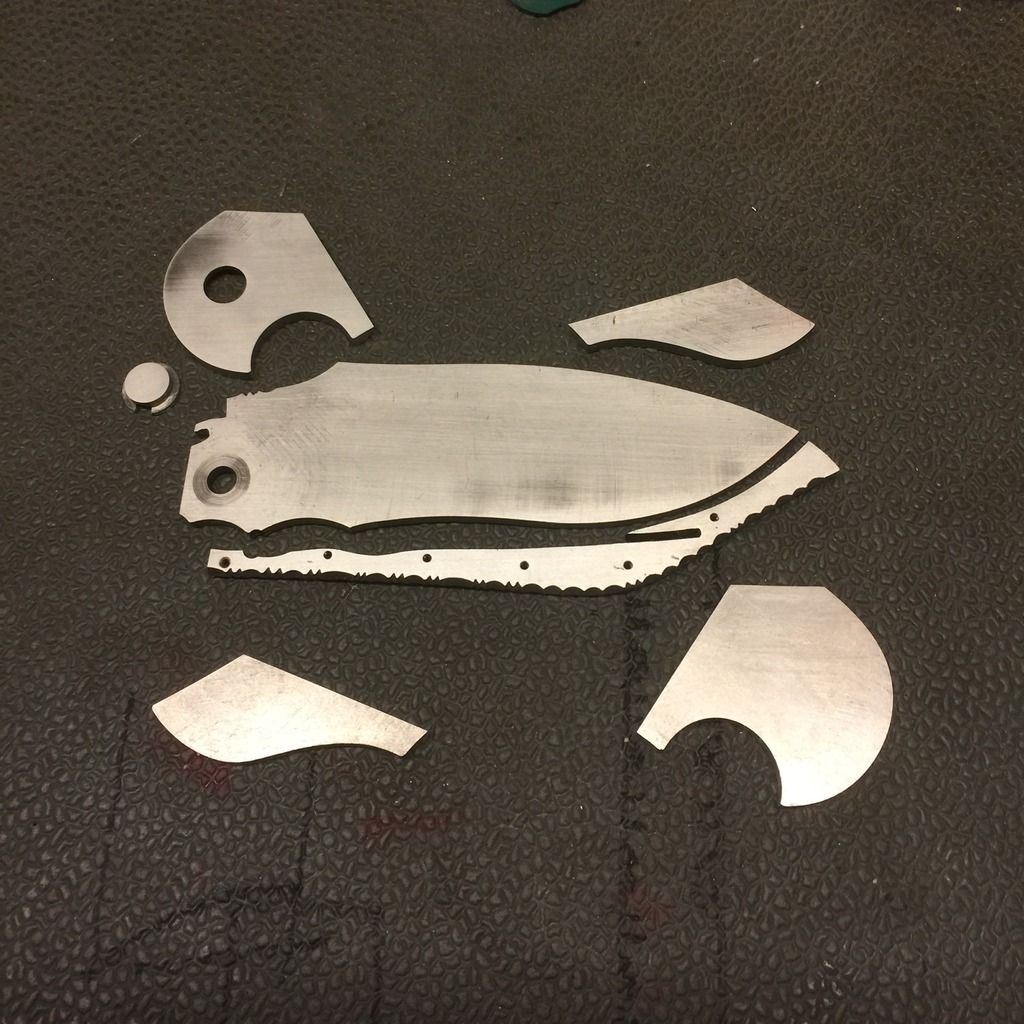
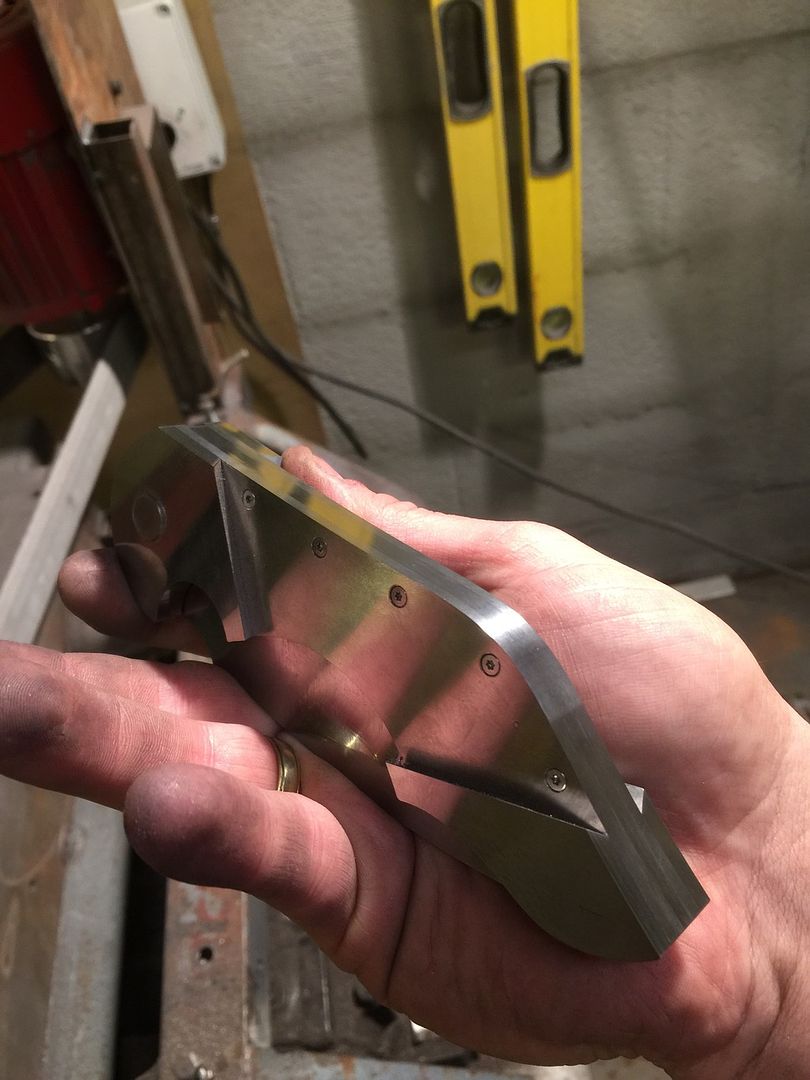
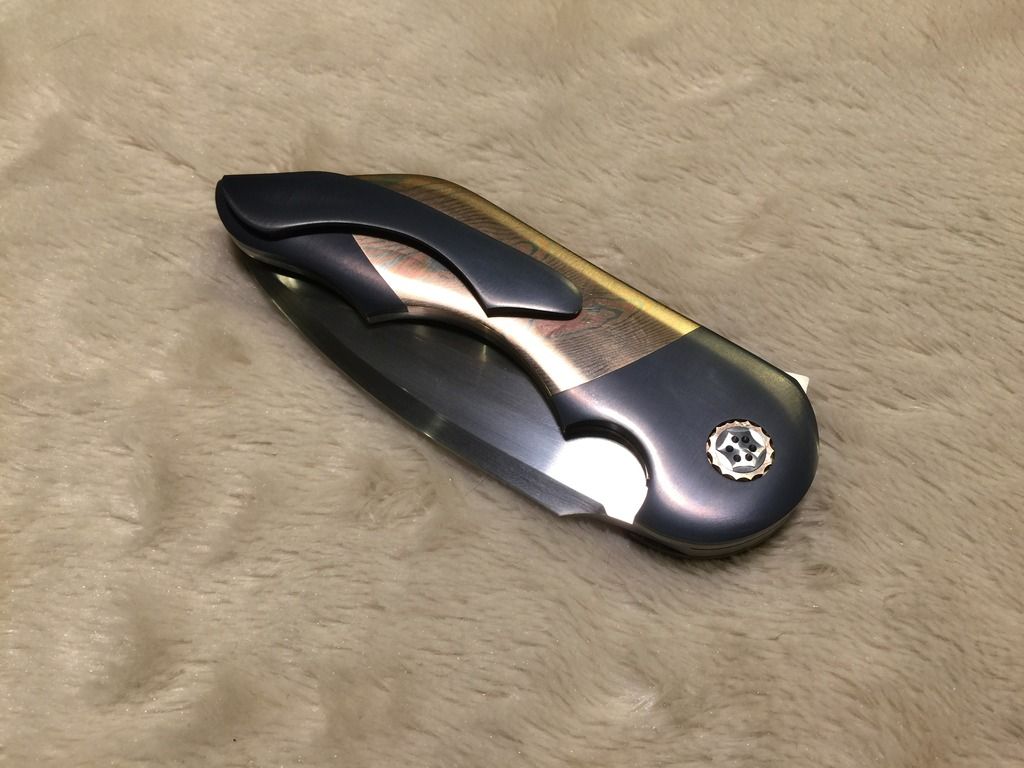
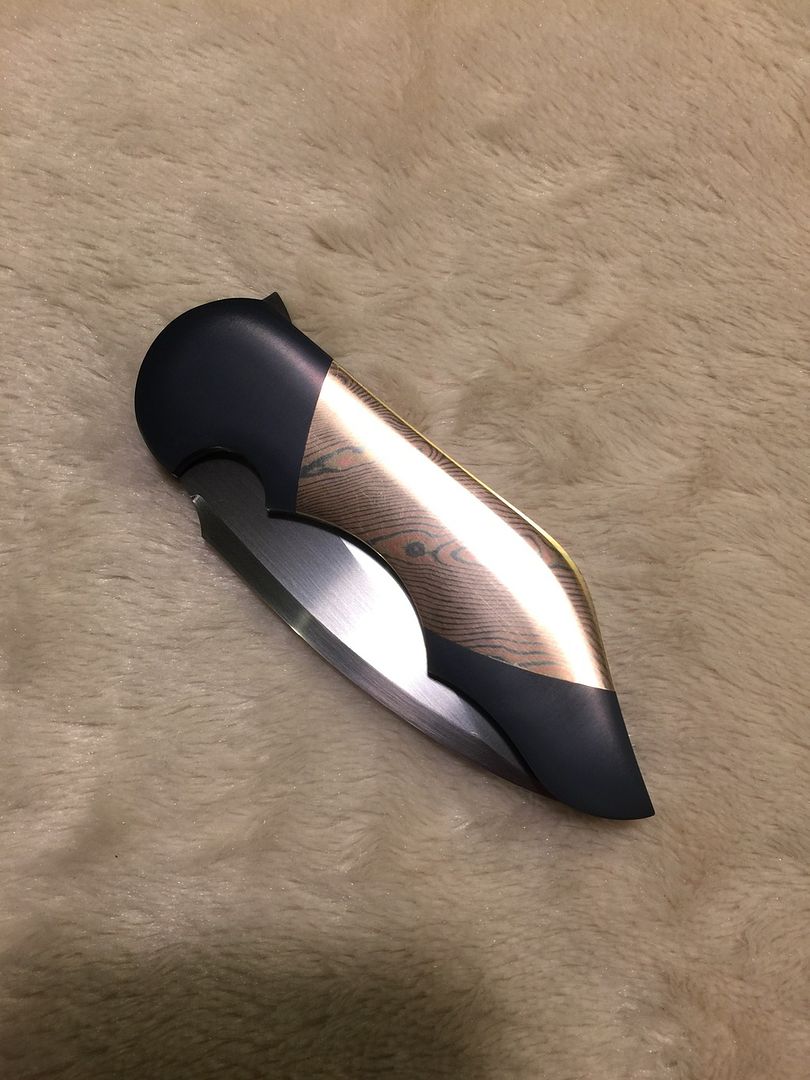
Time for assembly and some pictures of the knife. Only thing missing is to make a thumbstud, I always save that for last task
Polish up the hardware
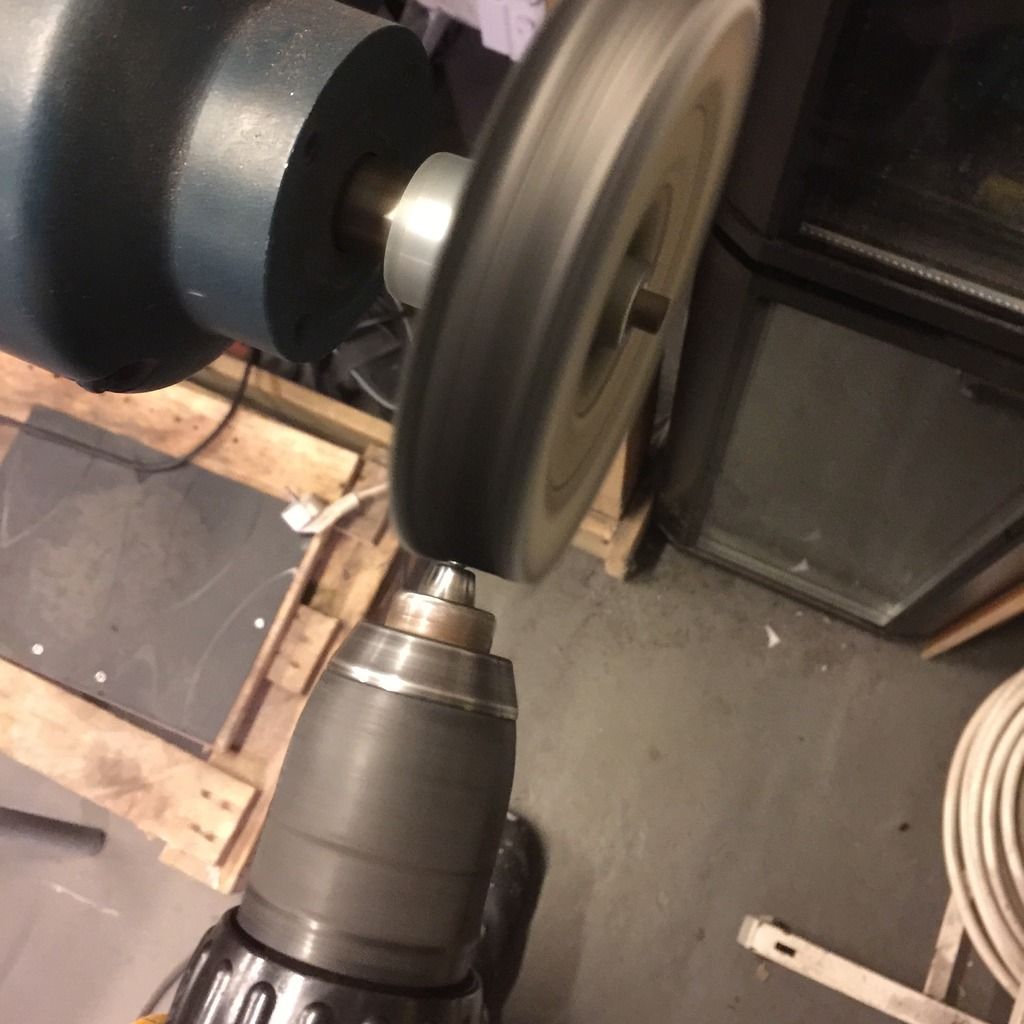
I use the cordless drill on the buffer
Making progress on assembly, I polished up all the screws and leave them natural without color to blend in more with liners inside the knife.

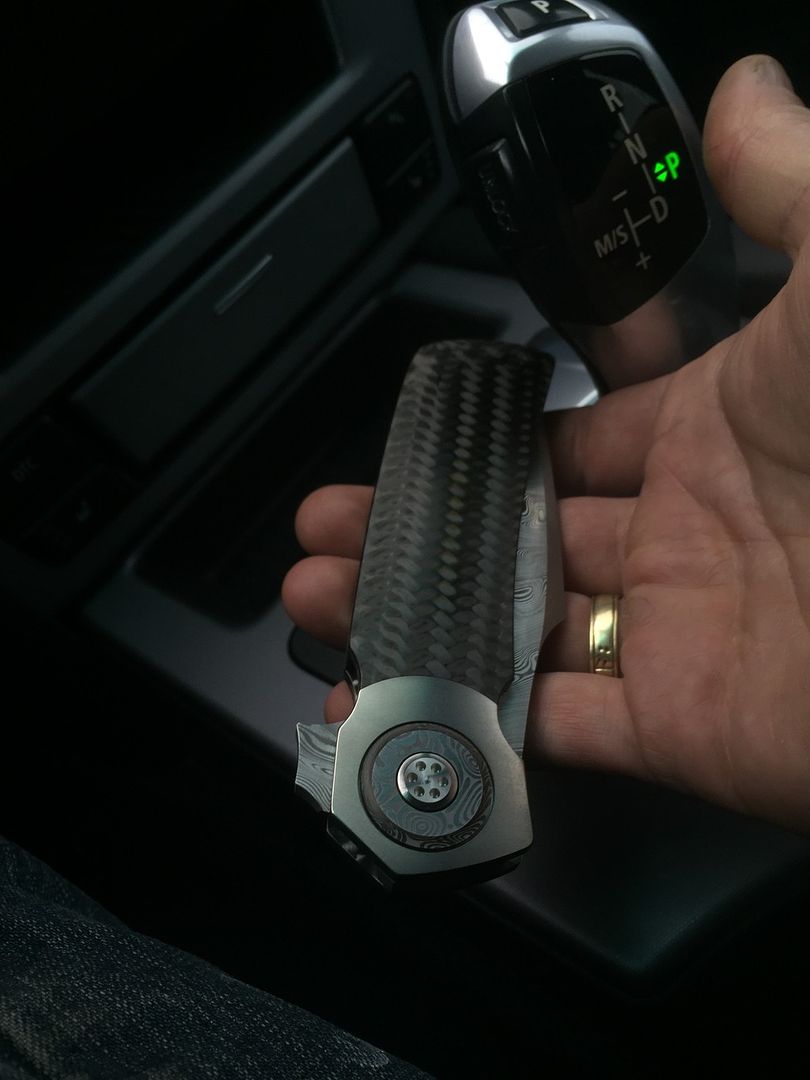
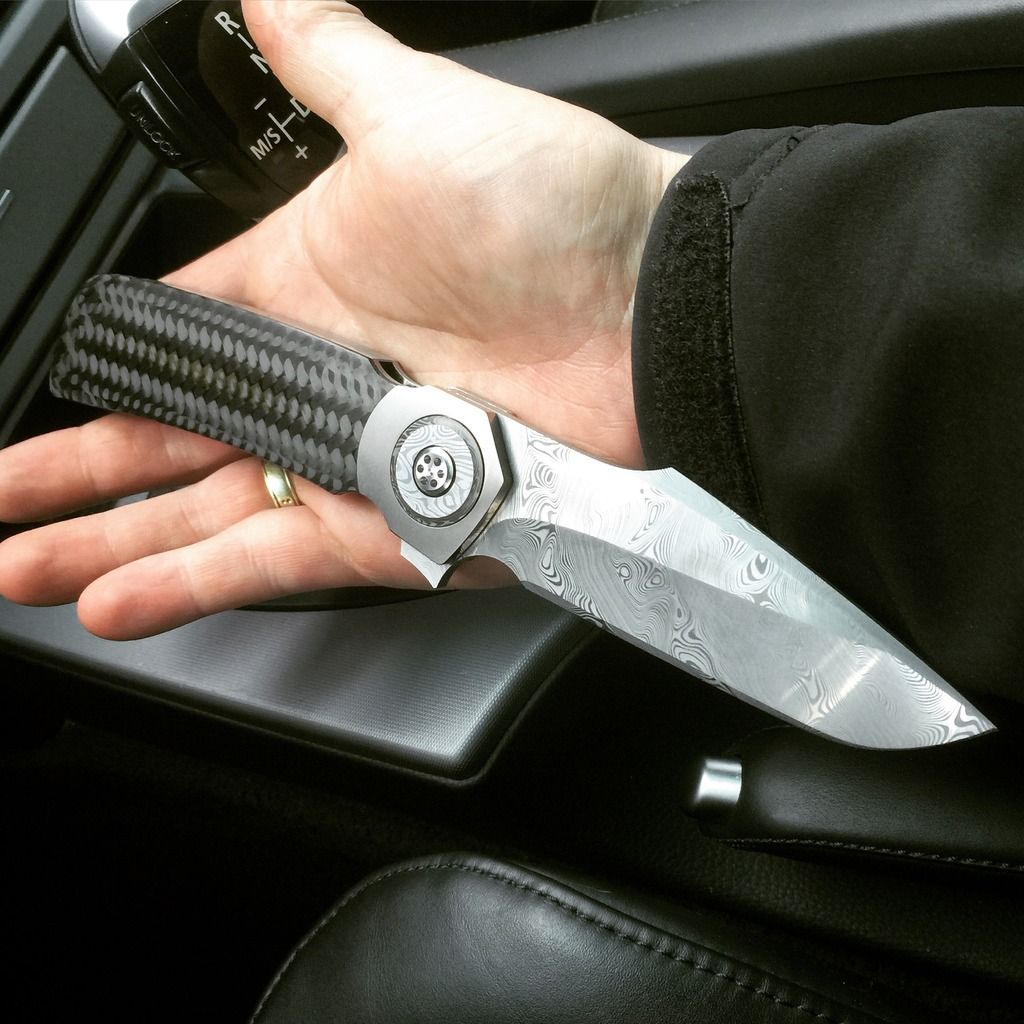
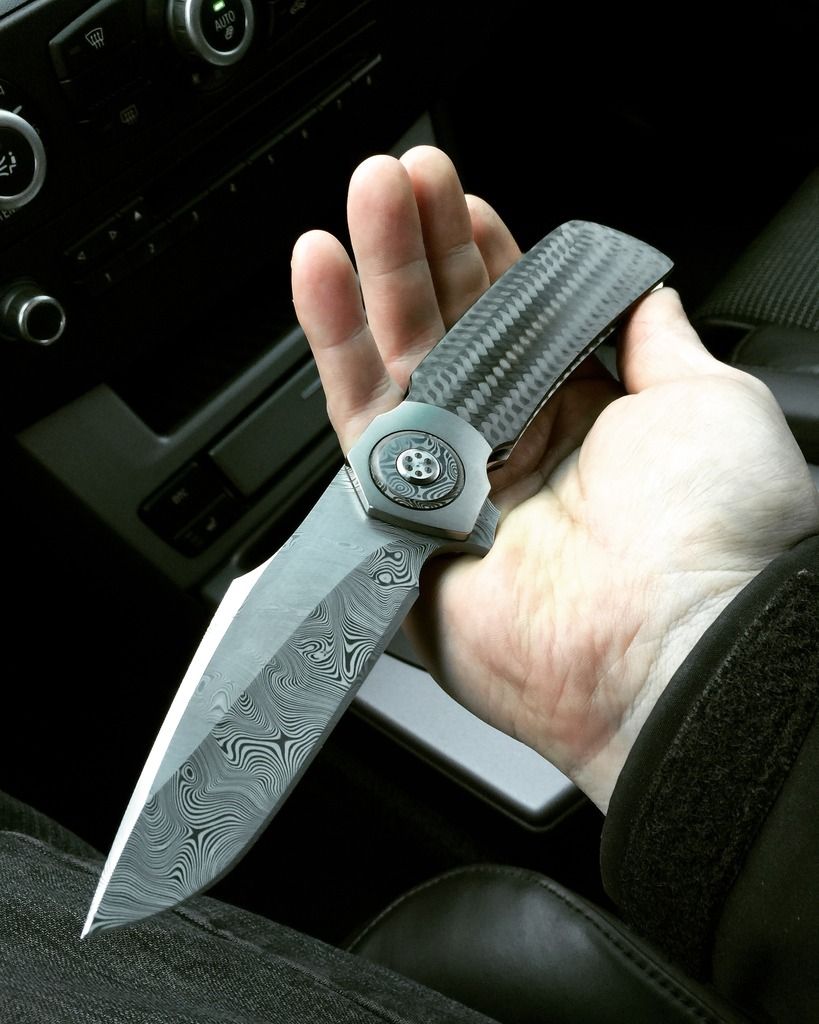
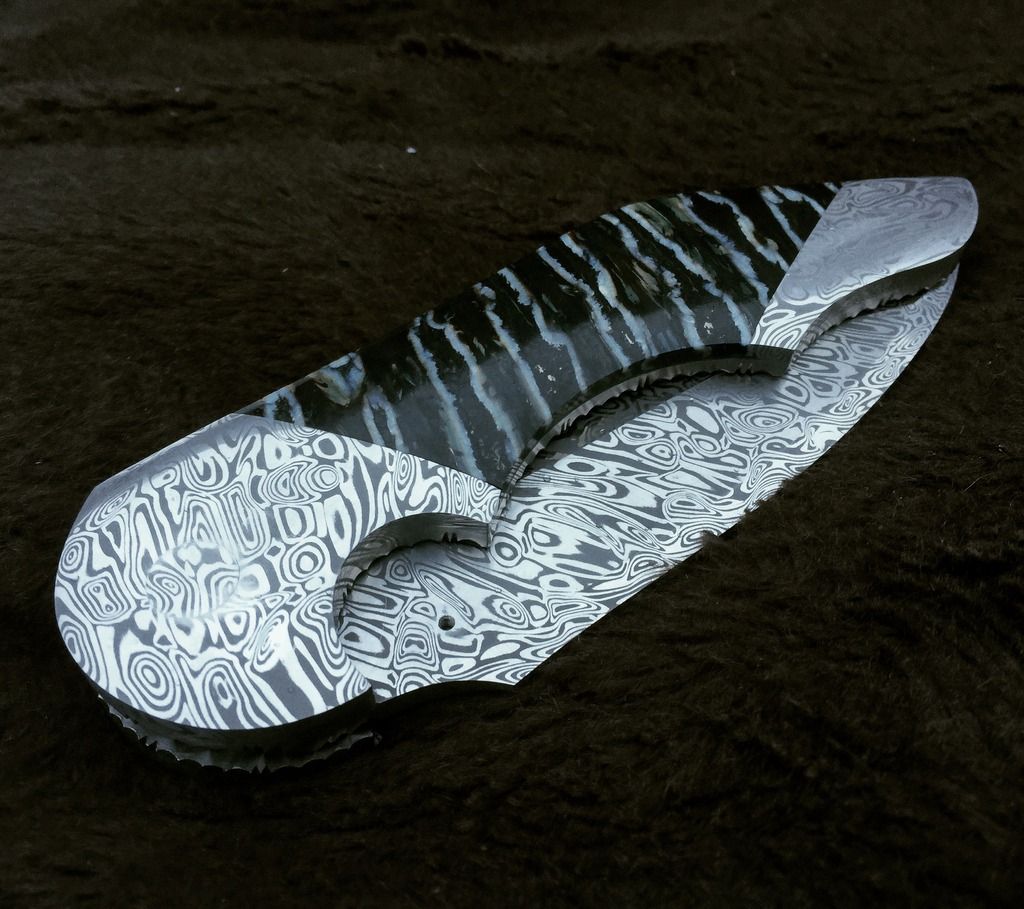
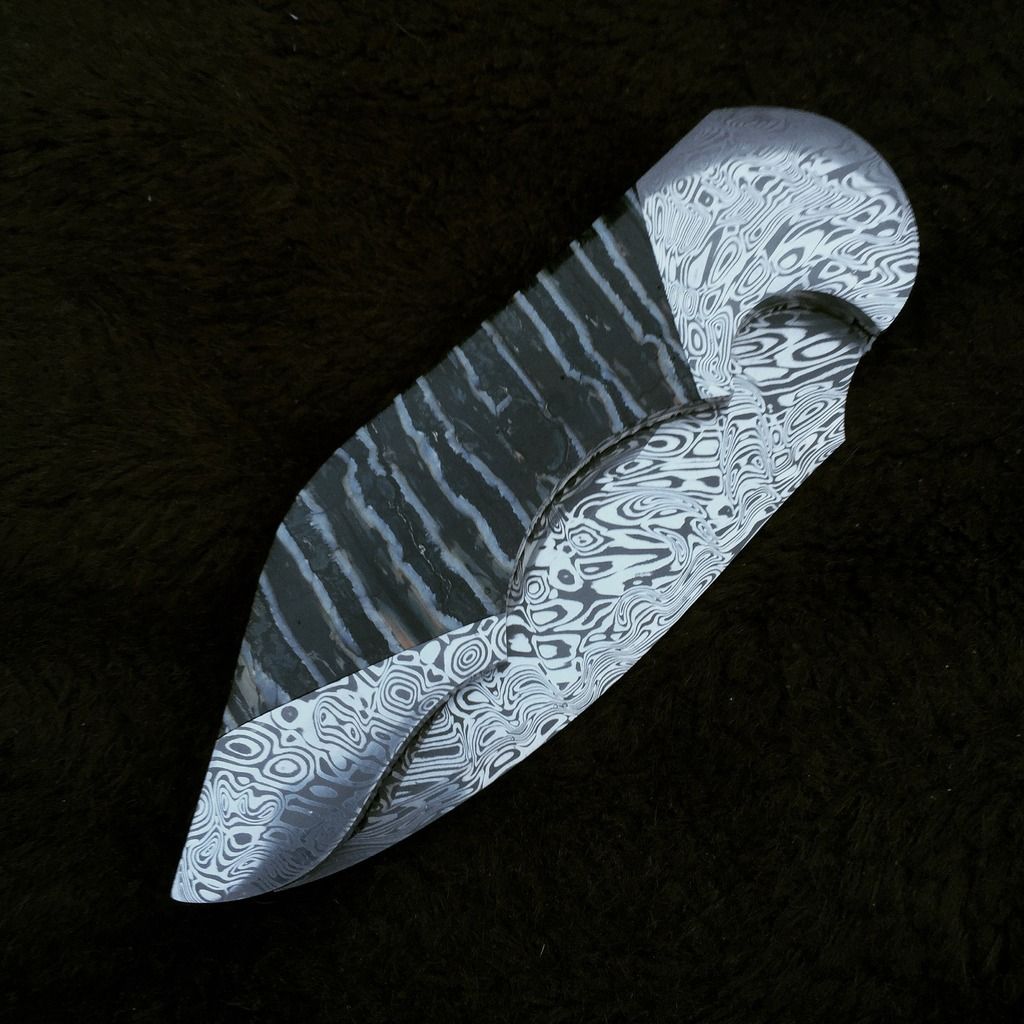
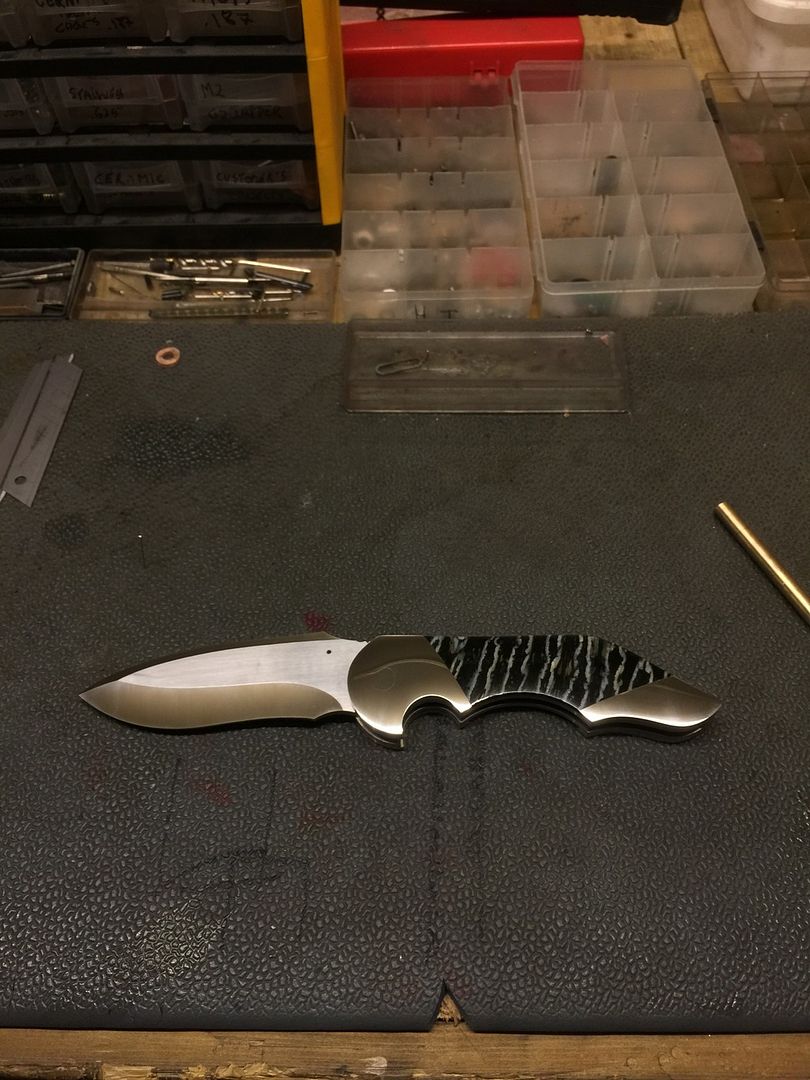
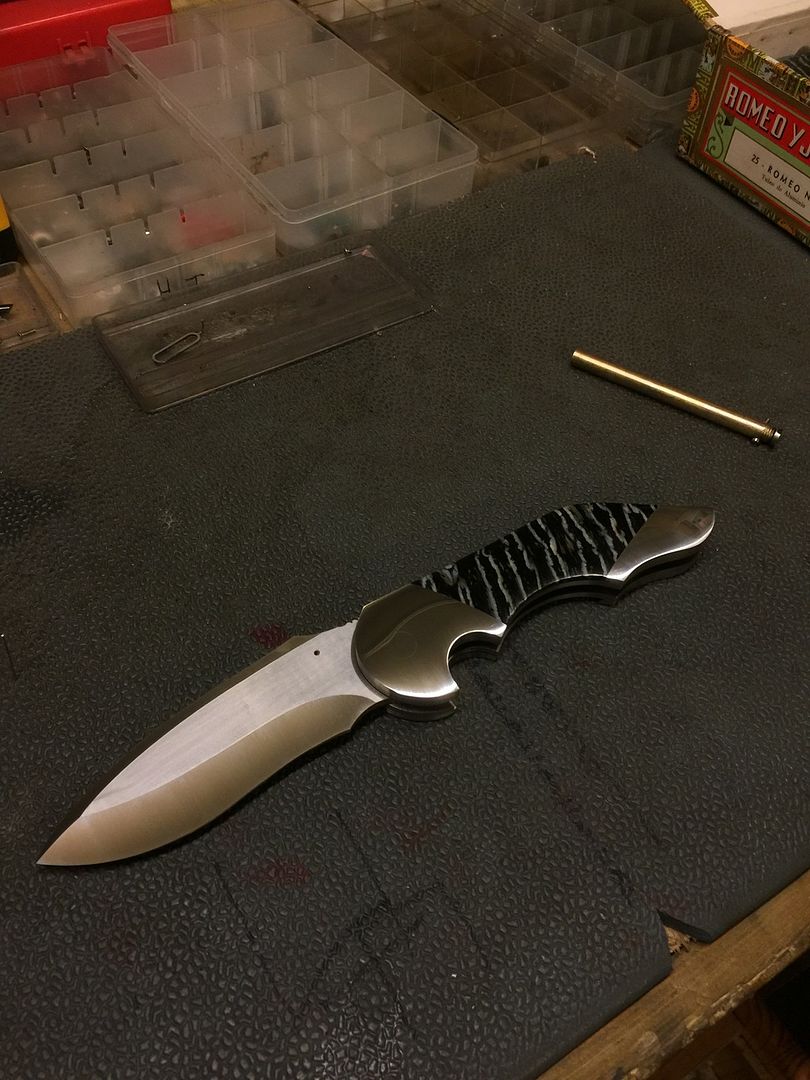
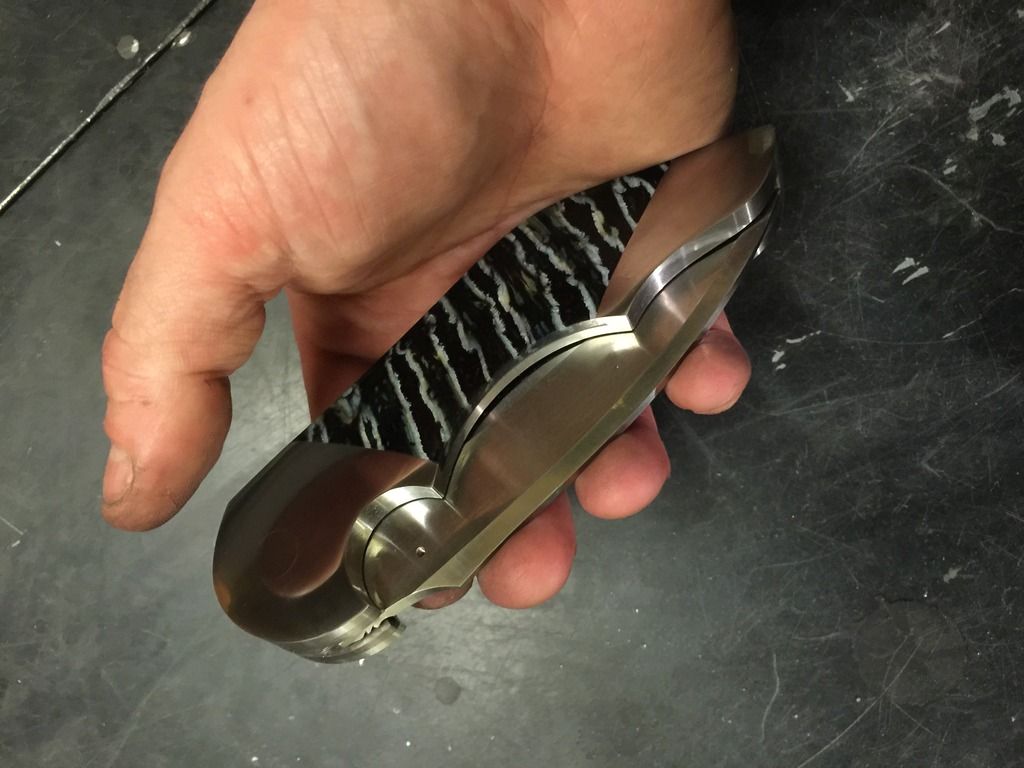
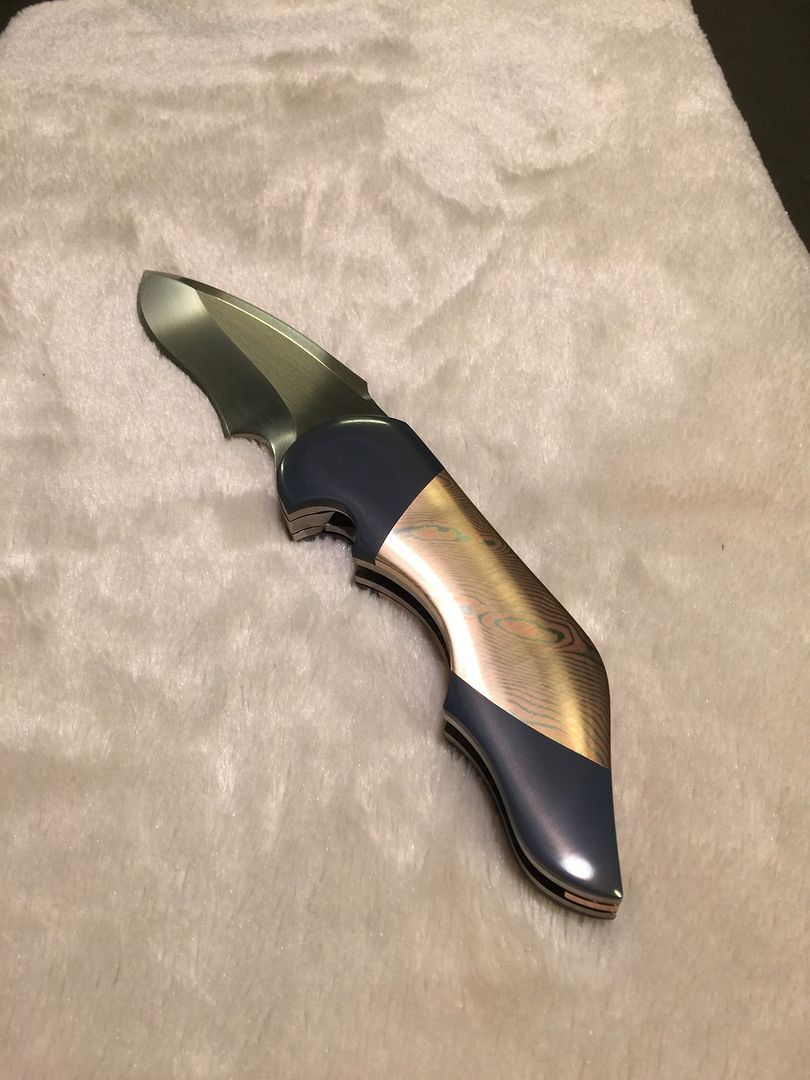
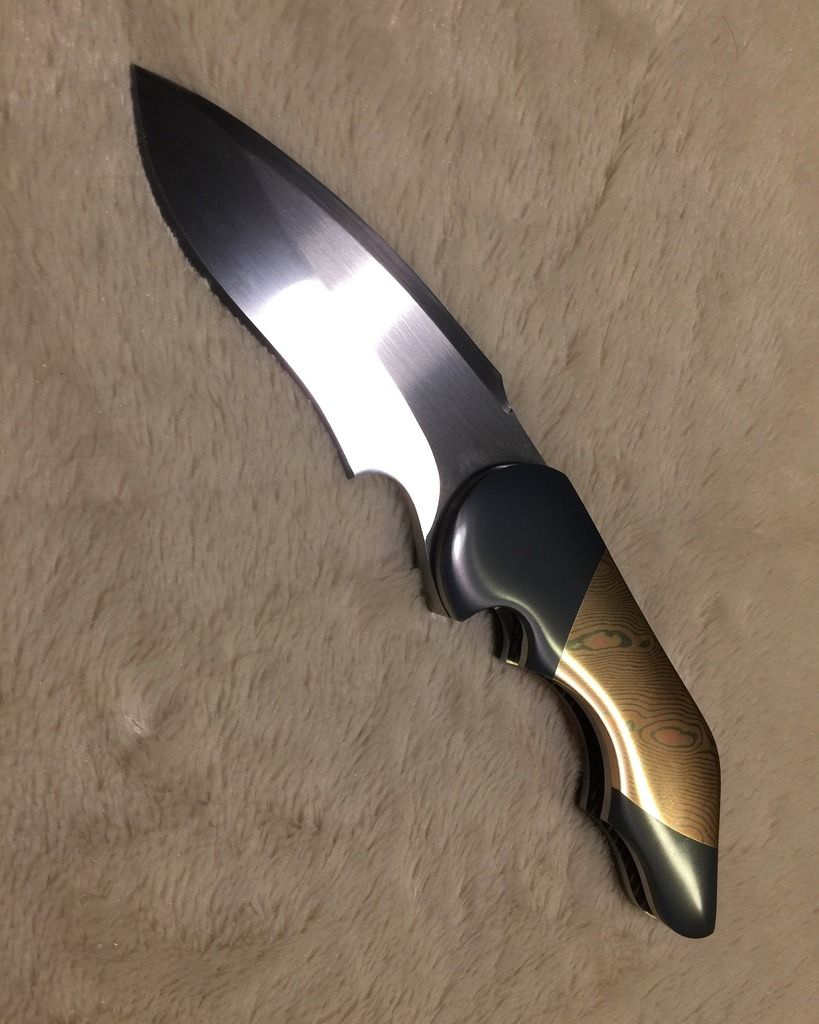
And here it is. Thank you everyone for showing interest into my WIP thread. I will pulblish a couple photo with the stud mounted on the blade later.
I have also made a video on YT, just search hovinknives.
/Glenn
-
Alright update.
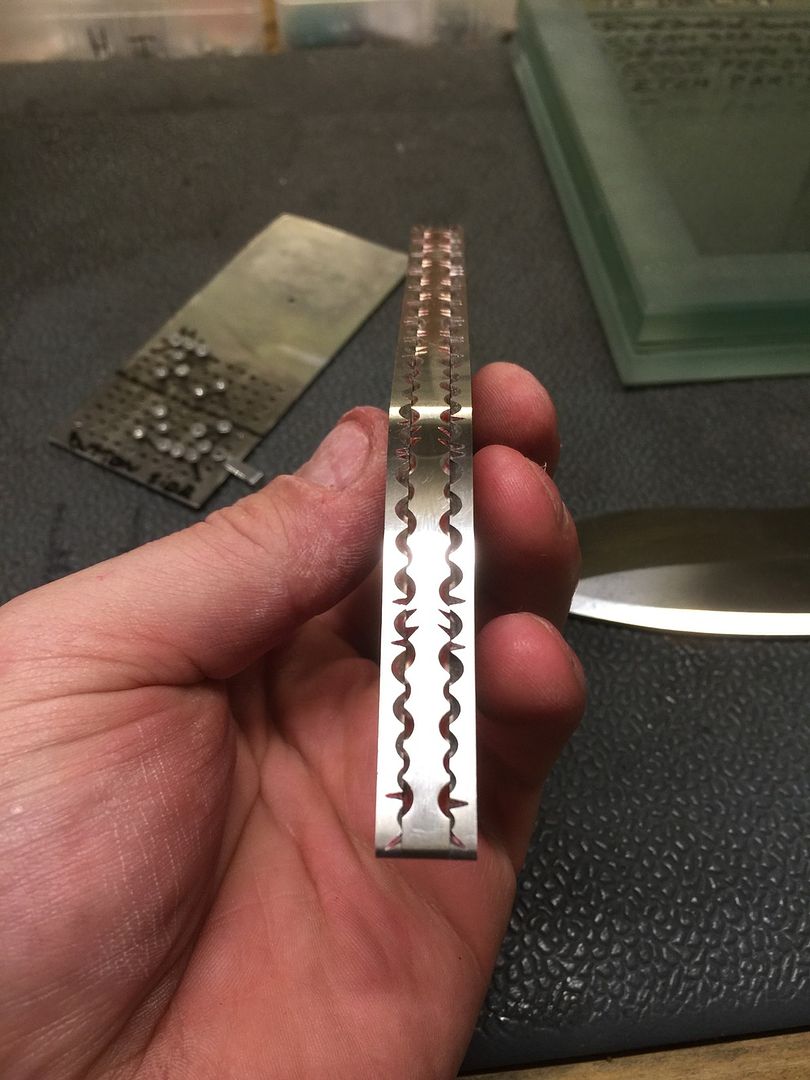
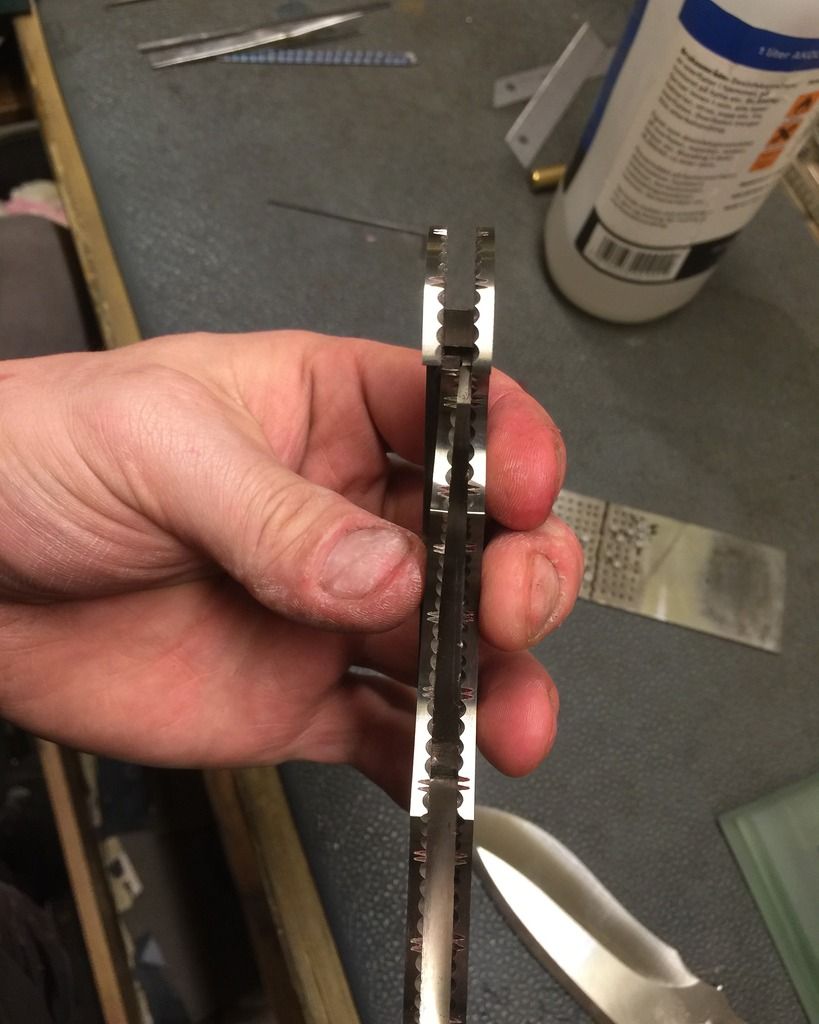
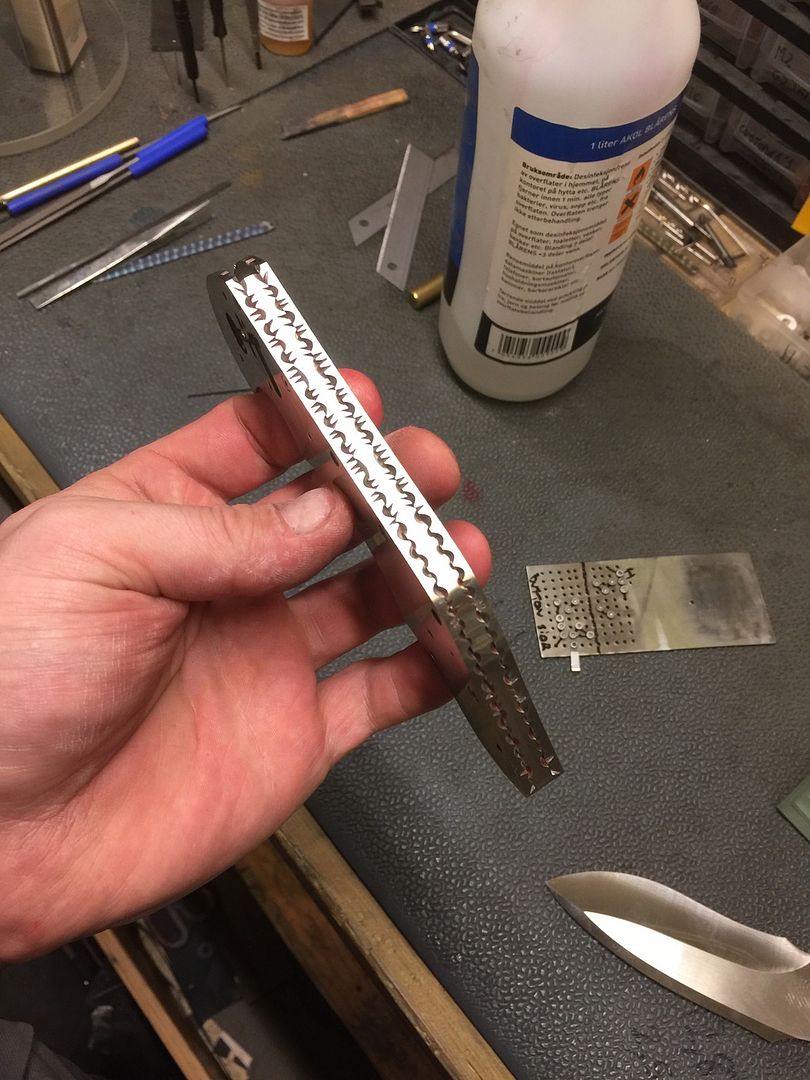
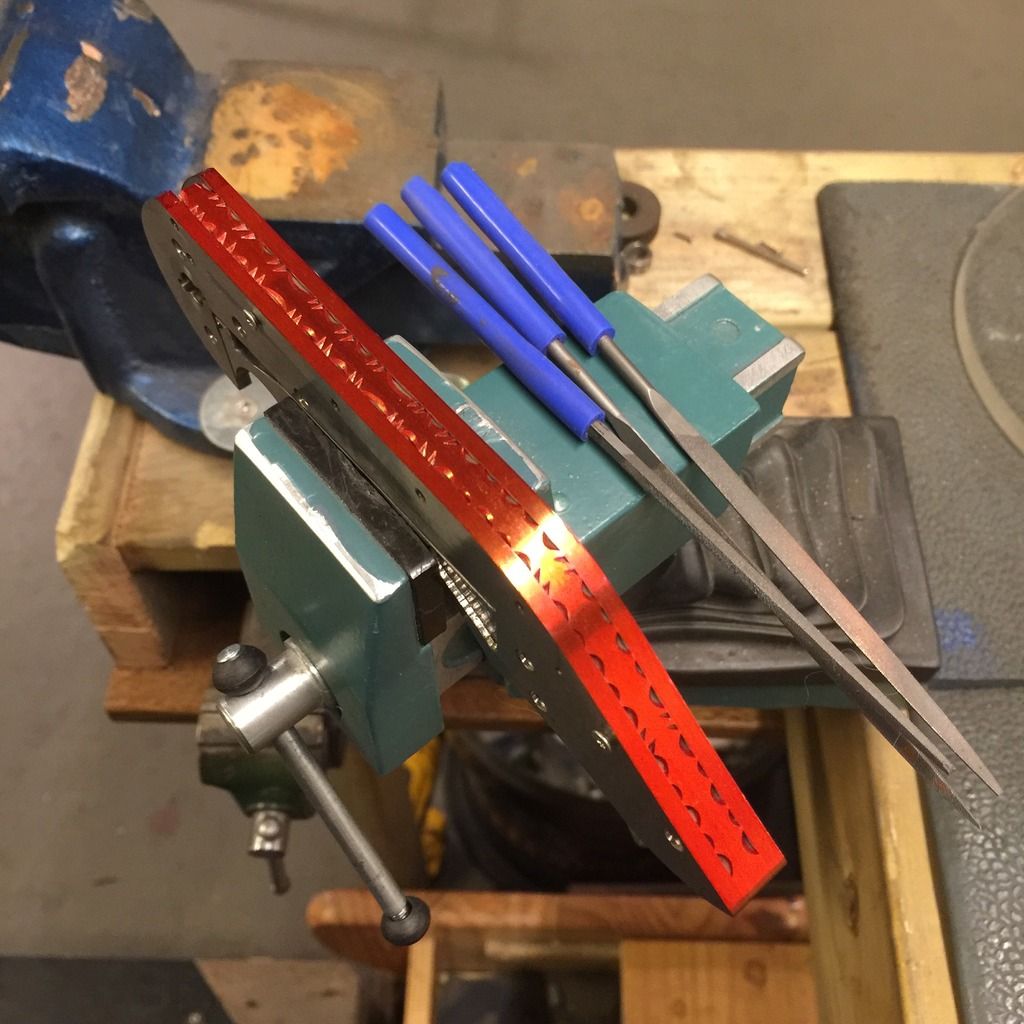
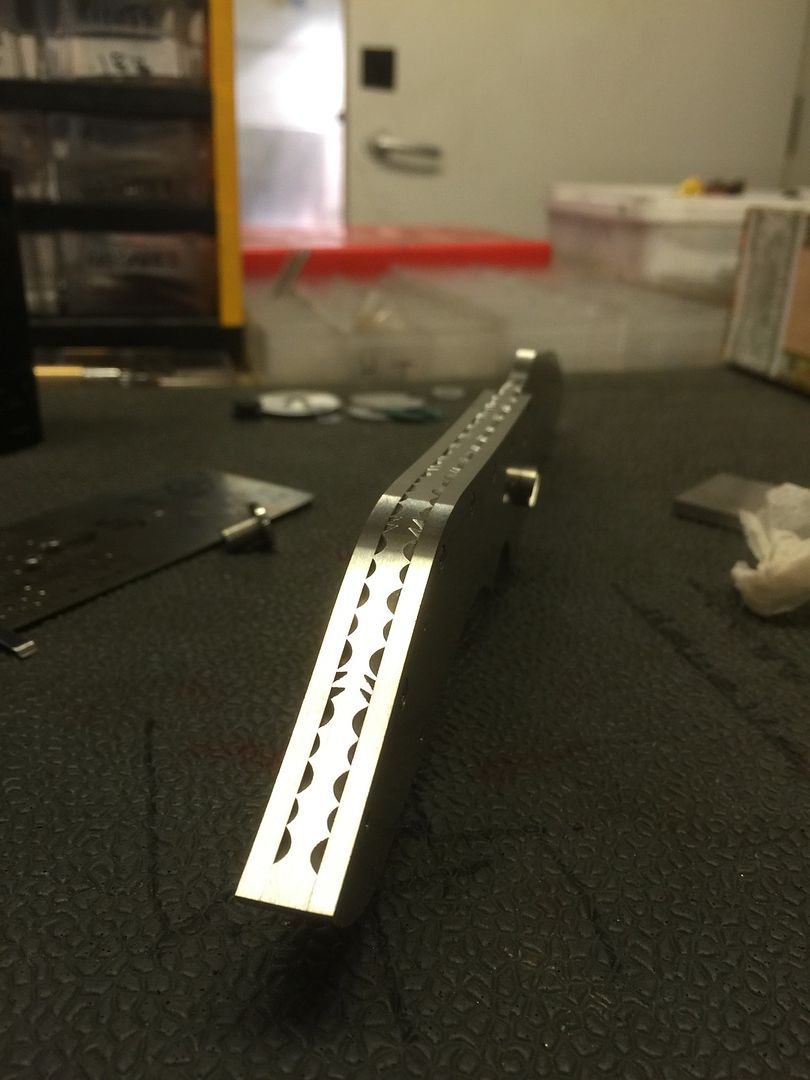
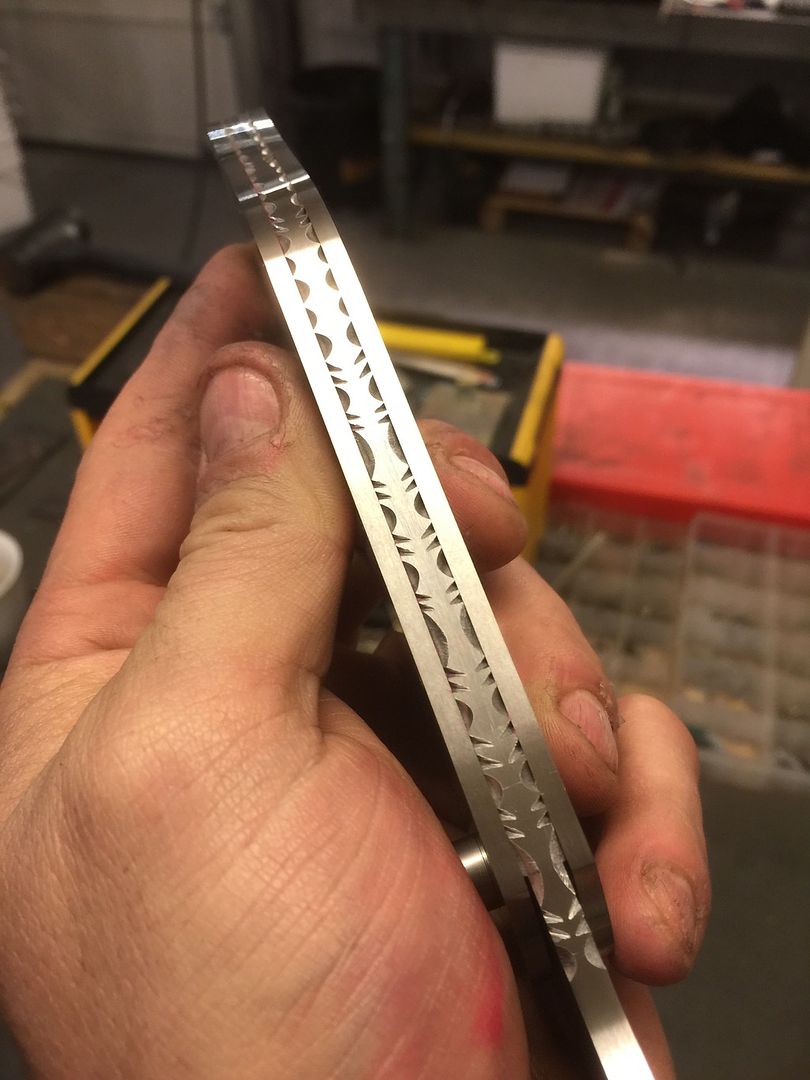
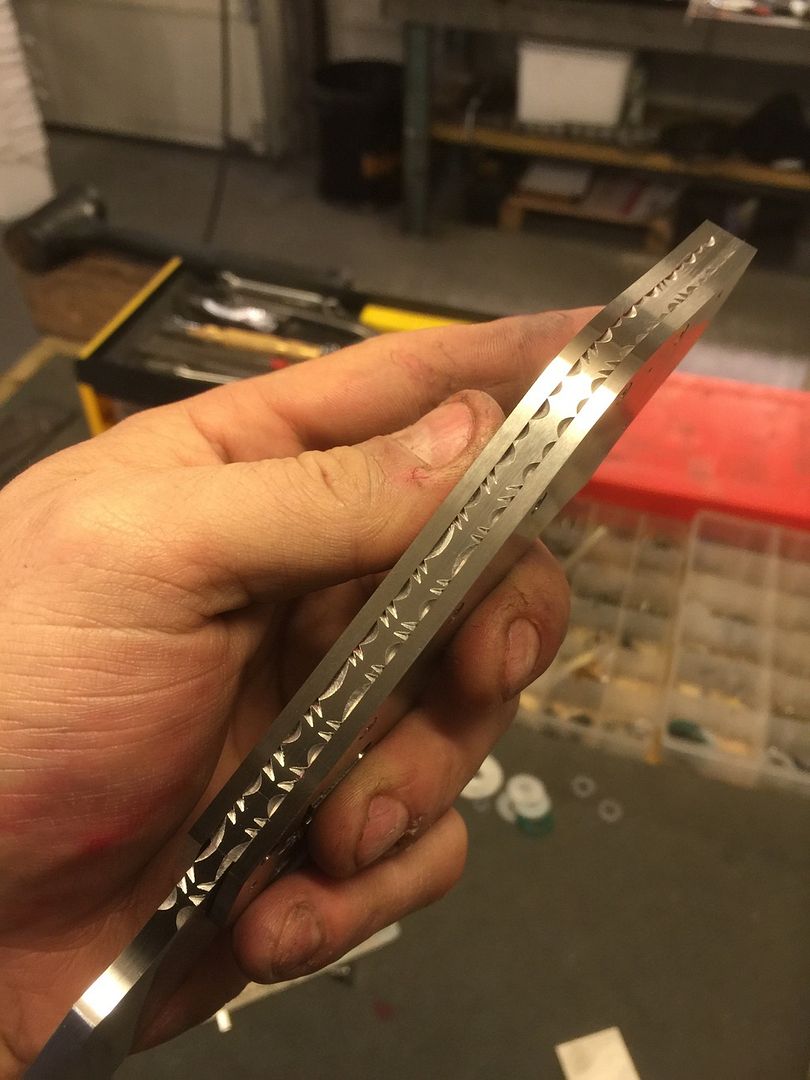
Finished up filework on liners, as said I ount the liners on spine inside out so I have most possibility to keep it mostly consistent.
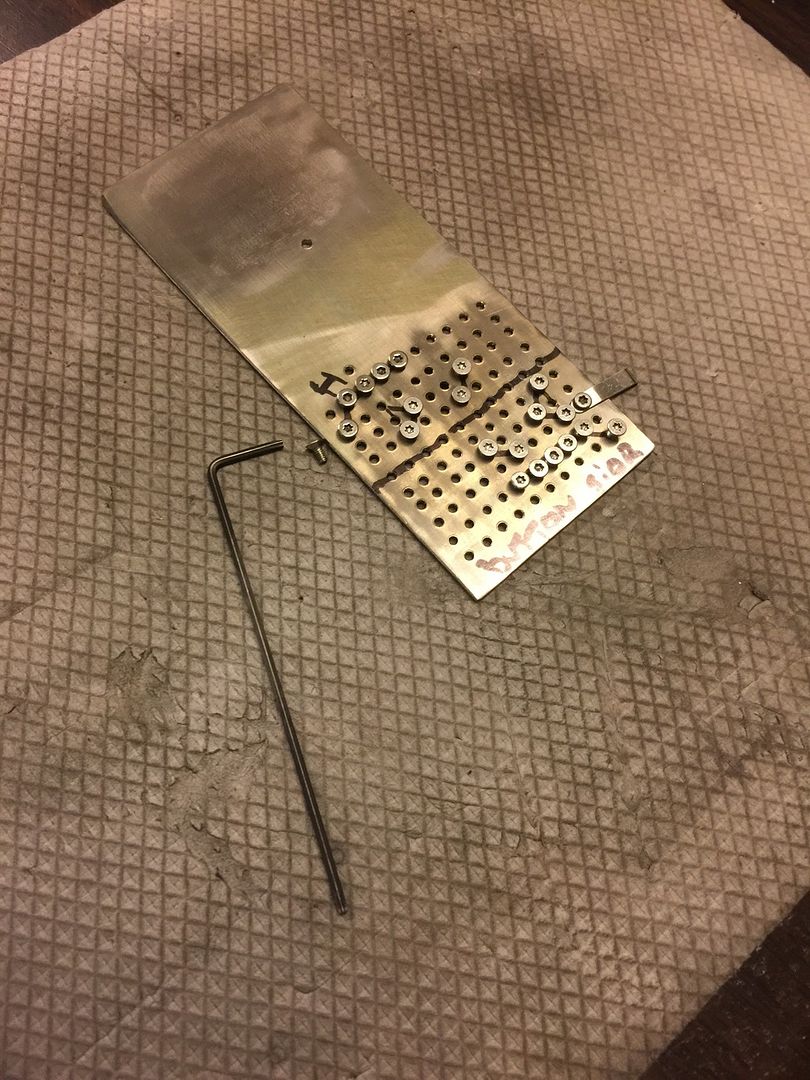
My plate for easy engine turning(jeweling)
Time to etch all the parts, I wish it was carbon damascus because I can also do hot bluing now. This steel has a story: A guy named Mathias is the owner of this knife, he is a blacksmith at Damasteel Sweden(main office/factory) and this steel isnt a catalog steel, this is one off just for this knife build. So the man that made the steel is the future owner. Quite fun

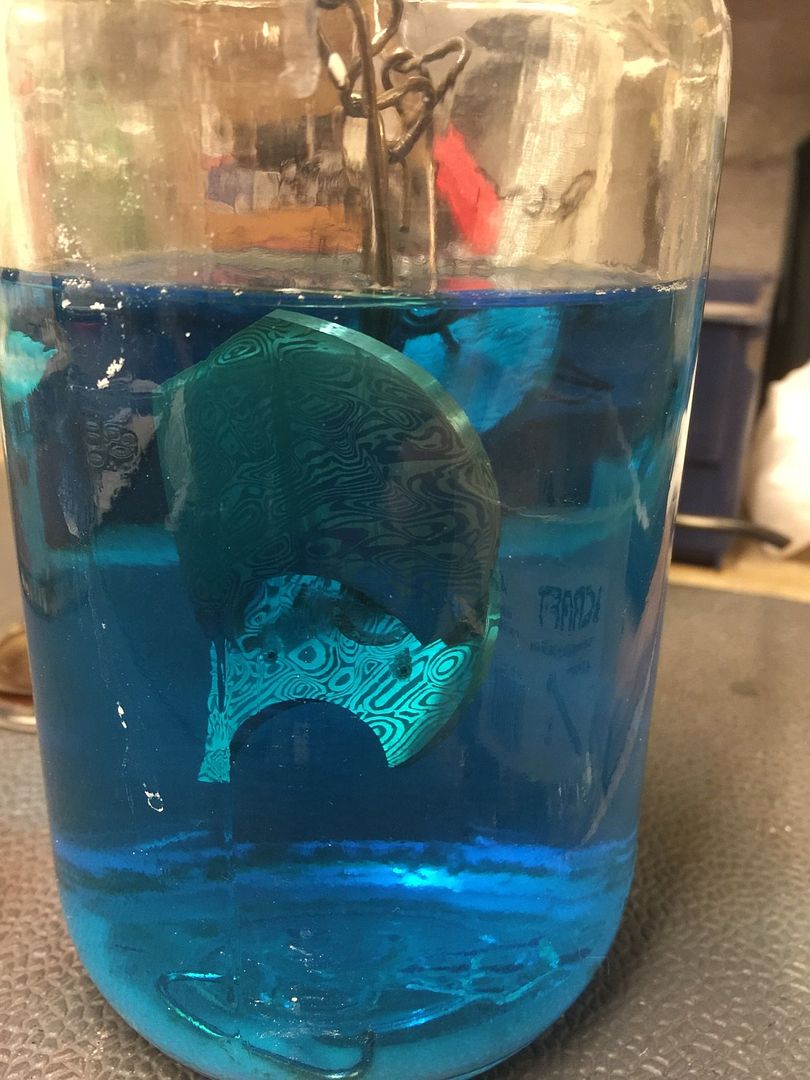
Have not pictures fro mthe etch itself, but I use 37% muritaec and pure each time for a etch, can be heated later for re-use. Here I have soaked them in Windex after neutralizing the etchant
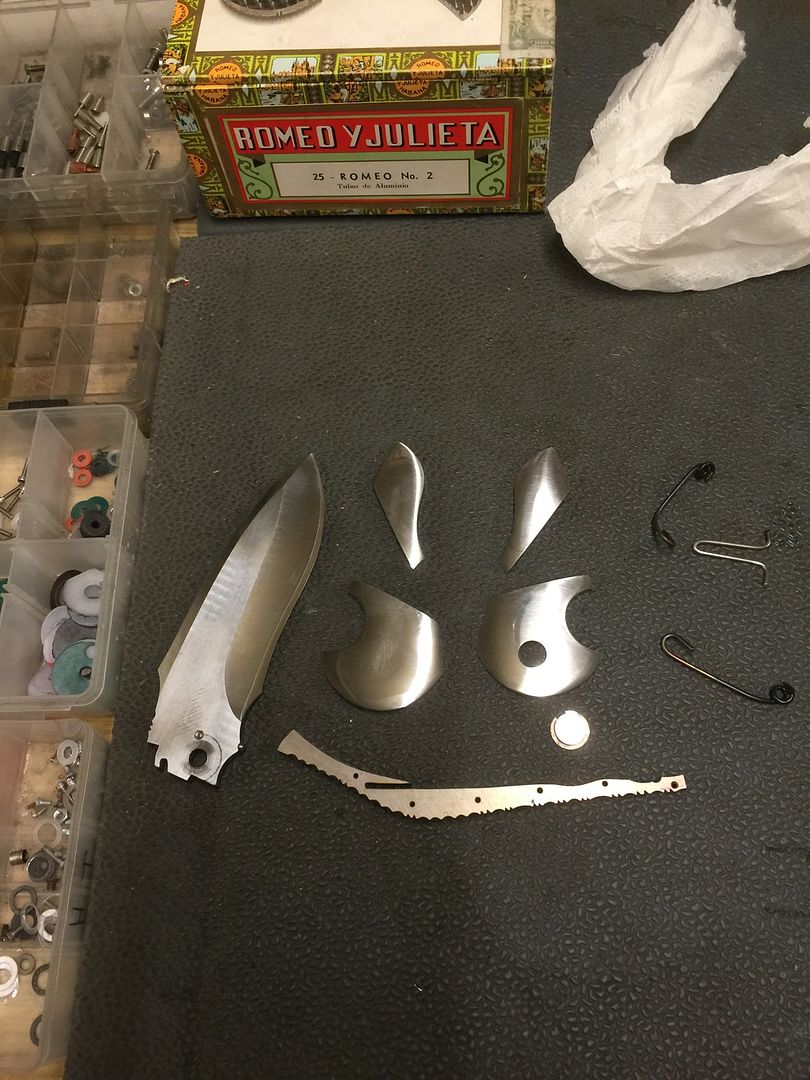
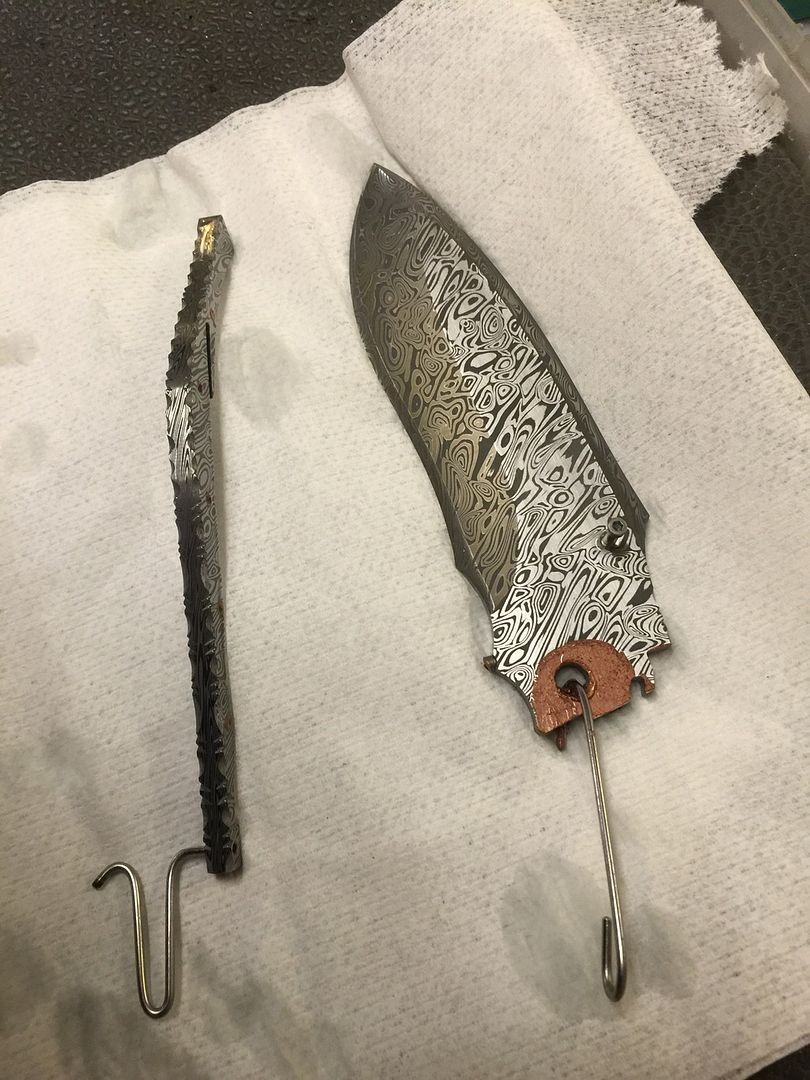
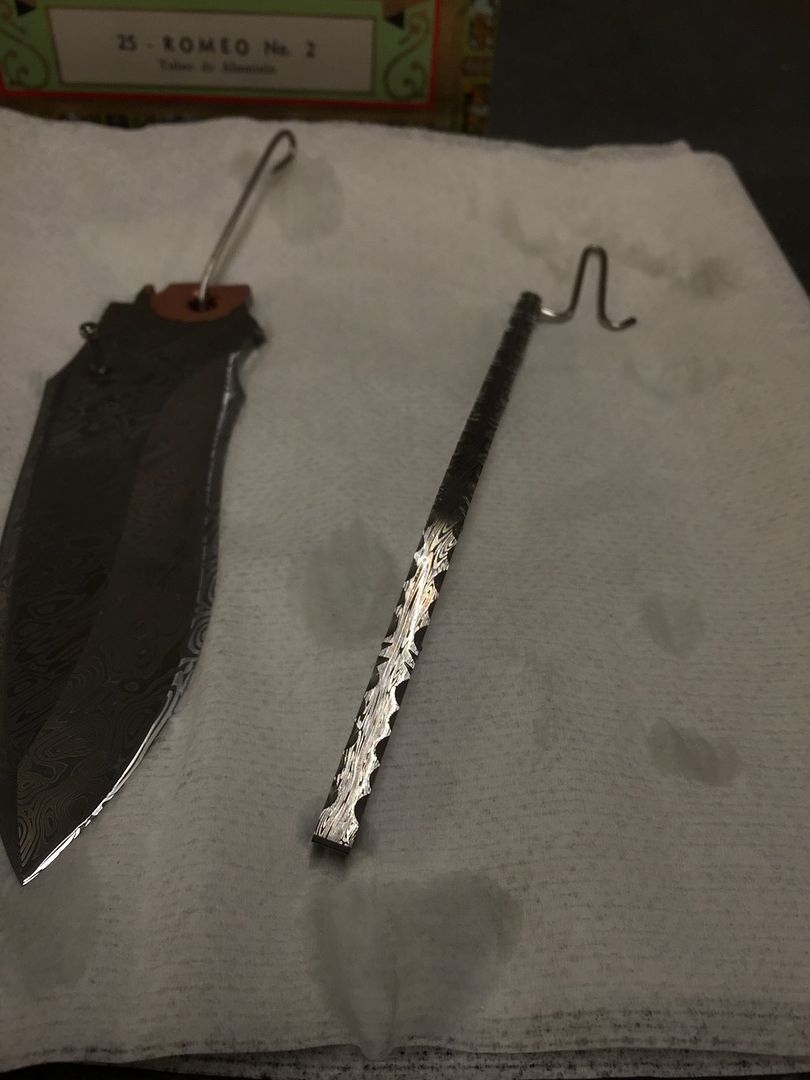
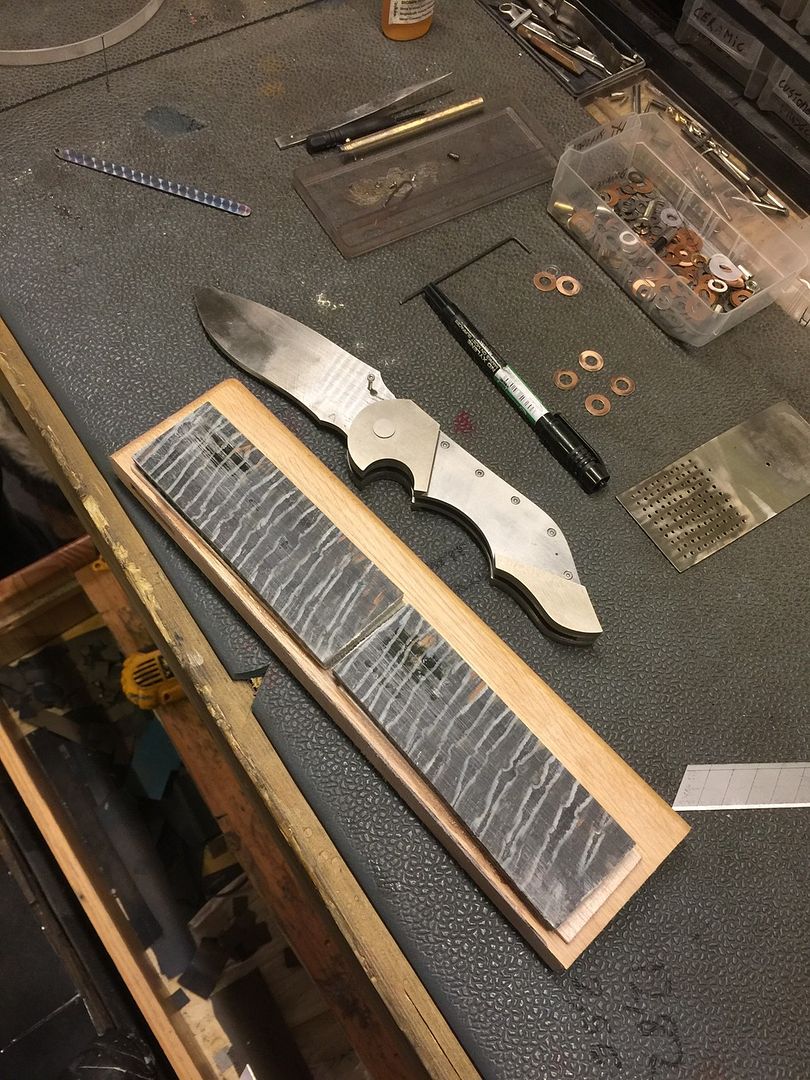
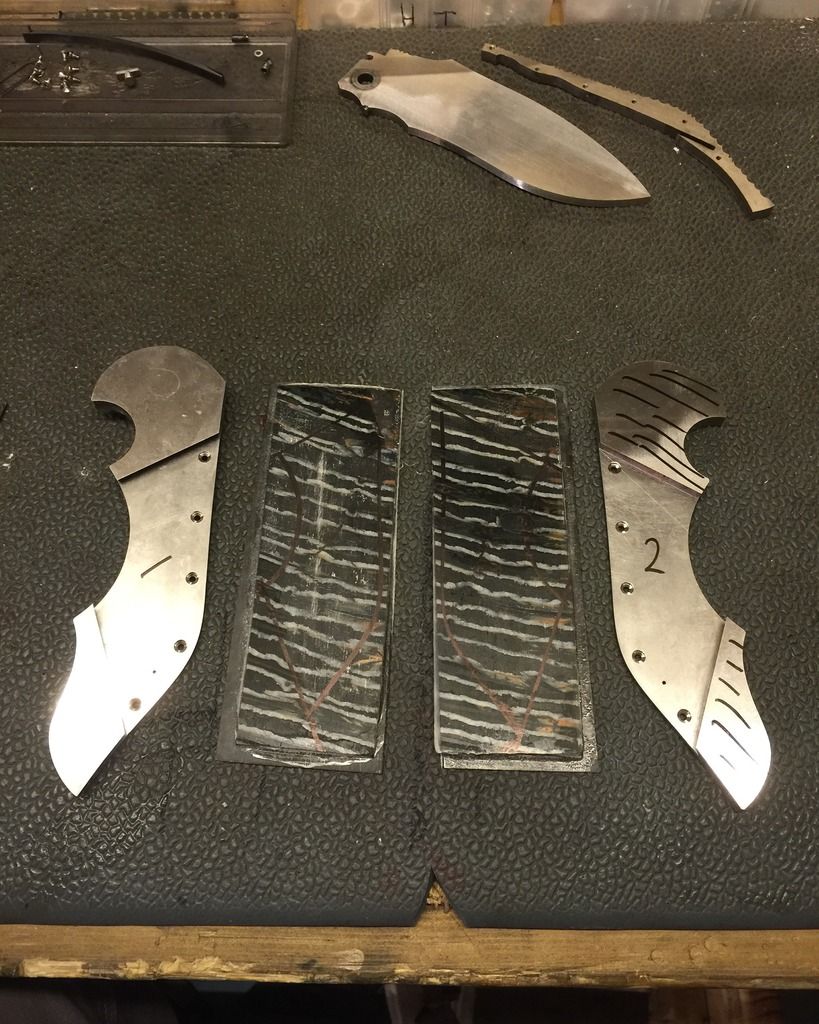
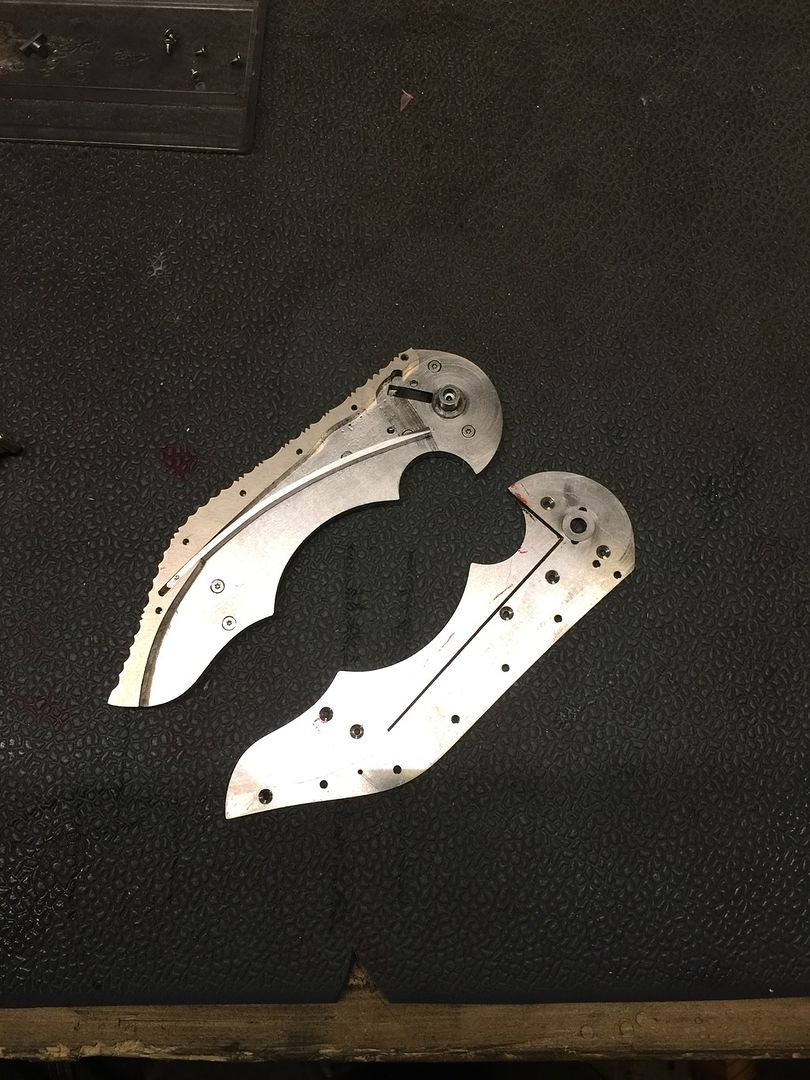
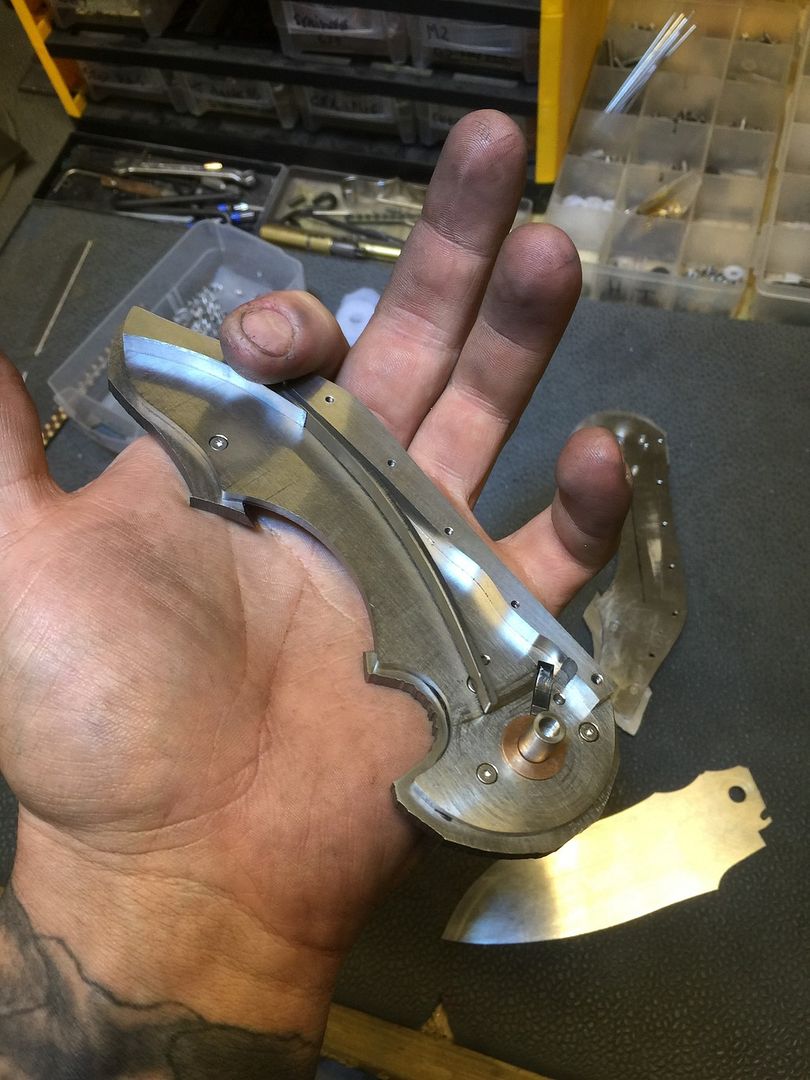
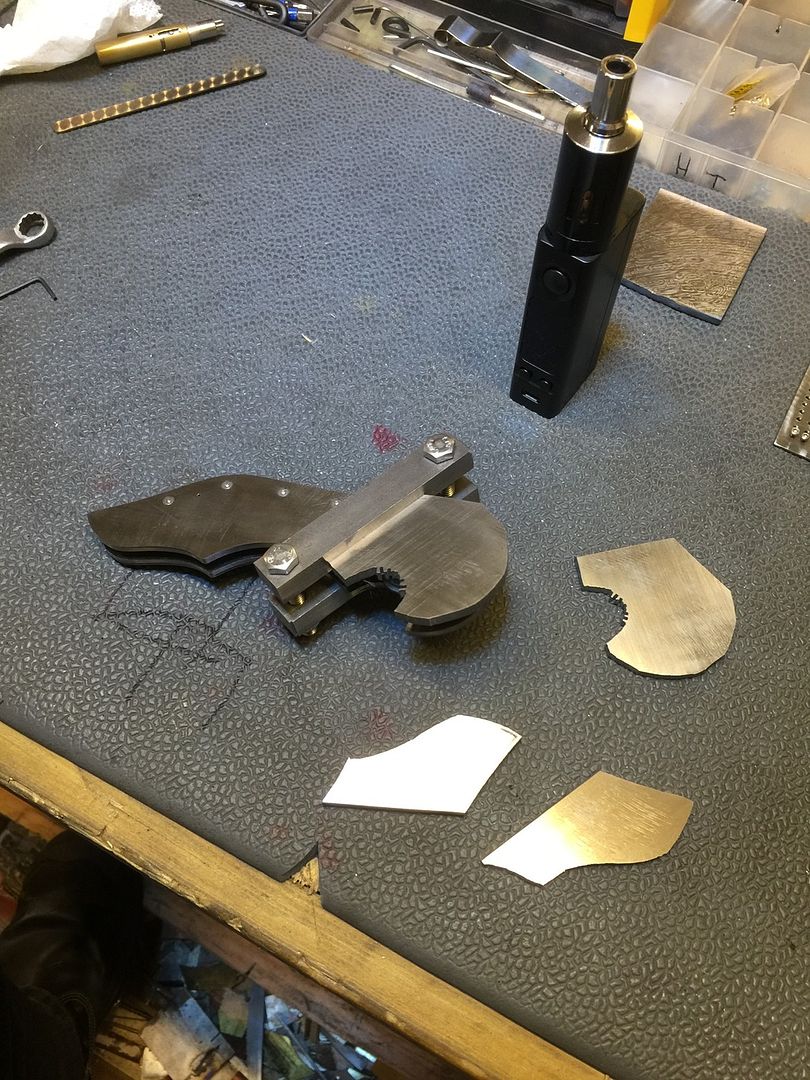
Parts done.
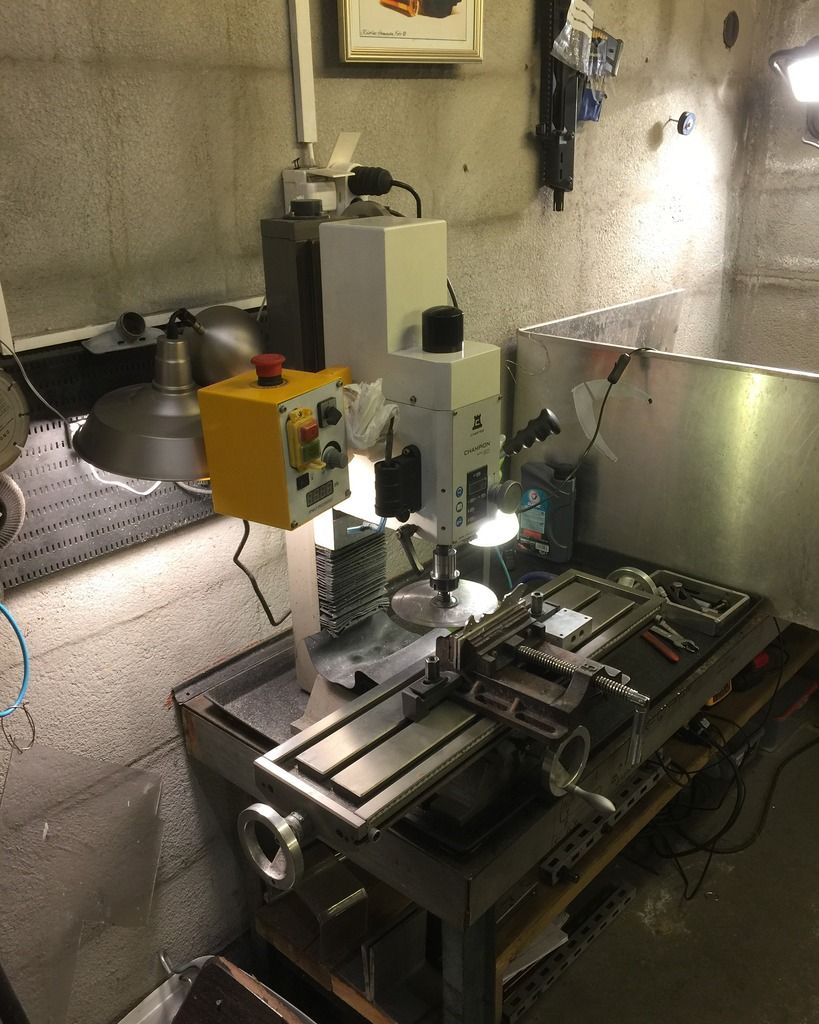
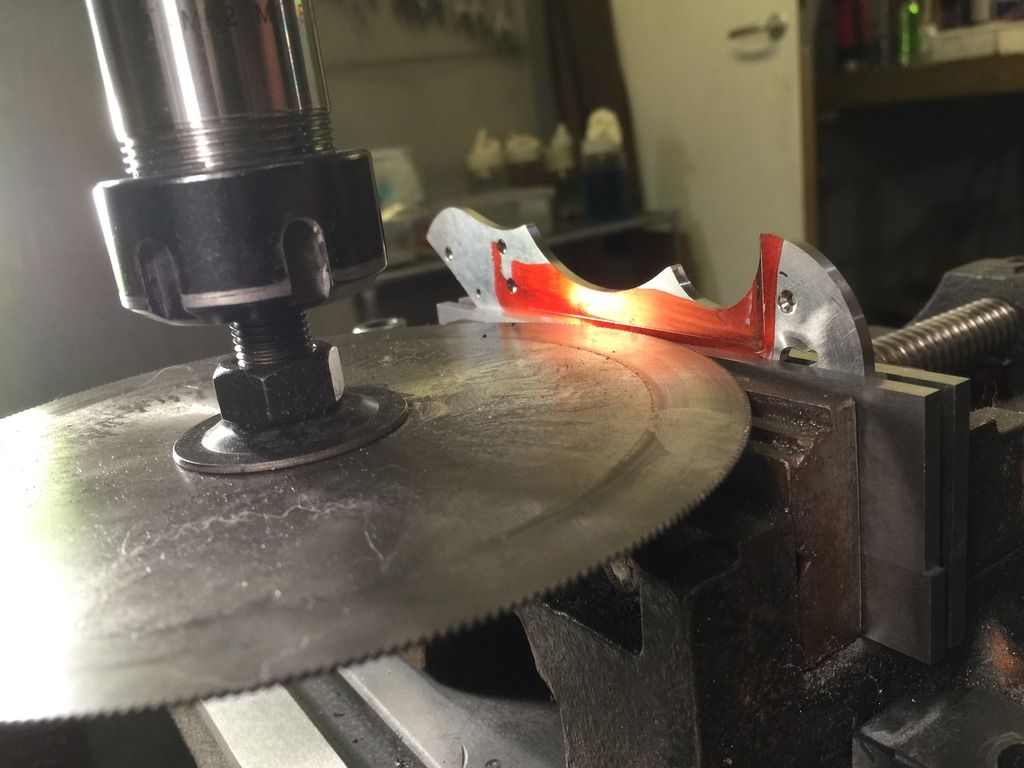
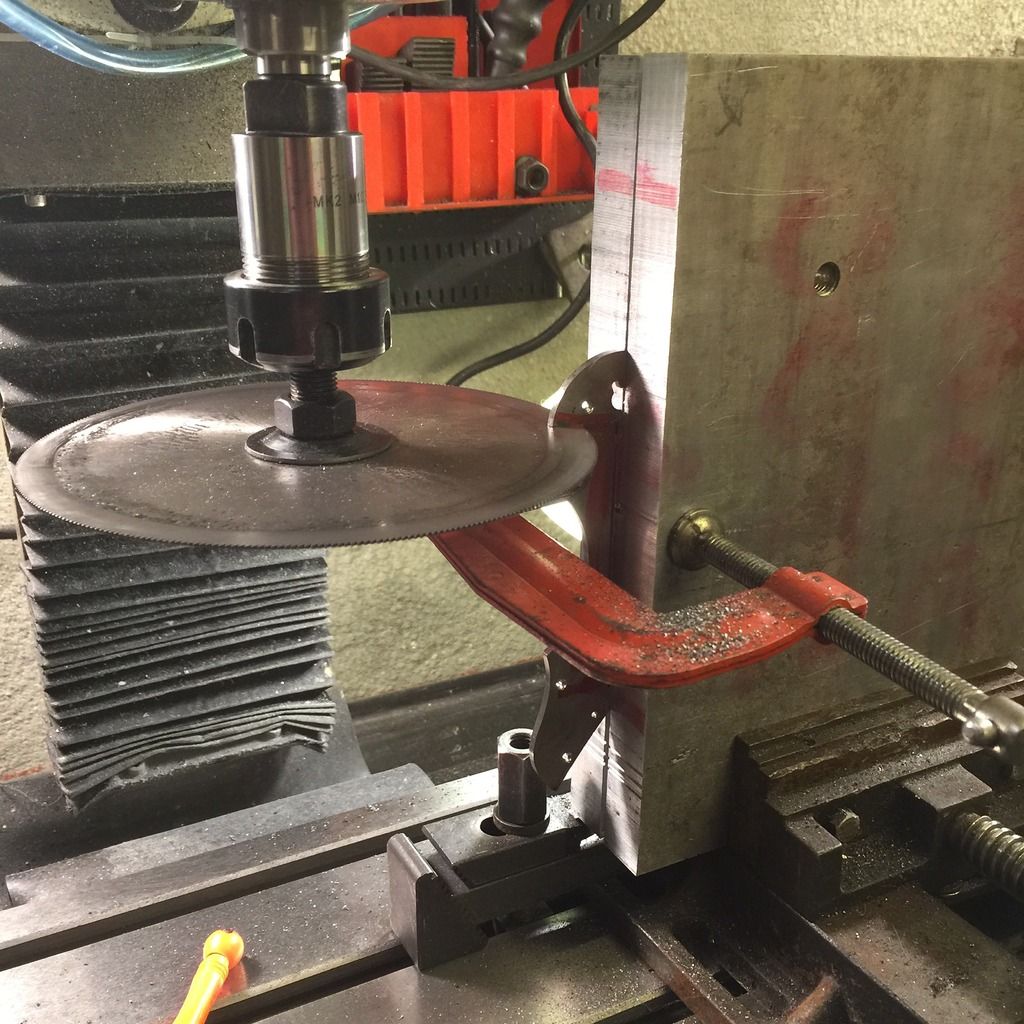
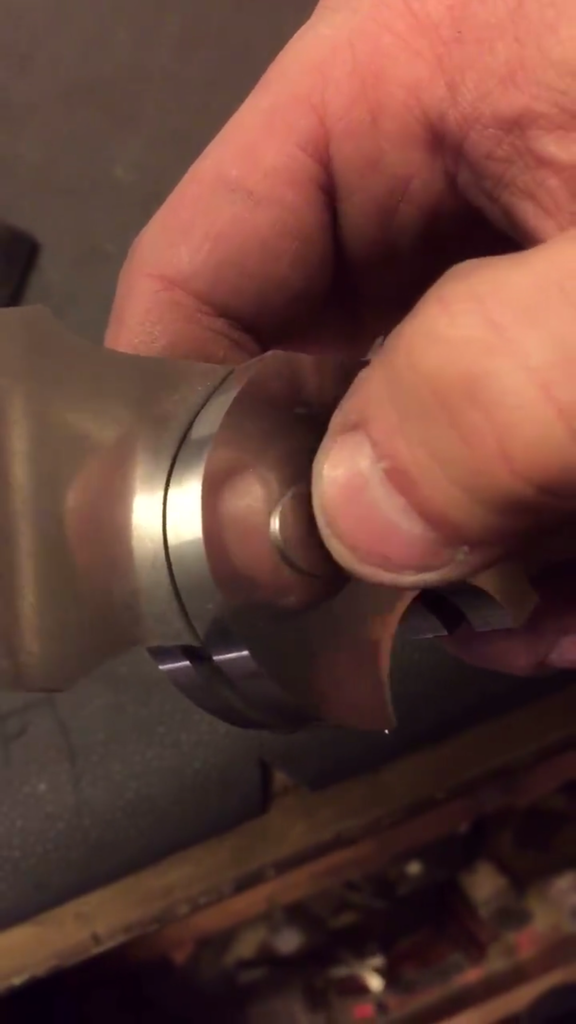
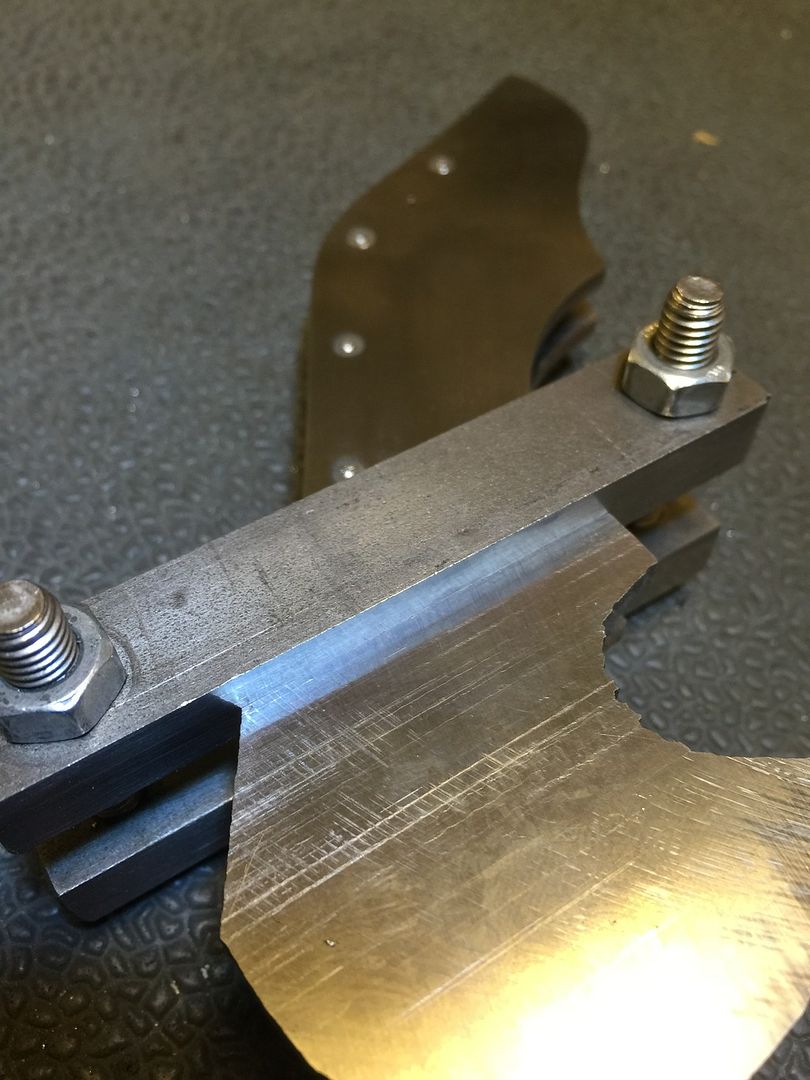
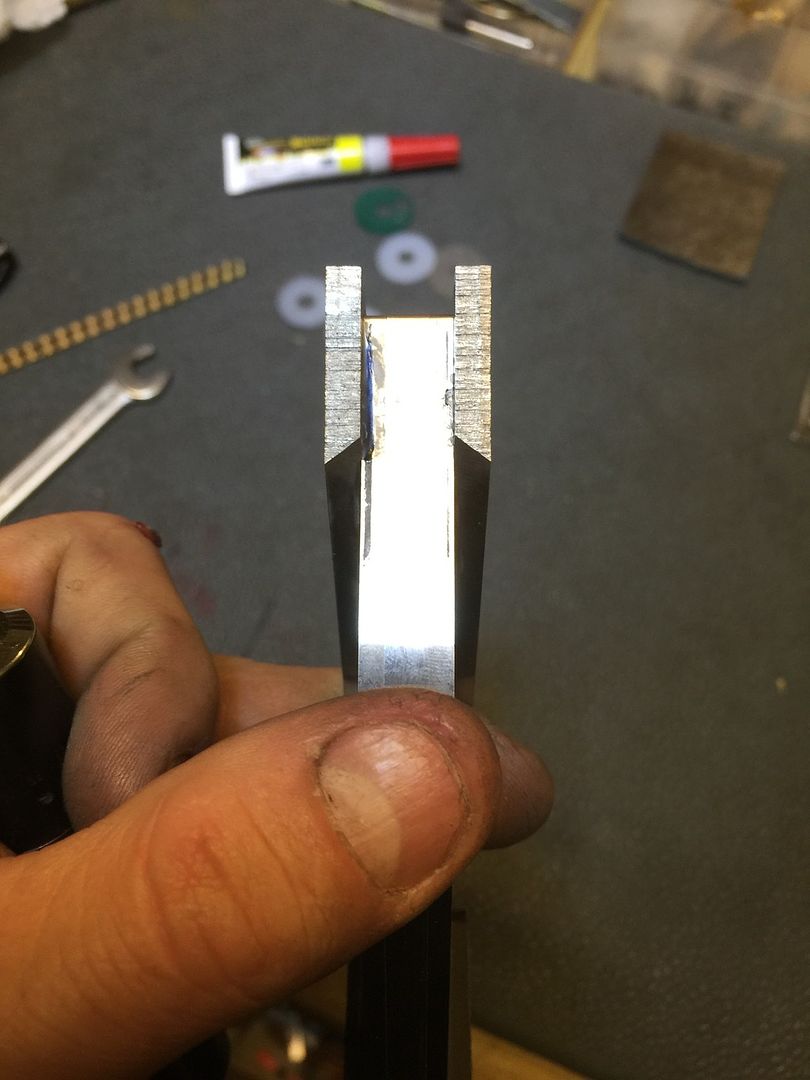
We are closing in on final assembly, making a damascus thumb stud left, I dont have lathe so I do that on my mill with roundtable and my own motor setup
-
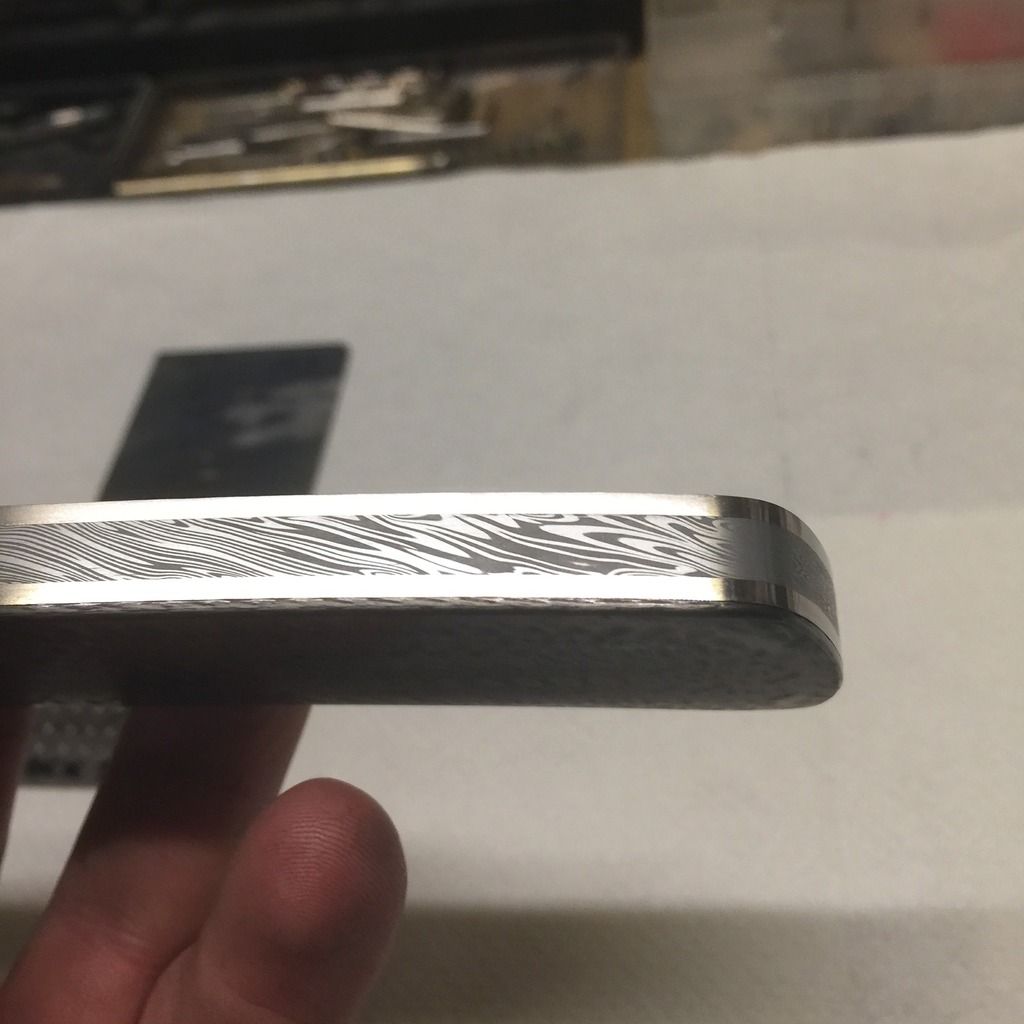
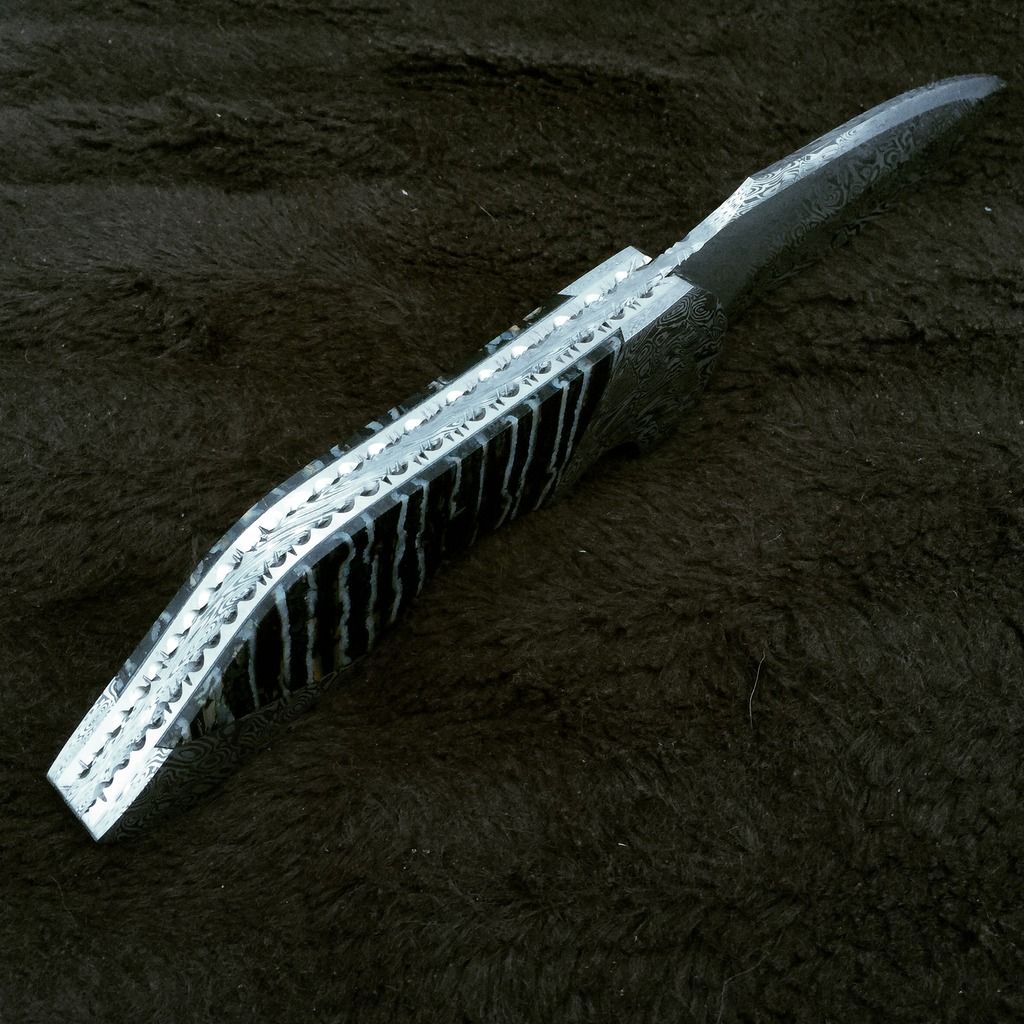
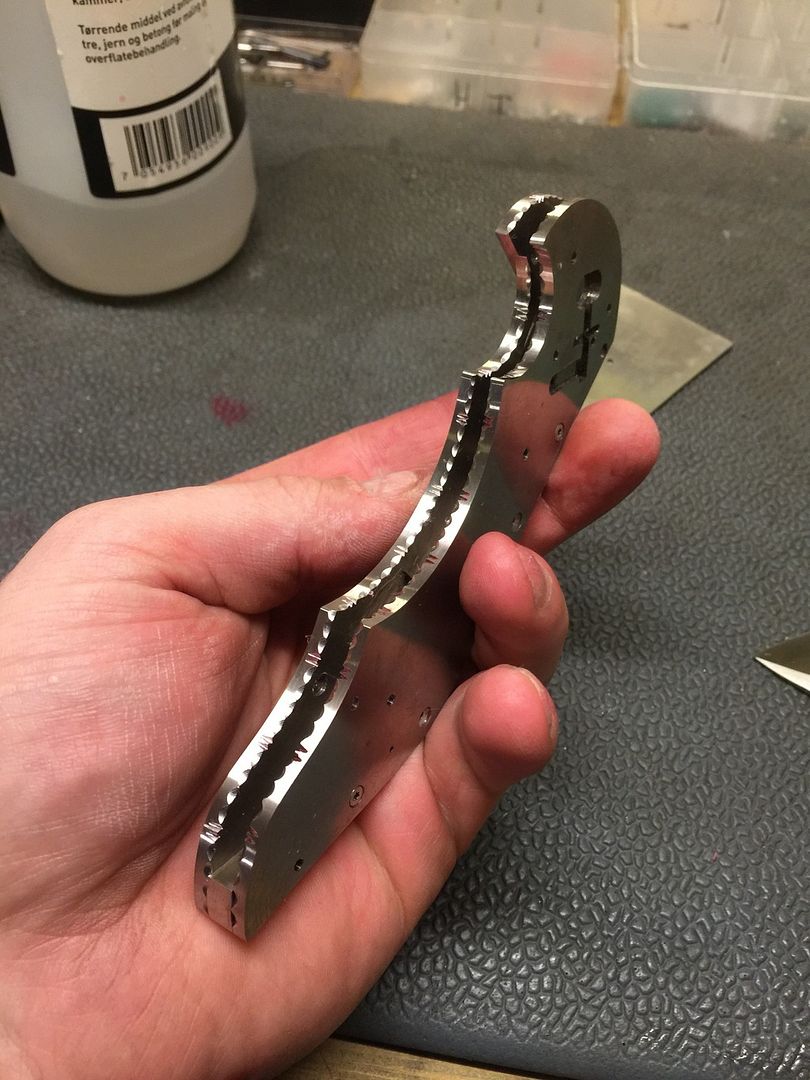
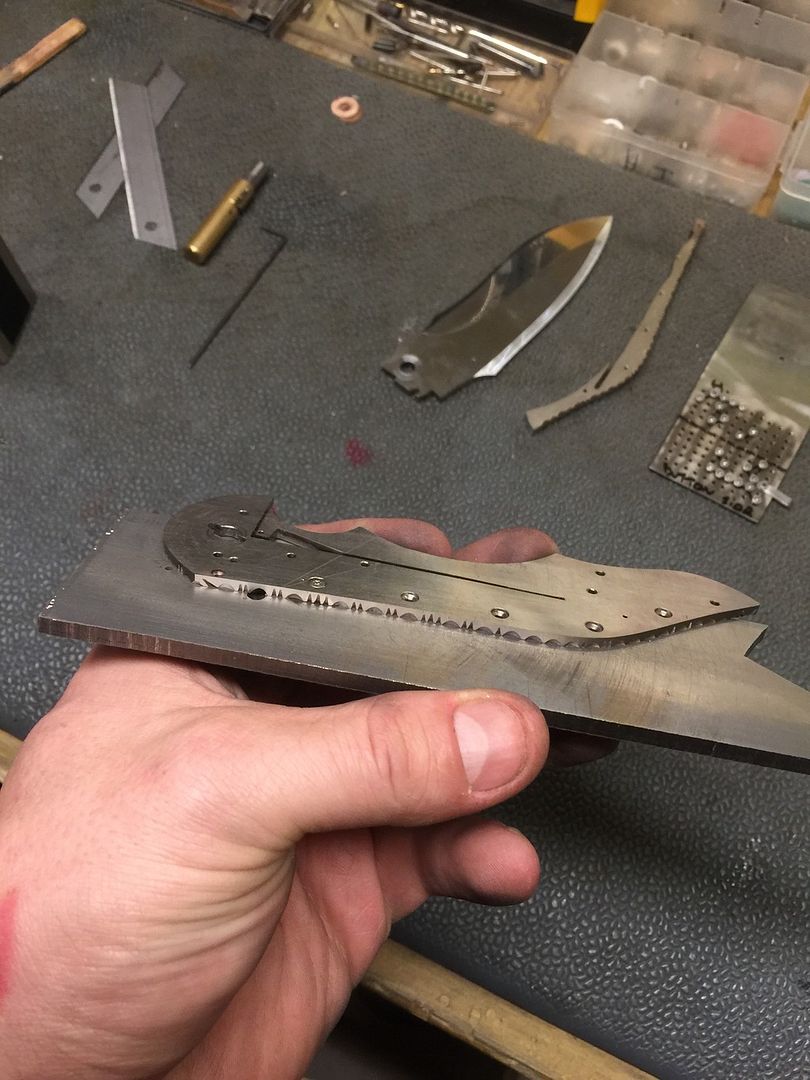
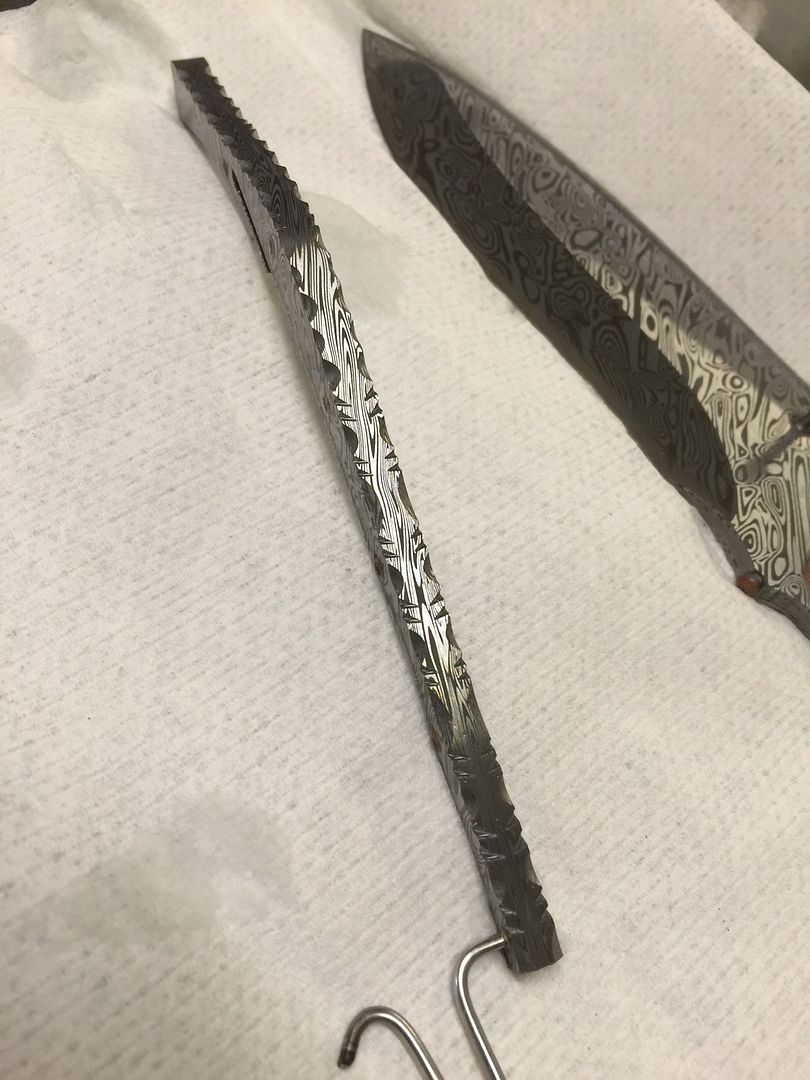
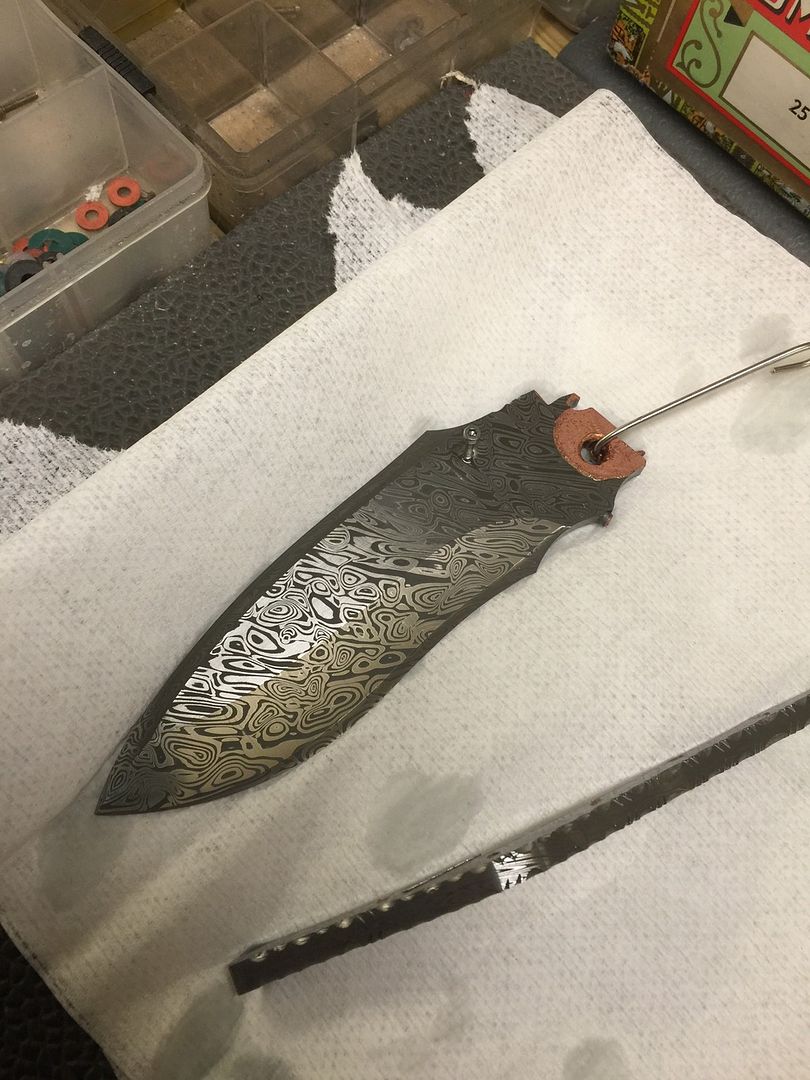
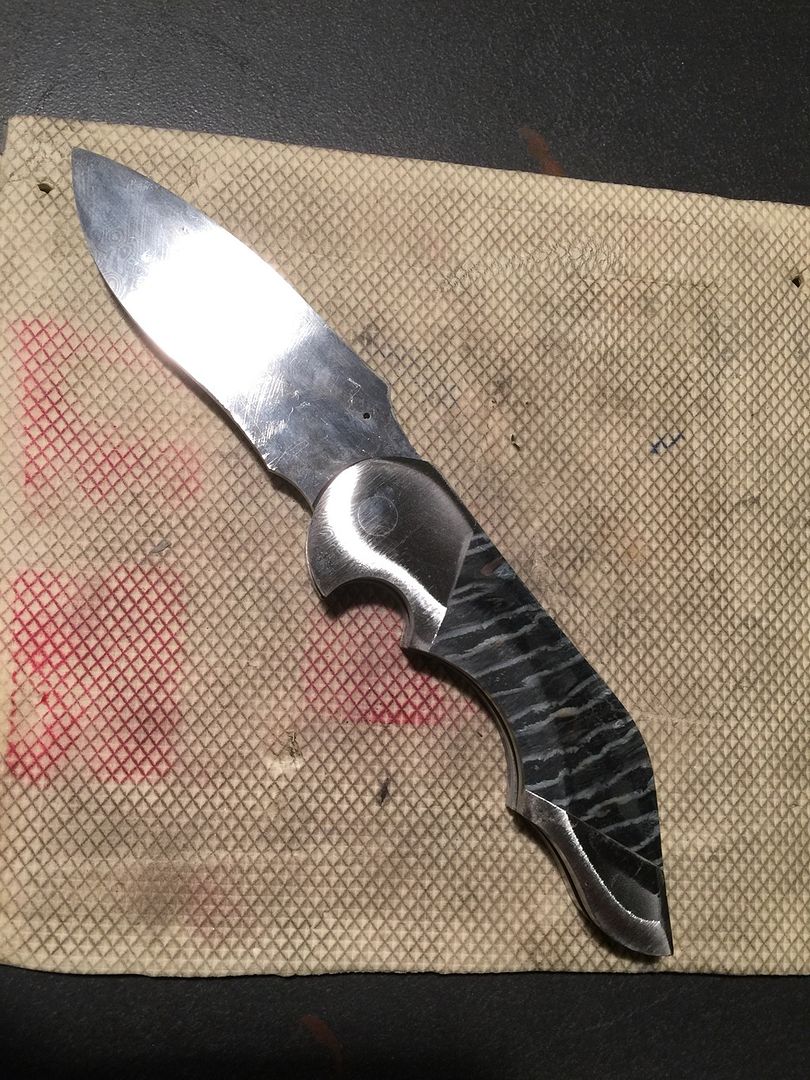
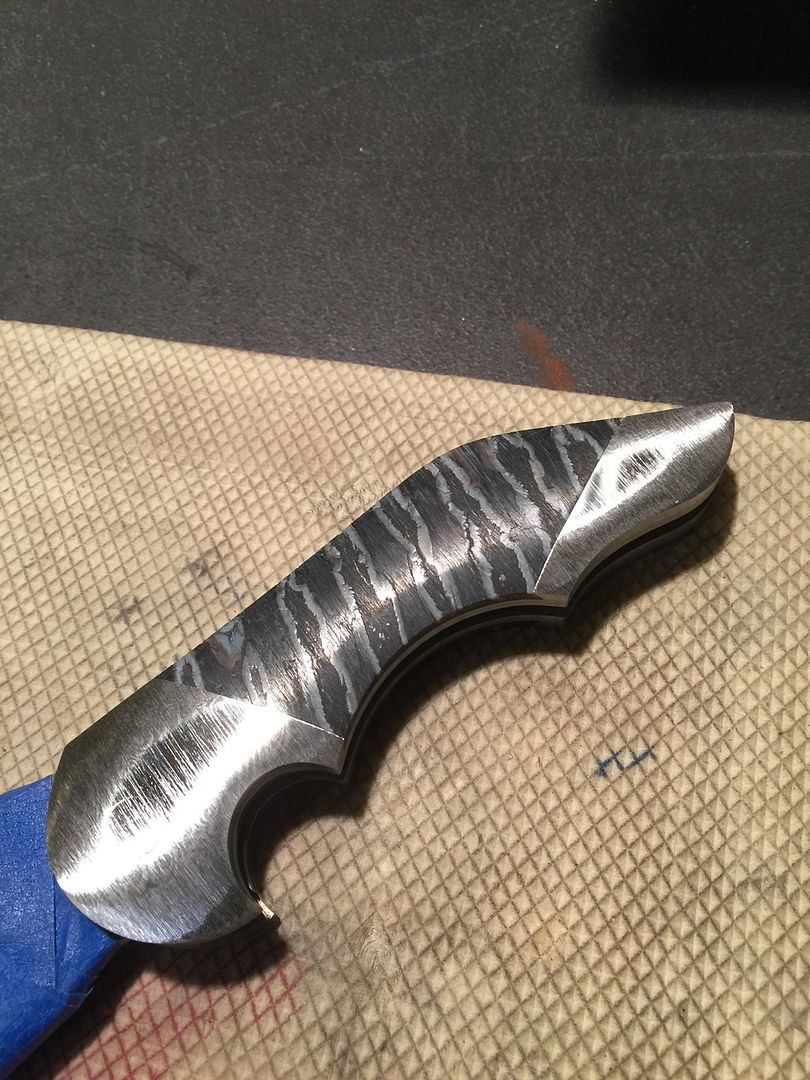
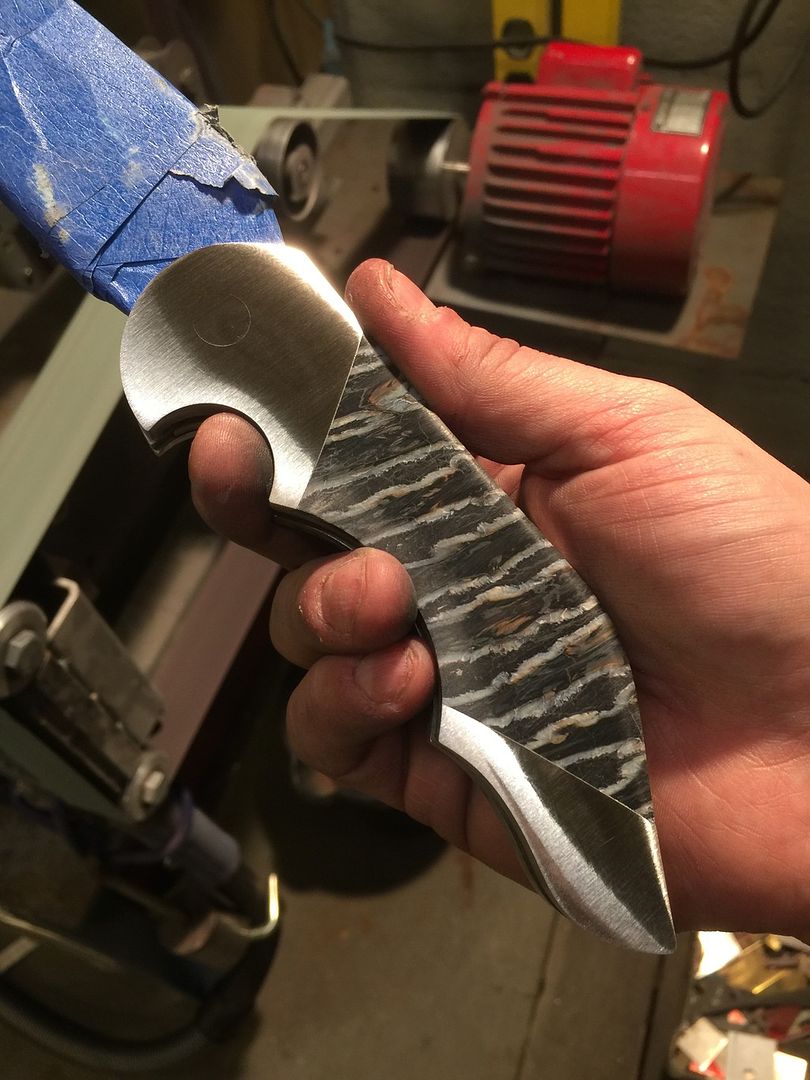
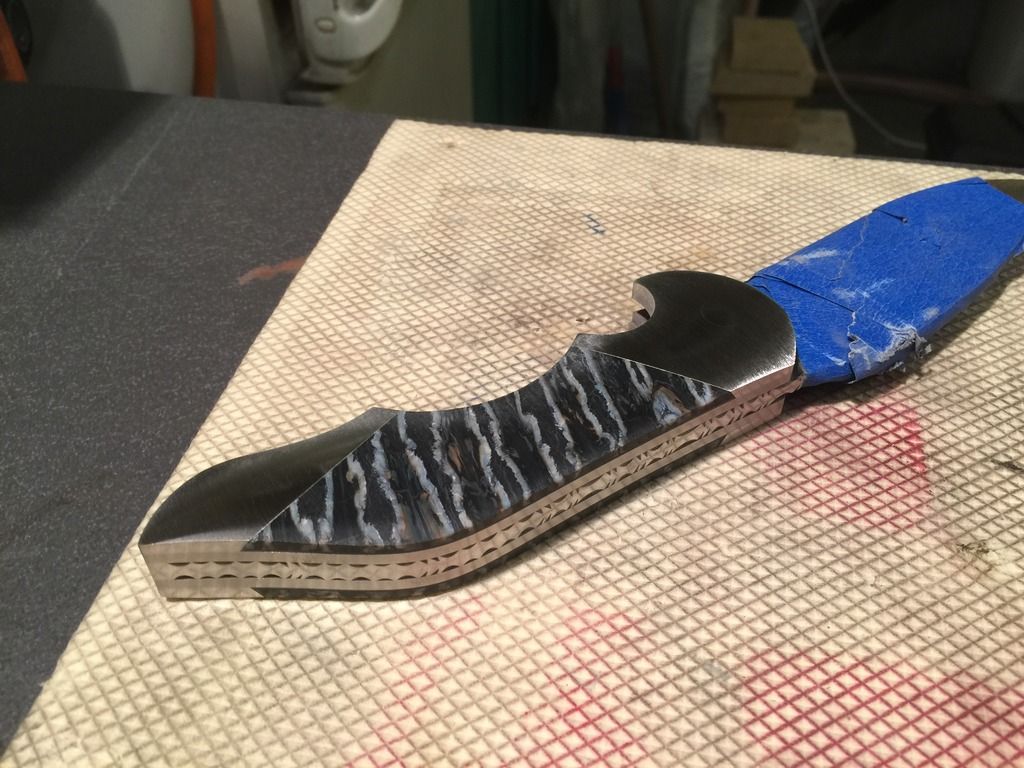
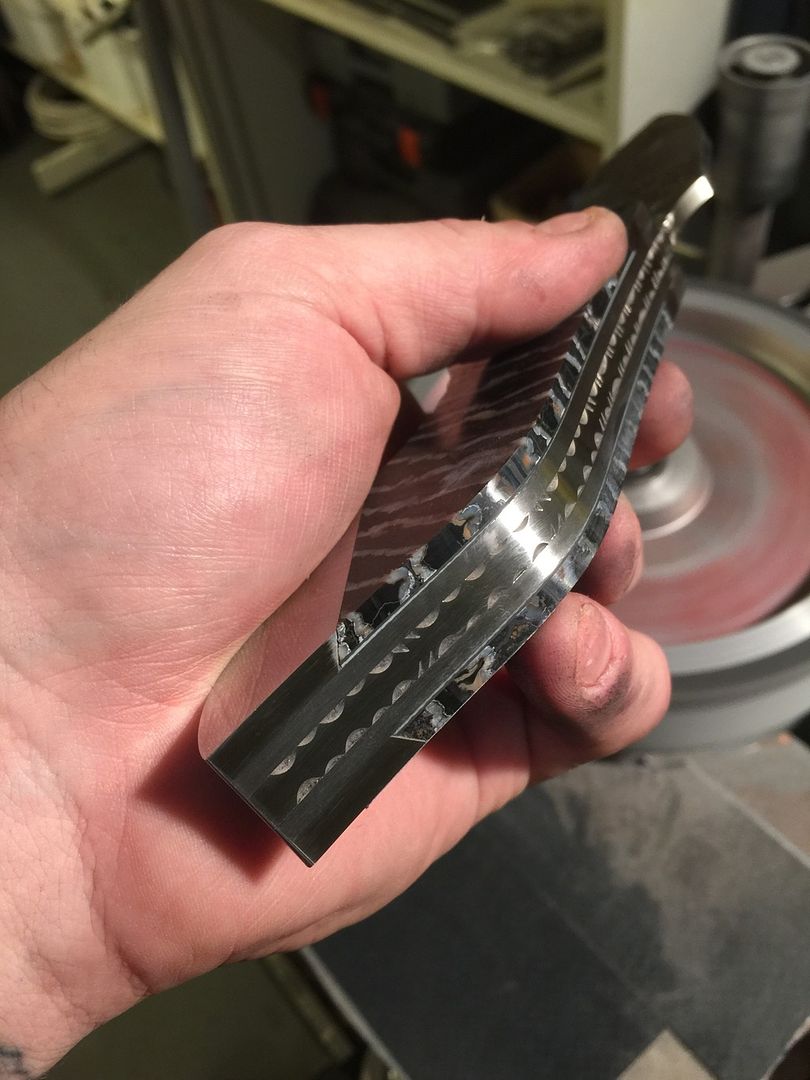
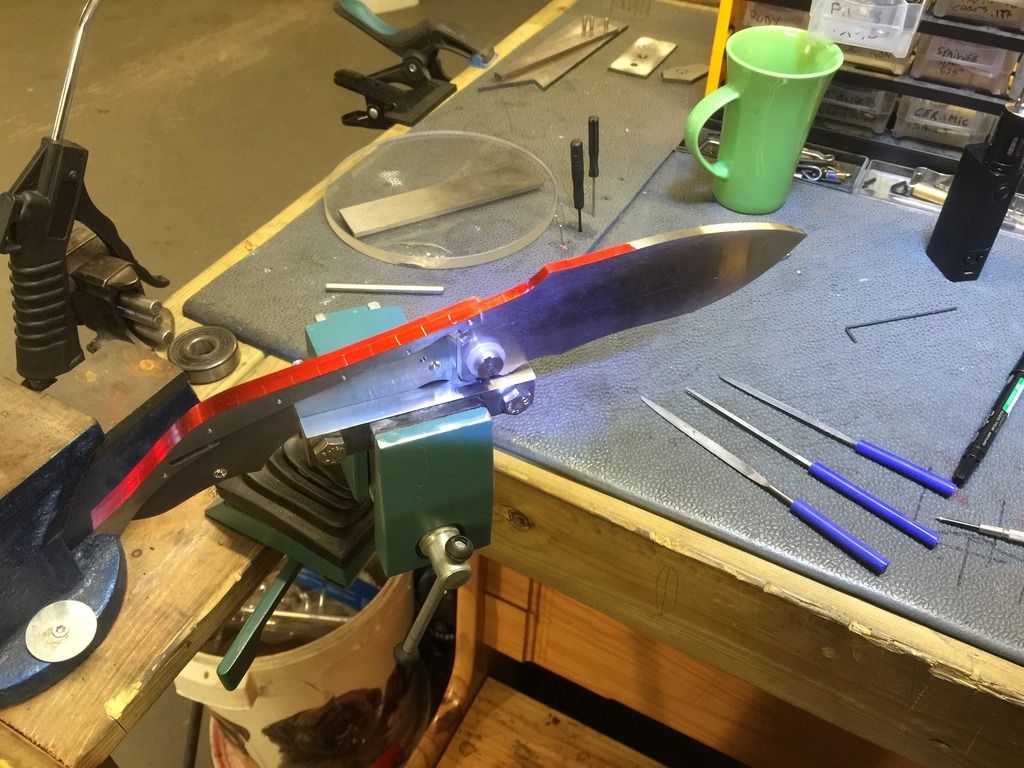
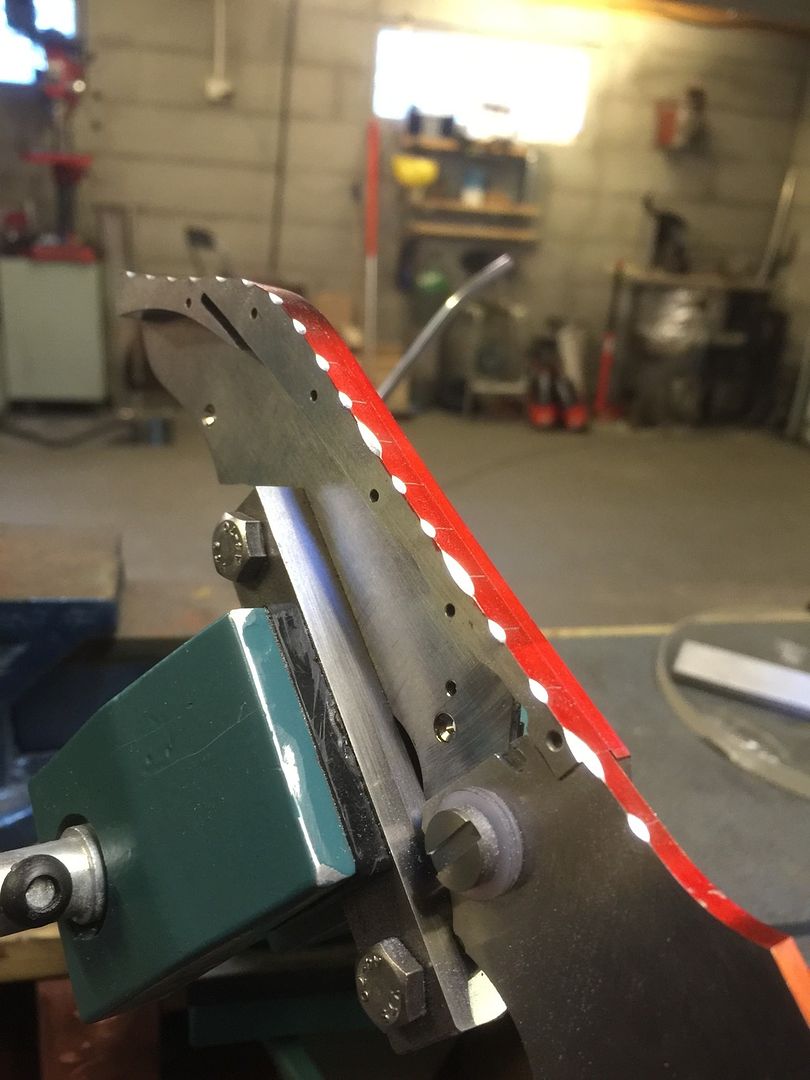
Blade is grinded and finished at 200 grit, just some finish on flats left.
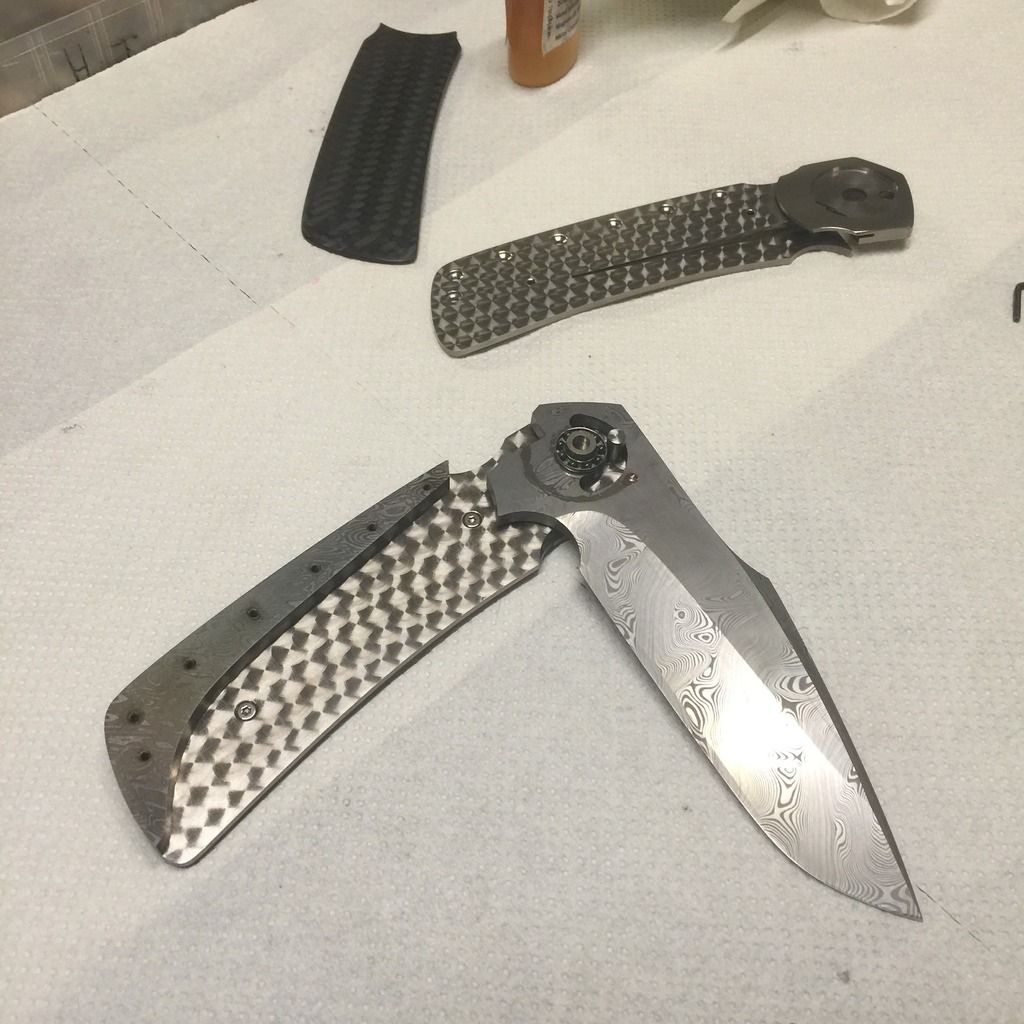
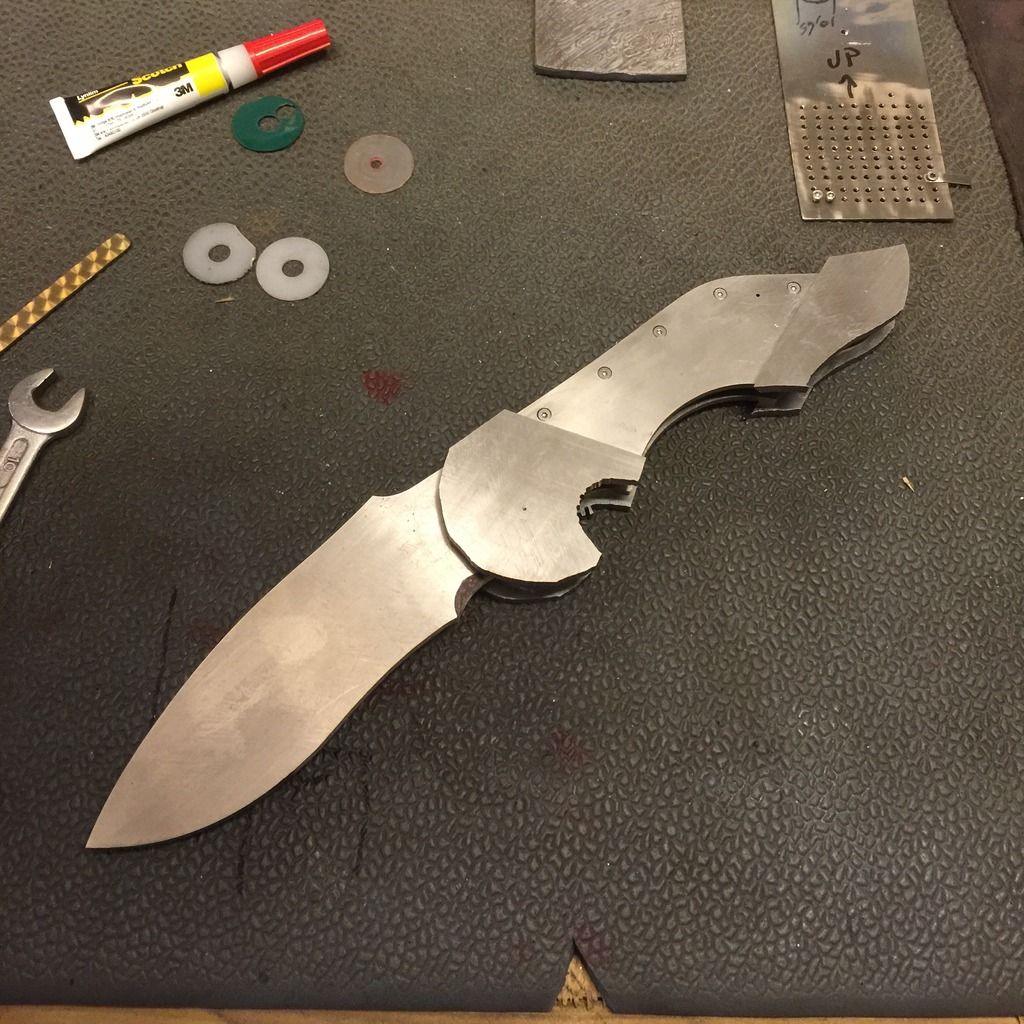
test mounted
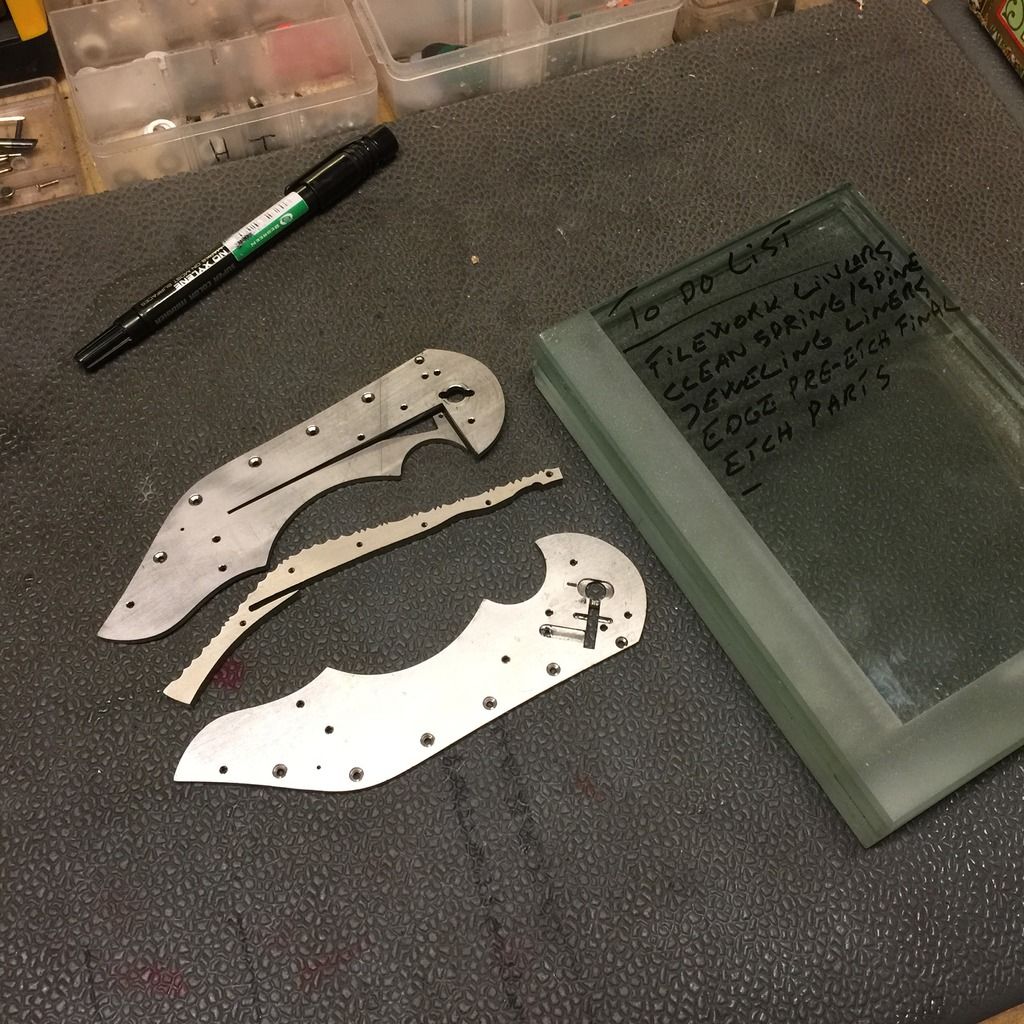
To do list
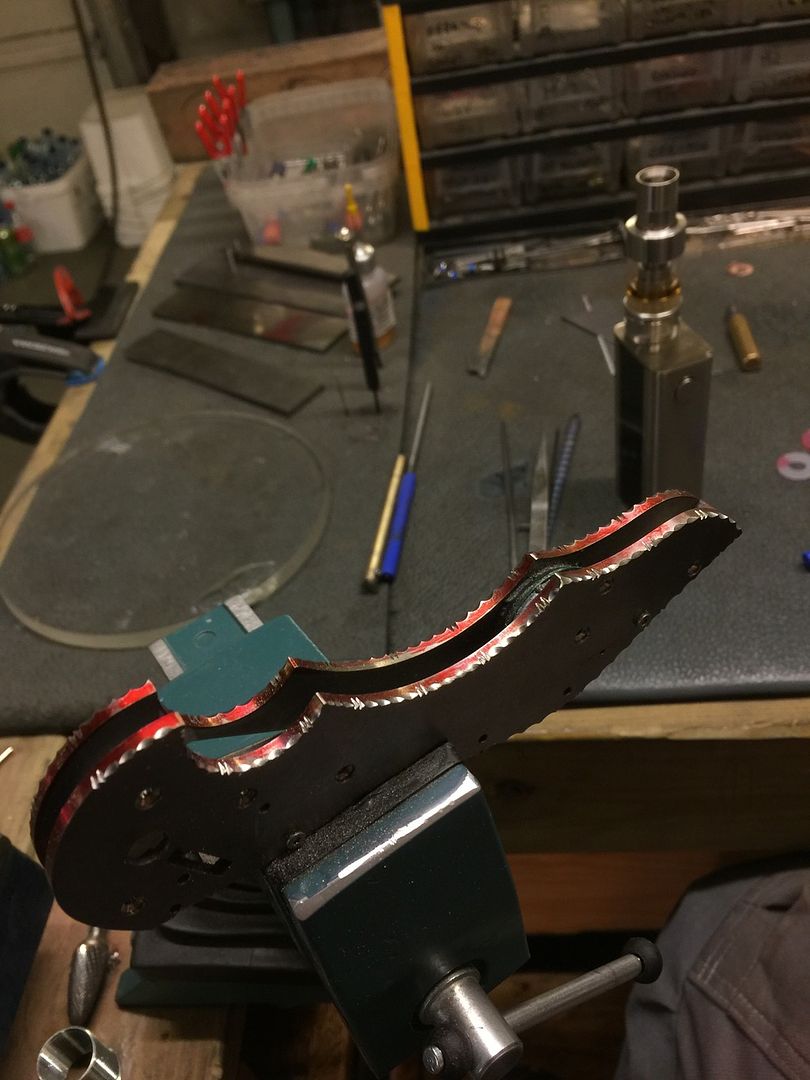
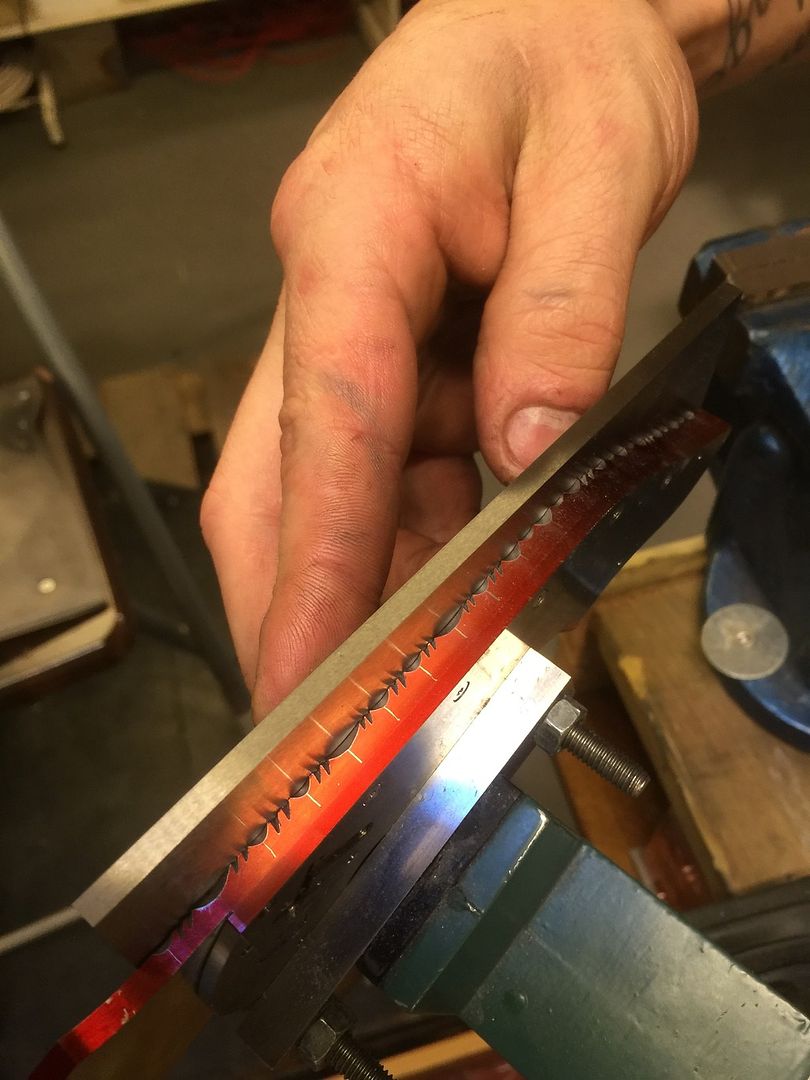
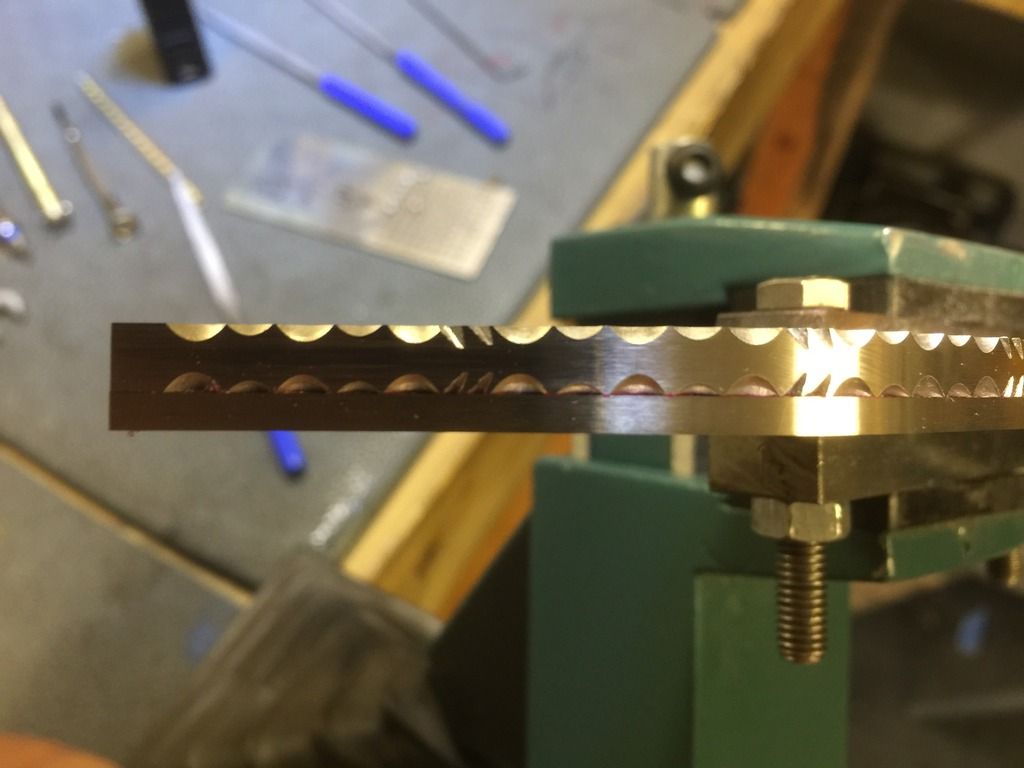
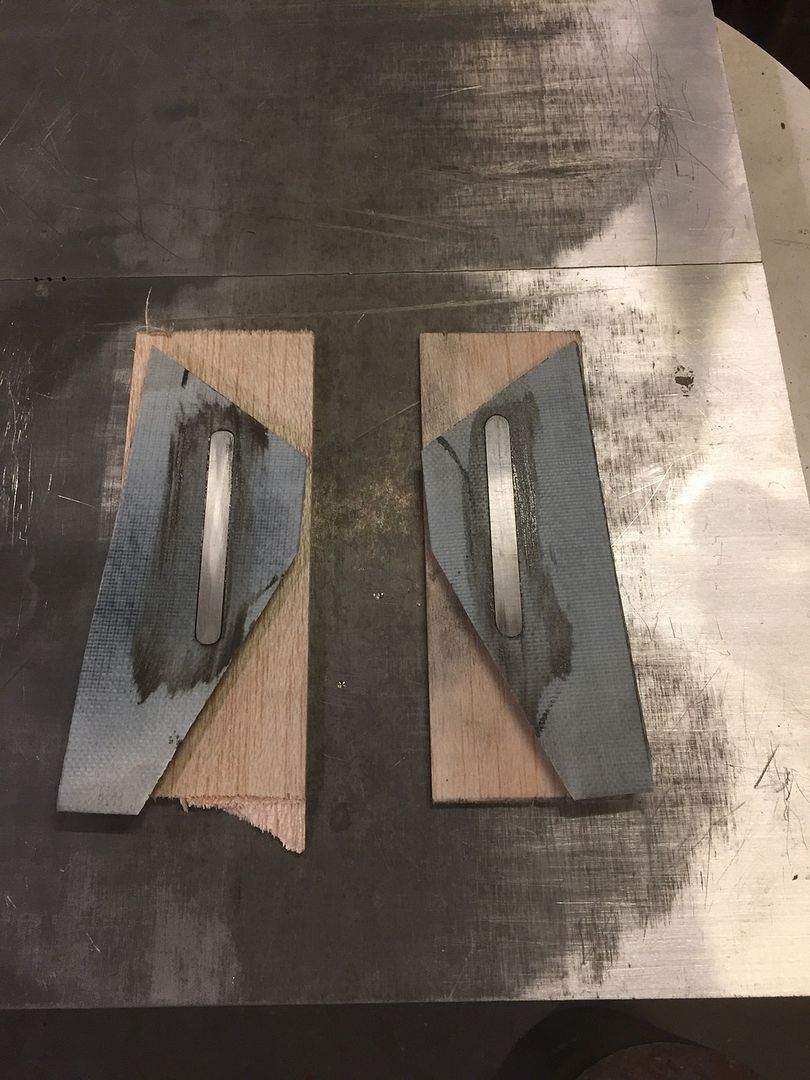
Filework liners started
placing the cuts to match the spine
a little action video peek
-
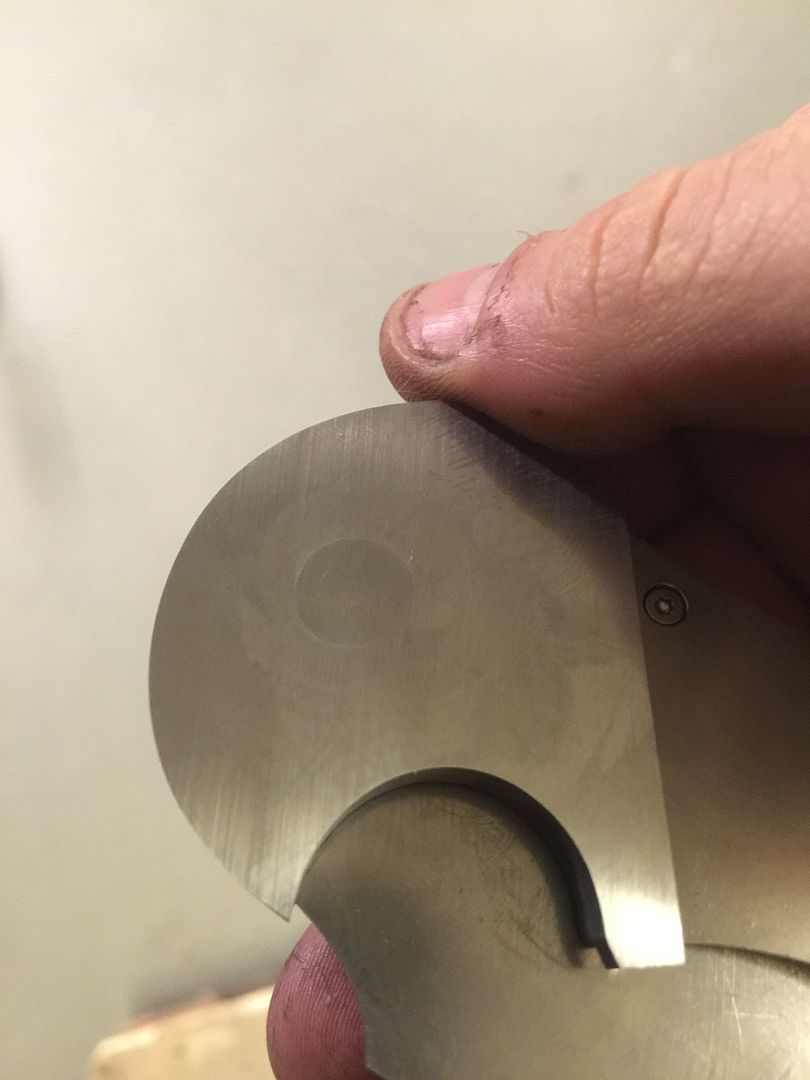
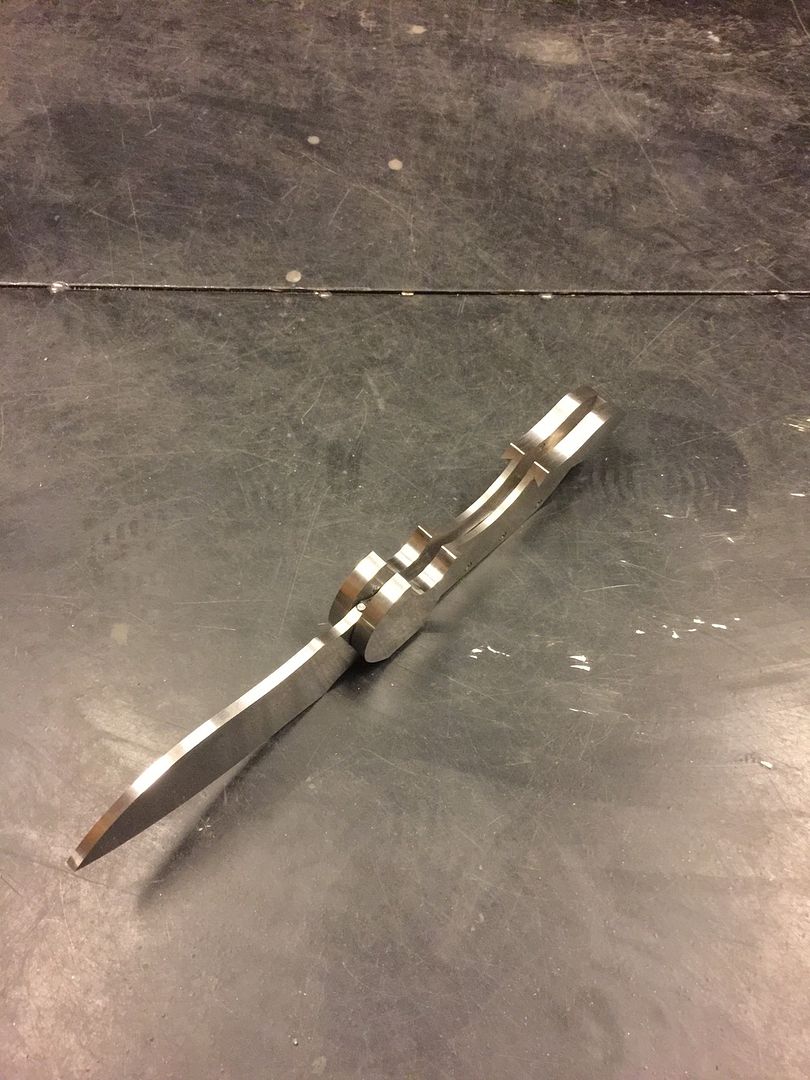
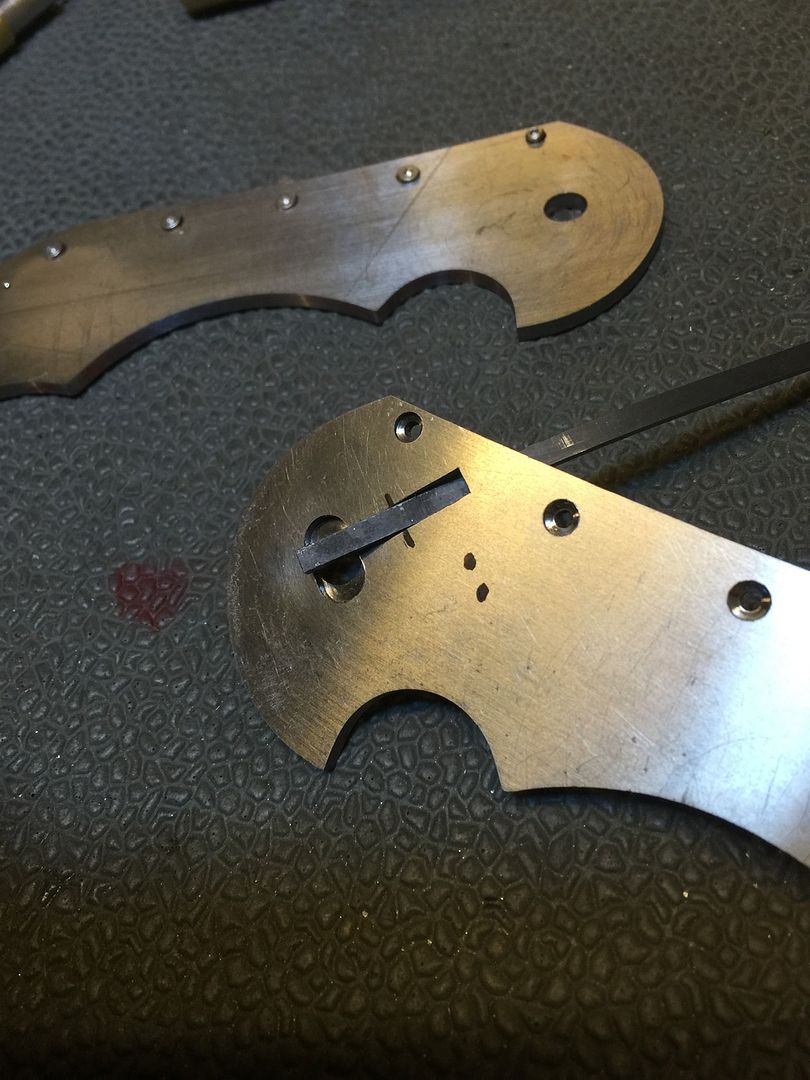
spring assembled and tested for clearaence
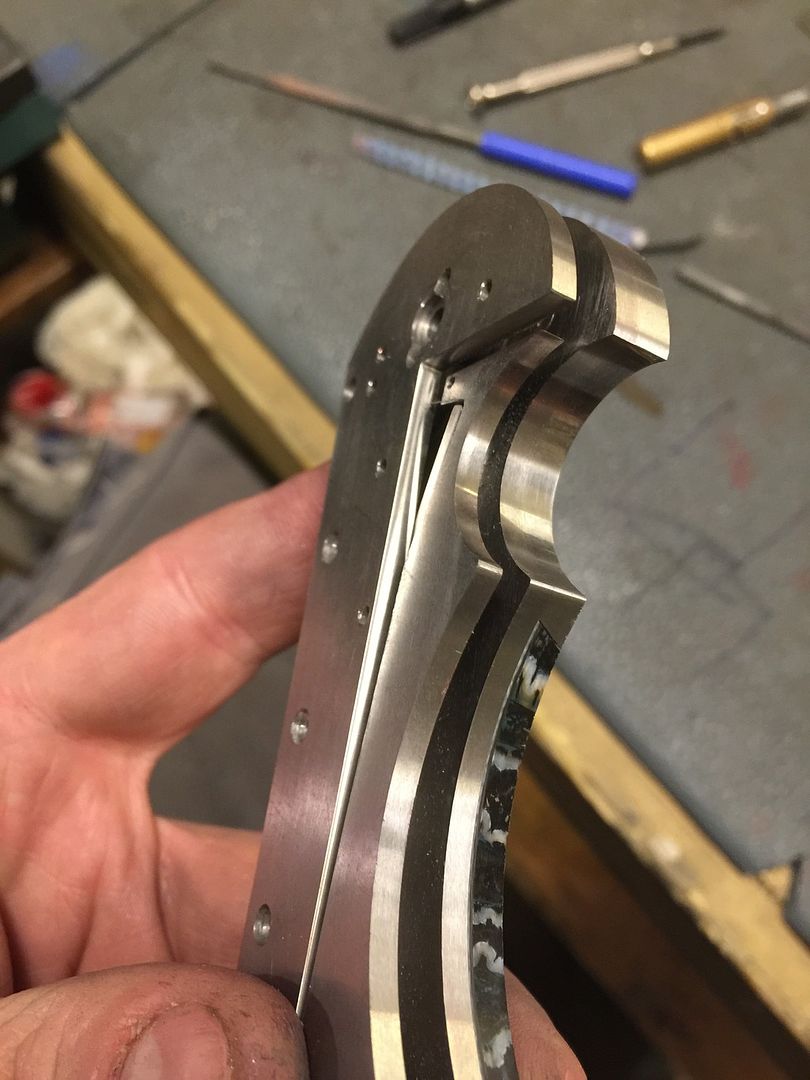
video clip of testing of button and detent. and action of the spring. need some tuning
lock is set and spot on
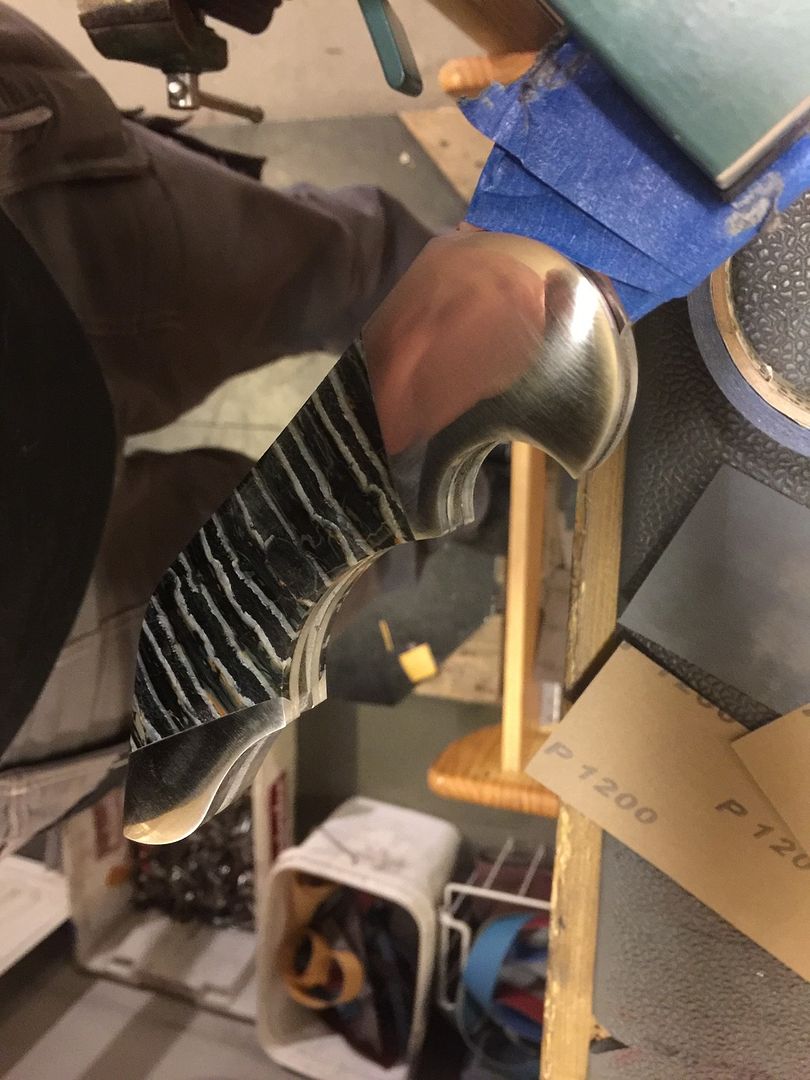
started contour of the handle
here it is about 600 grit
I do the contouring with everything assembled to eliminate any variables that can happen. this way everything stay flush and consentric

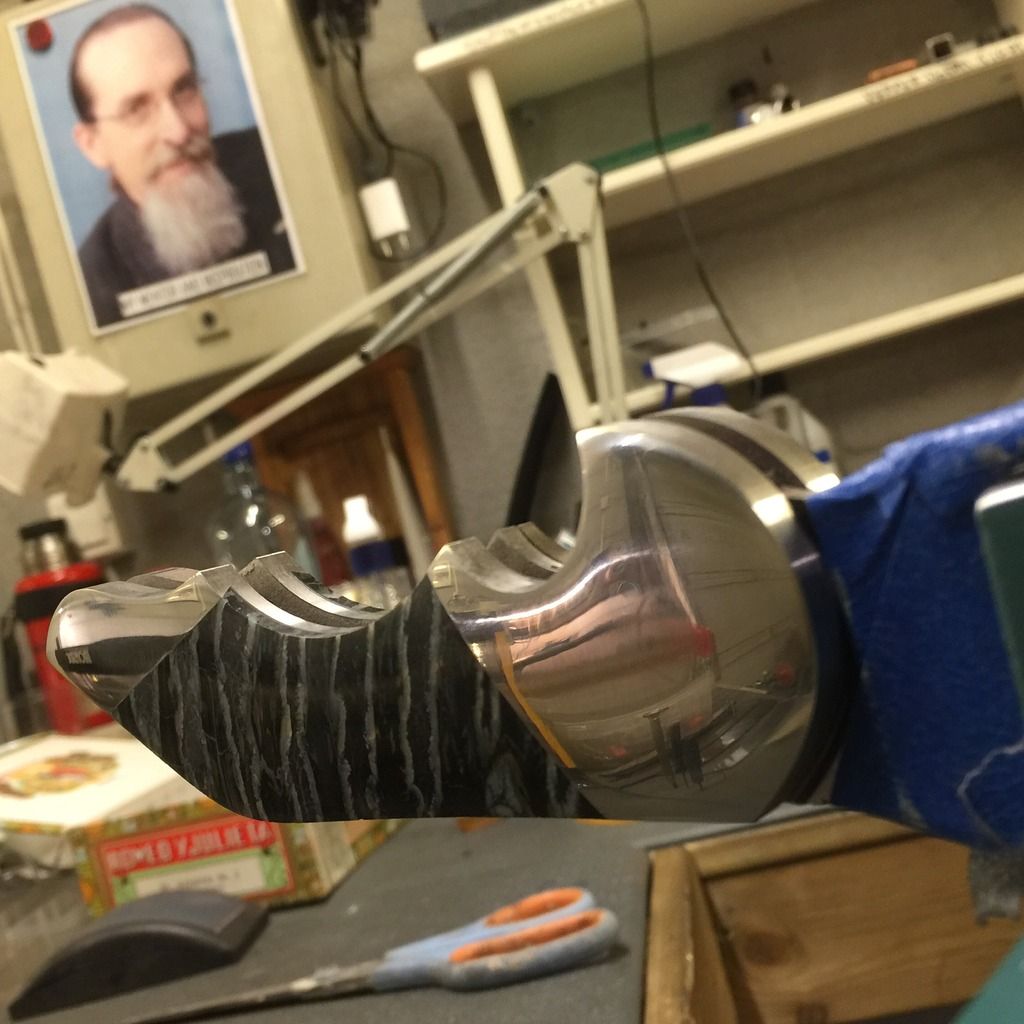
above 1000 grit I do the rest by hand with paper. finish is done on my grinder with leather belt
Here is what I am at the moment. more to come soon
-
Here we go folks and again thanks for showing interest.
-----------------------------------
WIP continues.
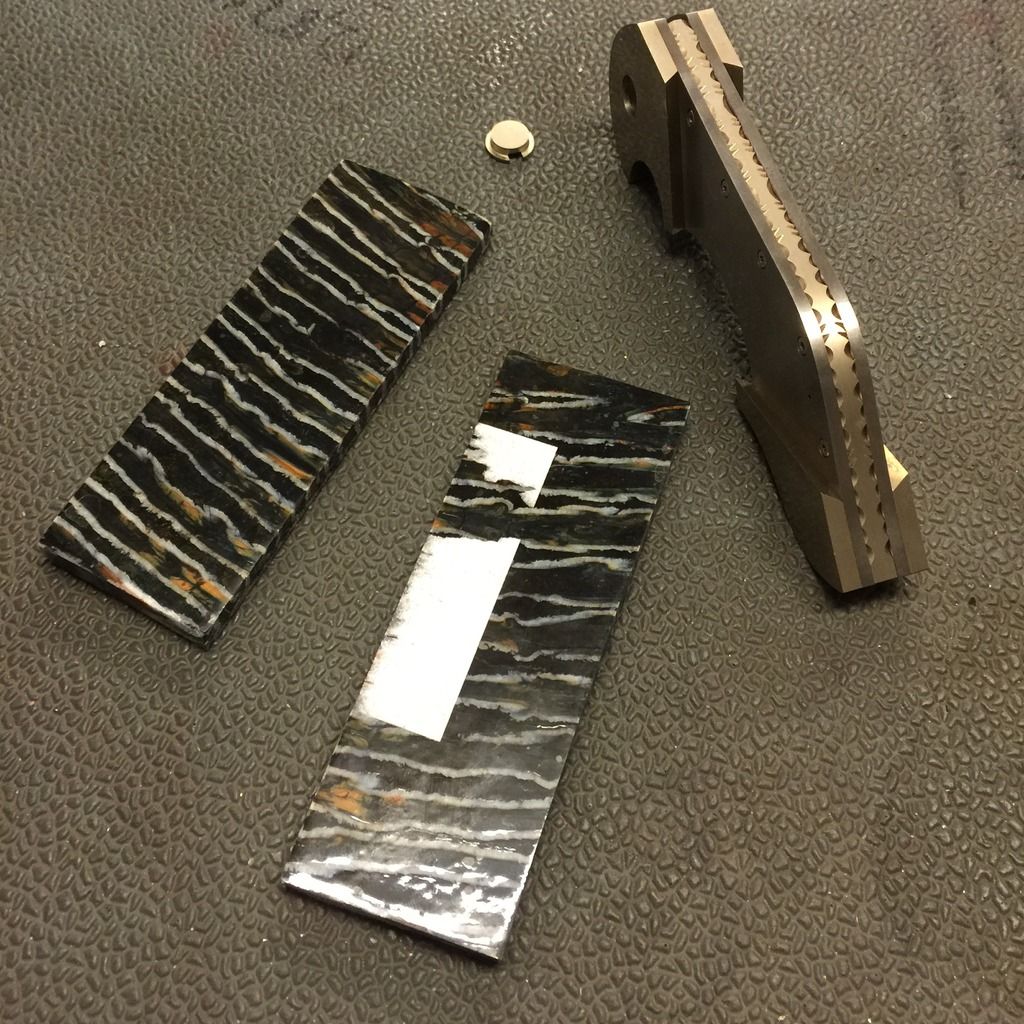
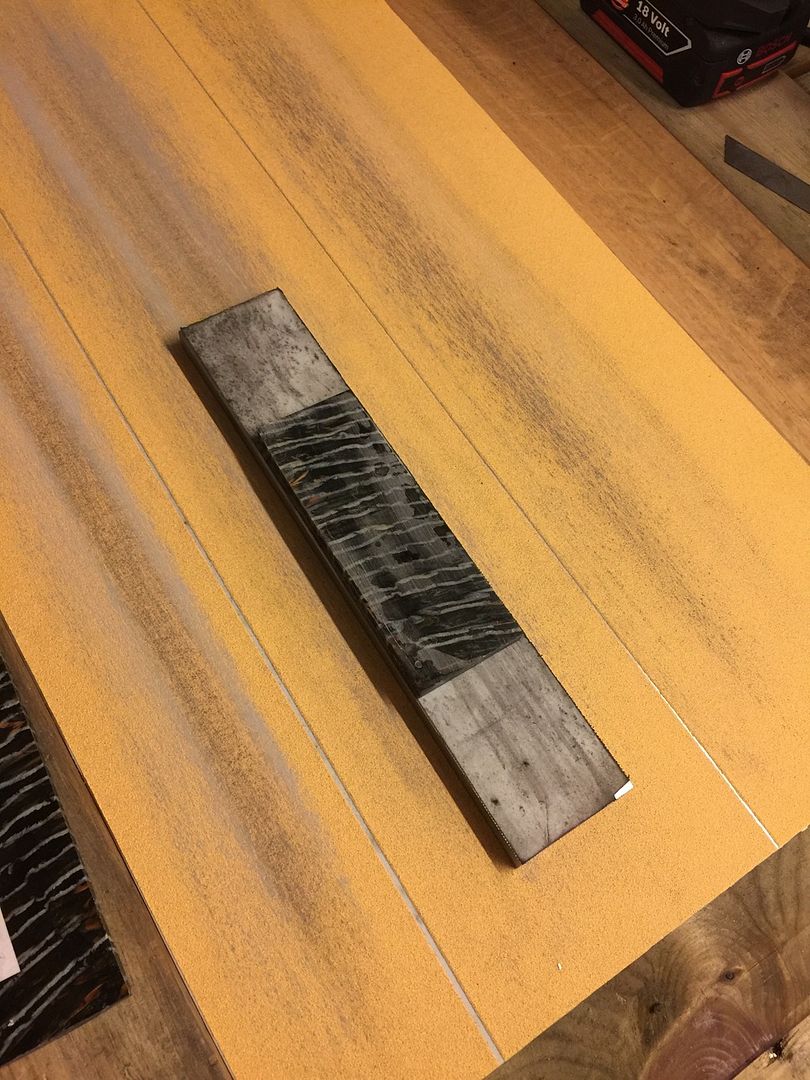
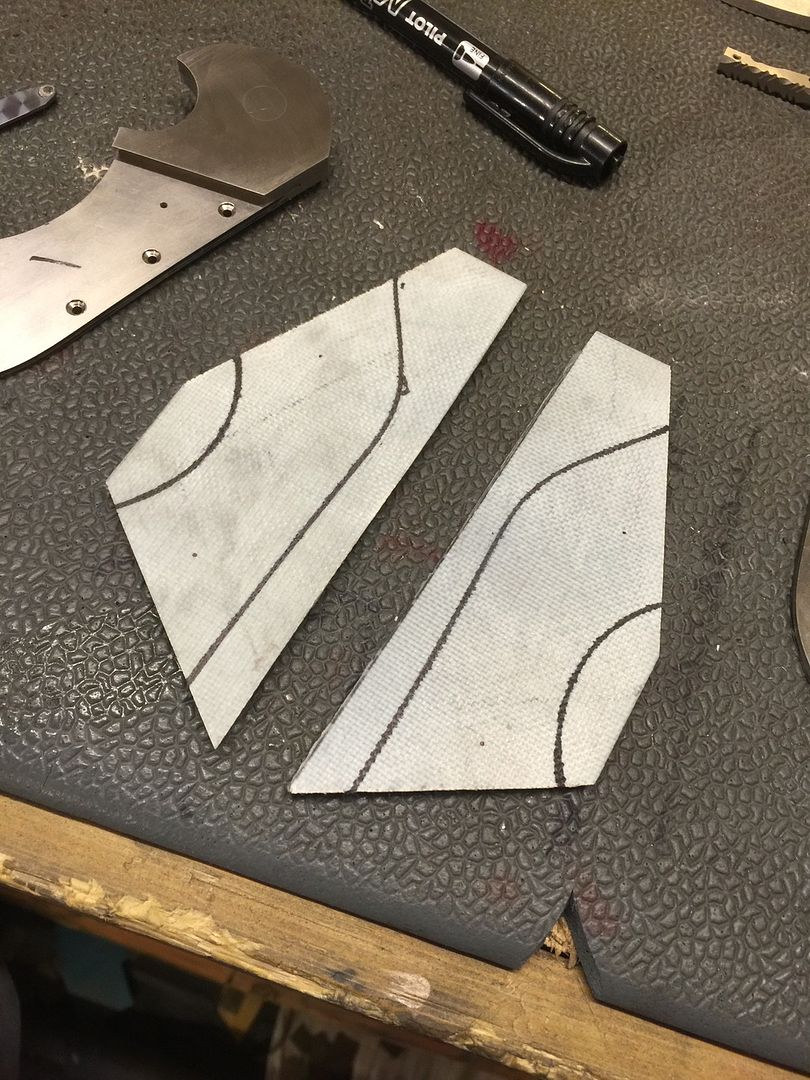
Time to prep the mammoth tooth.
First I make sure that one side is flat
I have milled a piece of oak flat and will act as a surface for the tooth
next I glue a sheet of balsa on top of the oak
The sandwich waiting to dry

Since I dont have surface grinder the tooth wil be milled down with a carbide endmill
milled down and glued on a thin sheet of cf to give the tooth some stability and strength
Cut thru the balsa and almost a ready piece of tooth for the build, right thickness.
next sand off the remains of balsa

ready for shaping and dovetails against bolsters
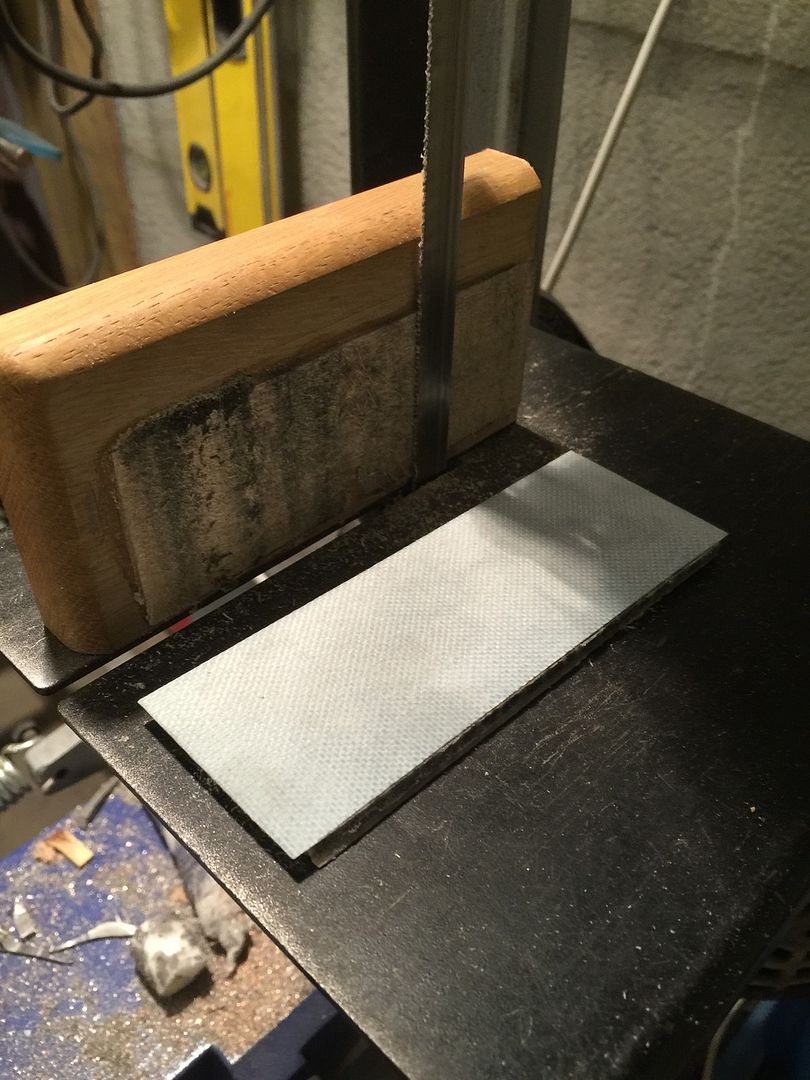
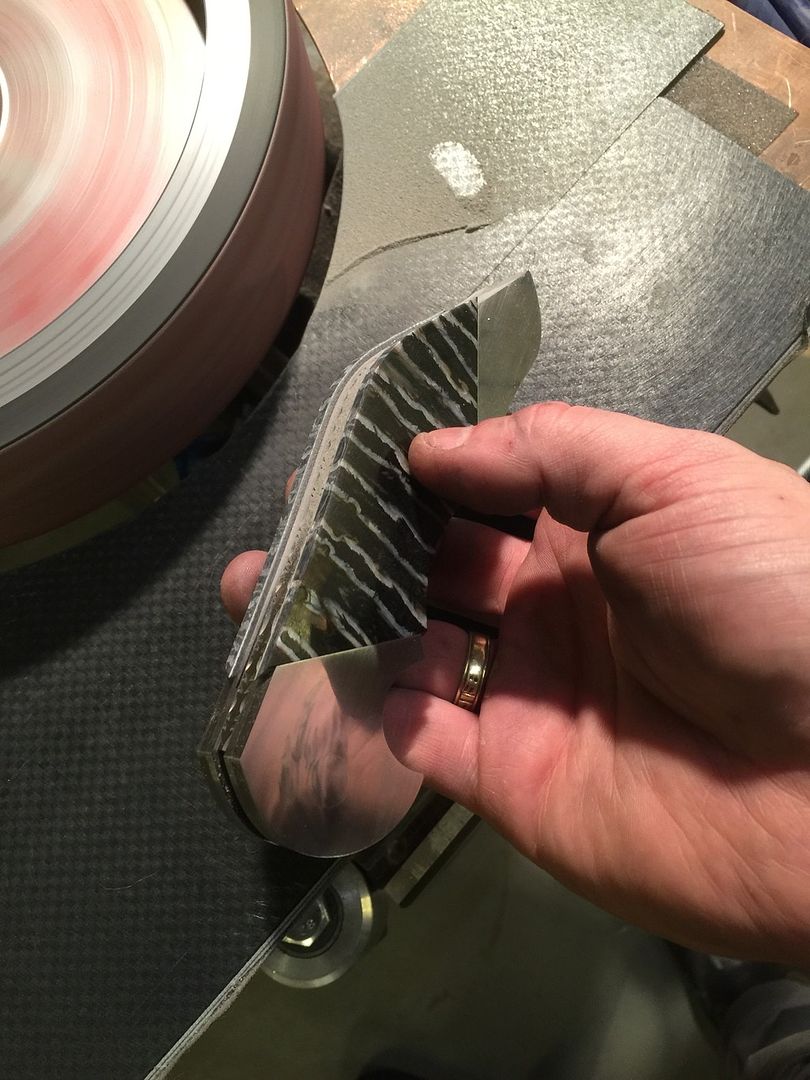
cut with a fine blade on bandsaw
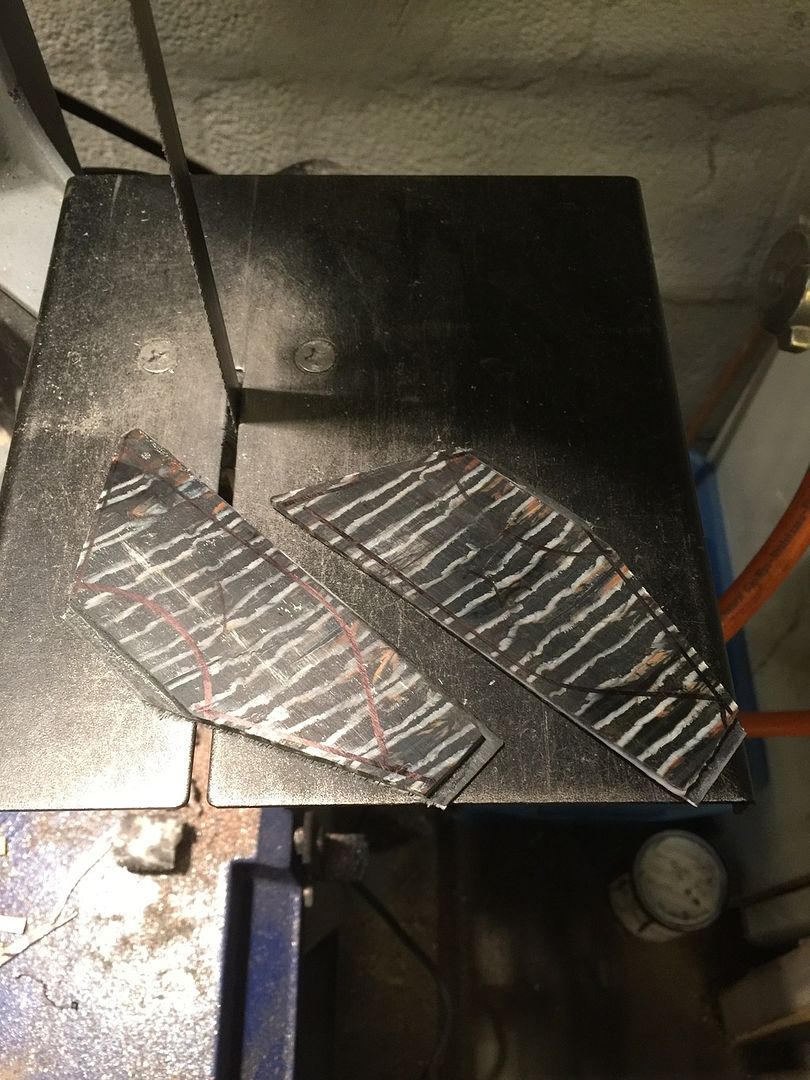
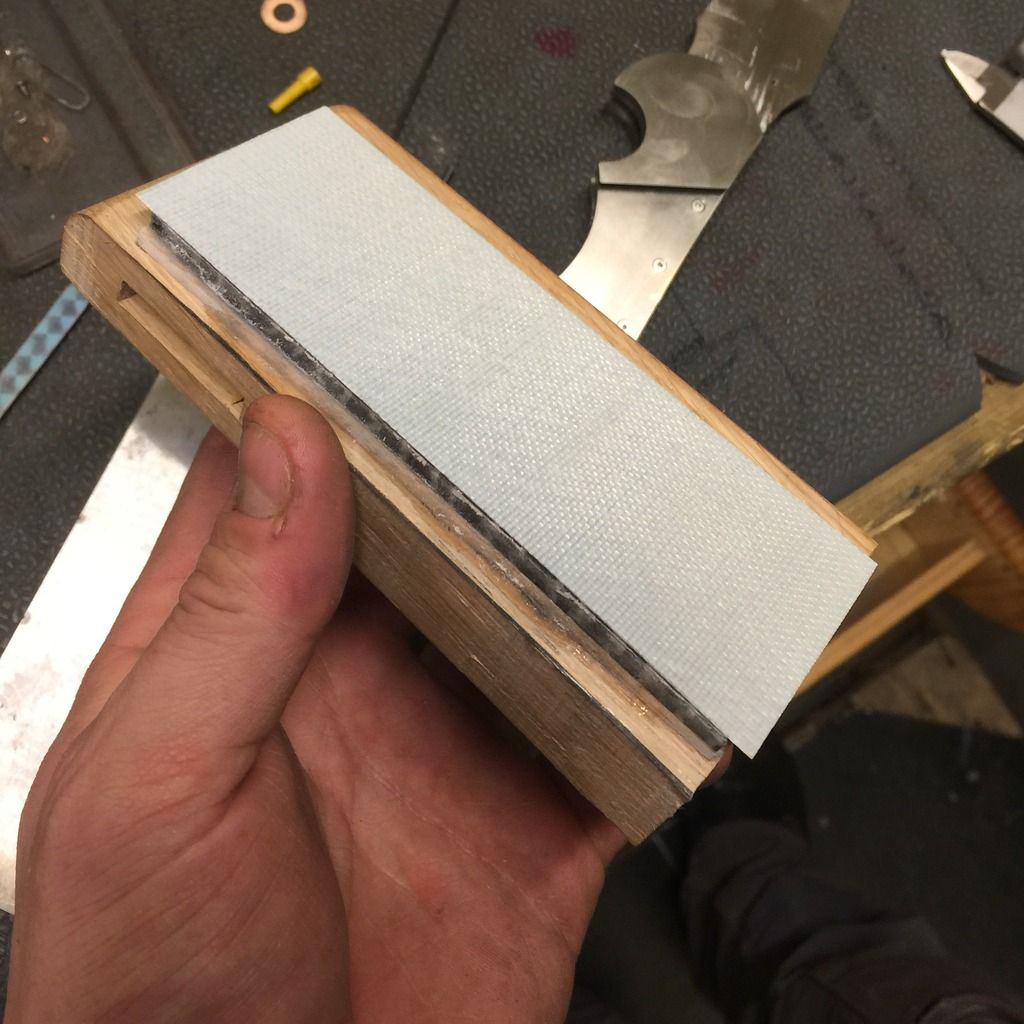
I use my glass platen with a angle to do the finishes on dovetails
next I place out the holes and drill undersized holes for the scales.
transfered the location
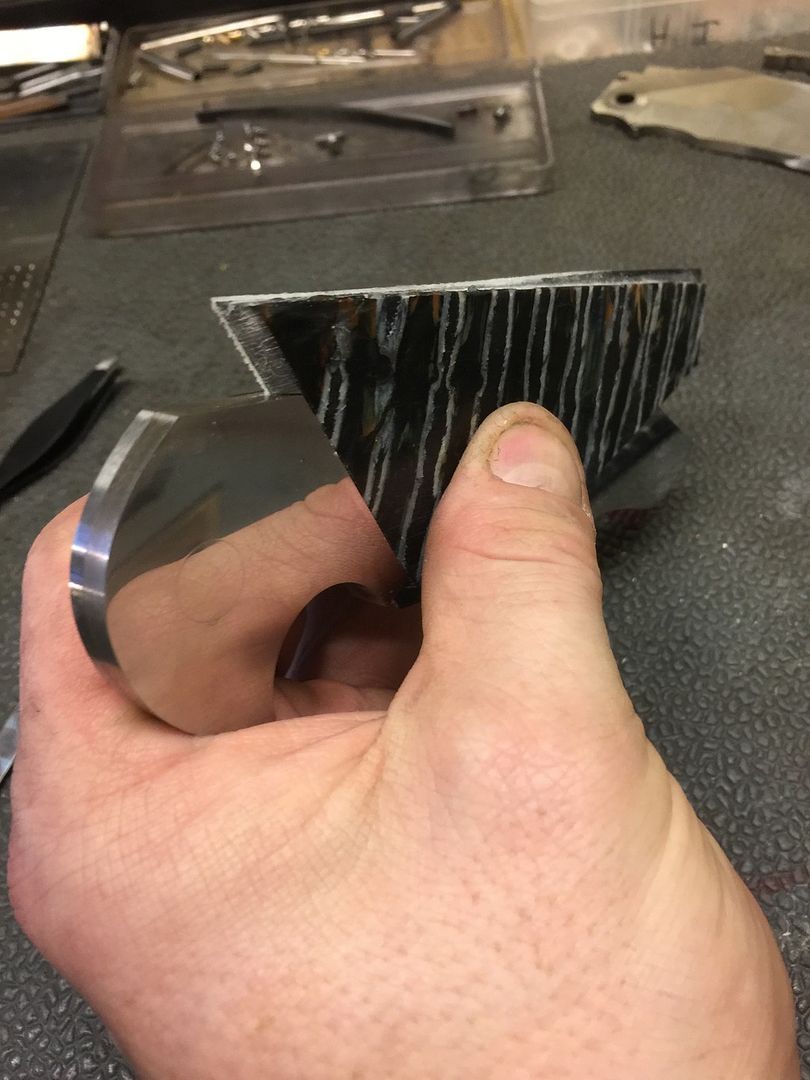
and they are in place ready to profile scales against liners.
profiling started
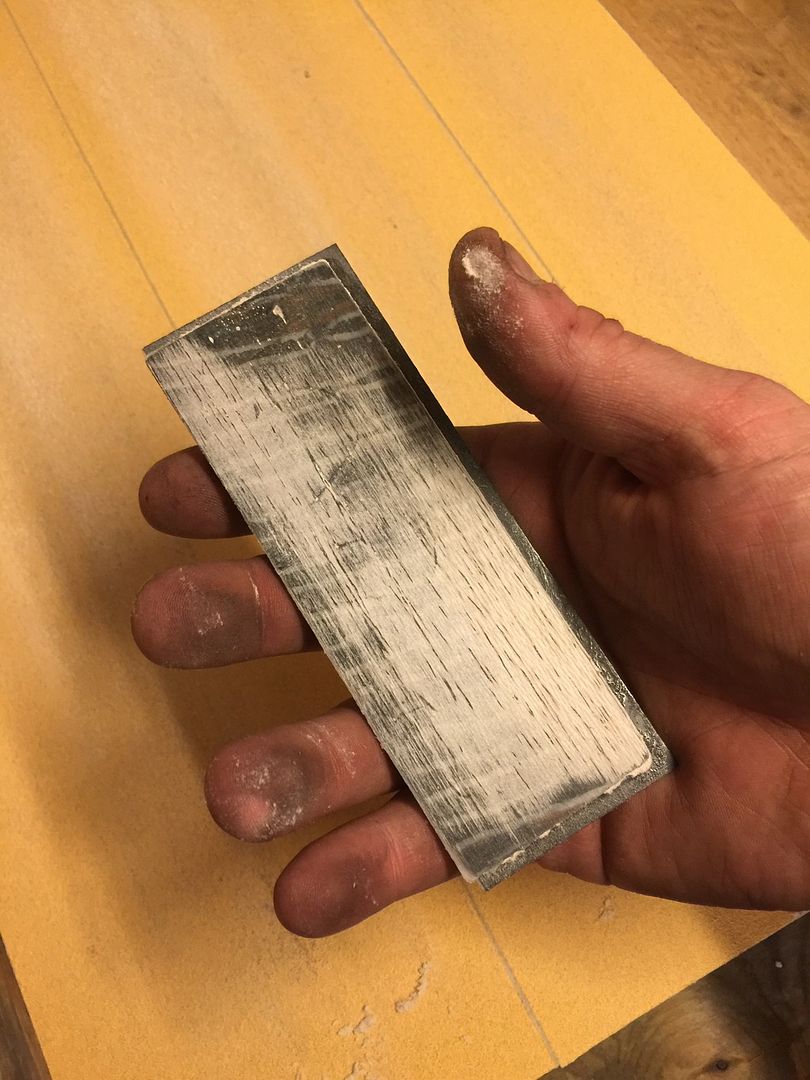
400 grit
profiling done
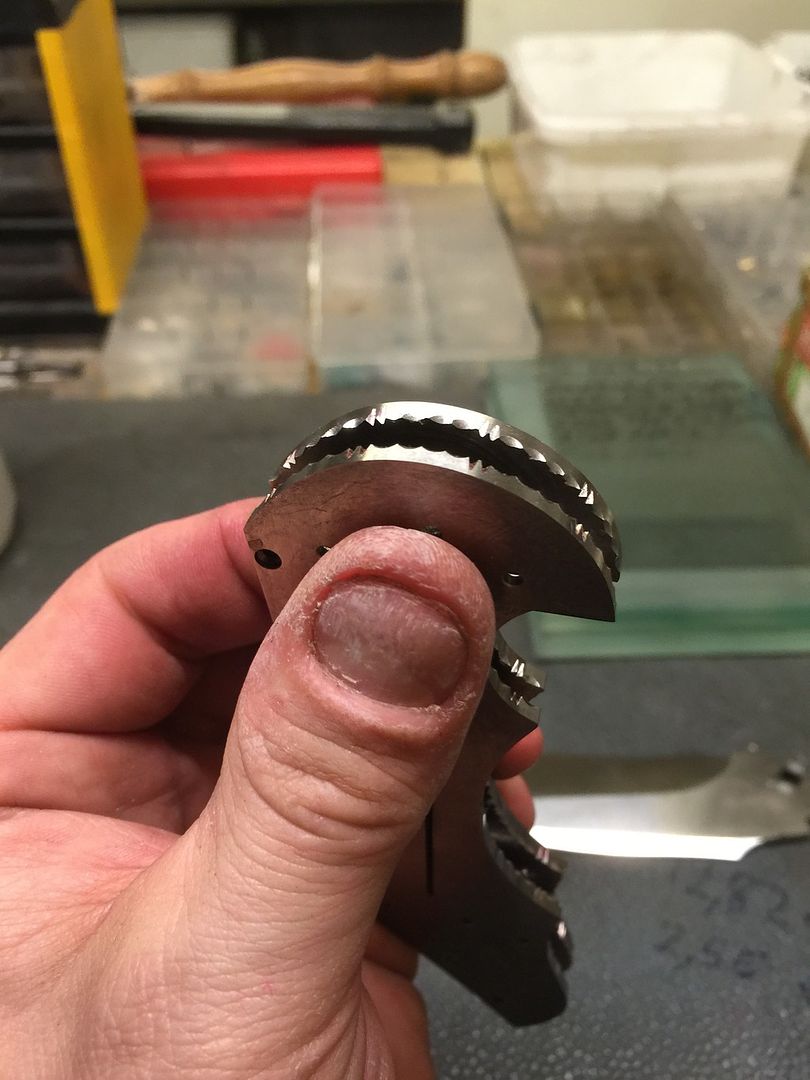
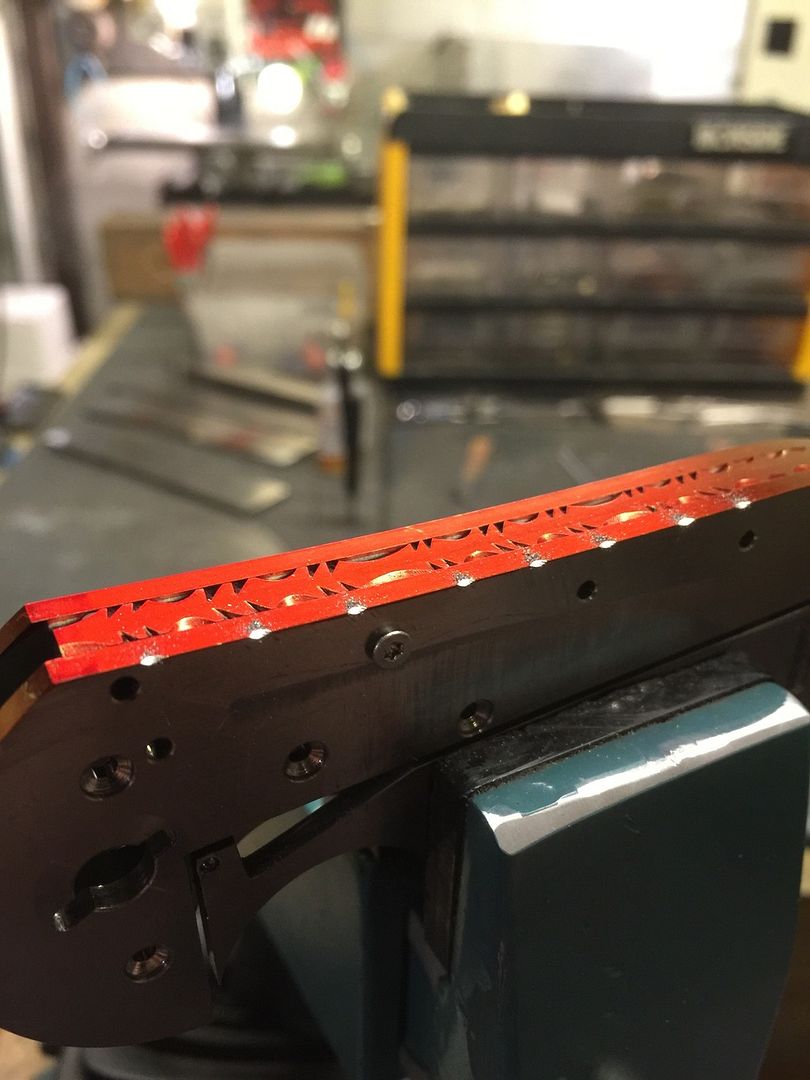
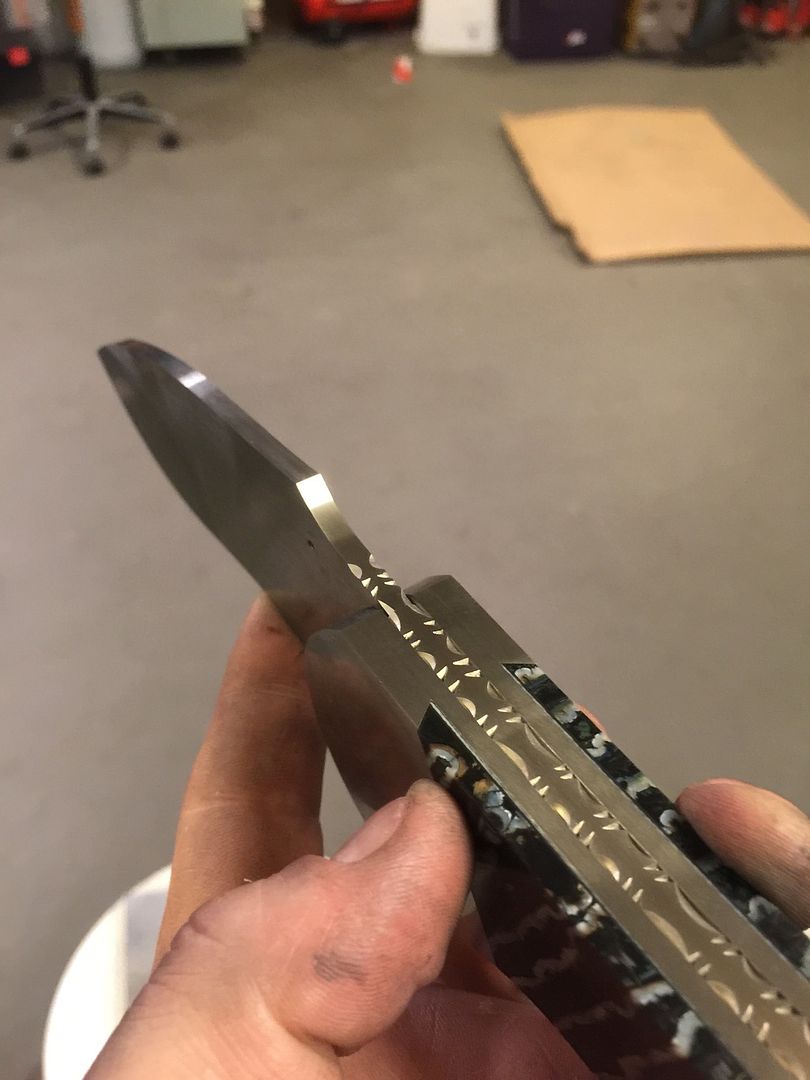
filework on liners is done after contouring of the handle.
transision between blade and spine still good after HT and other processes
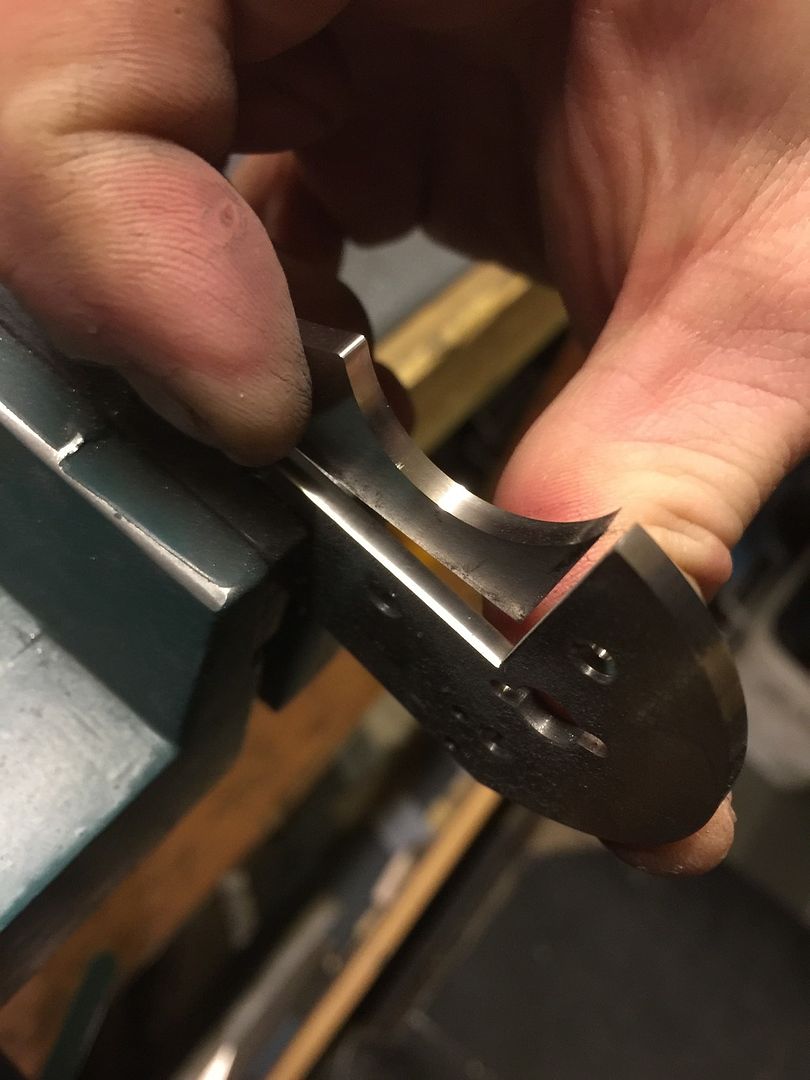
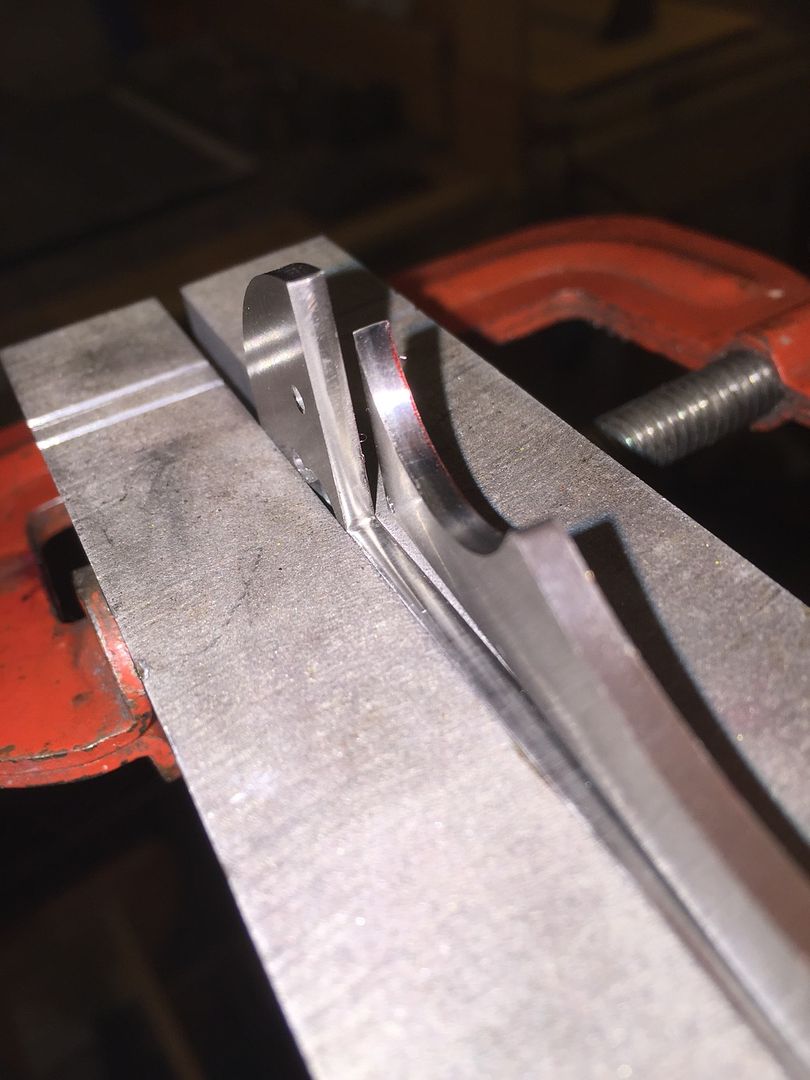
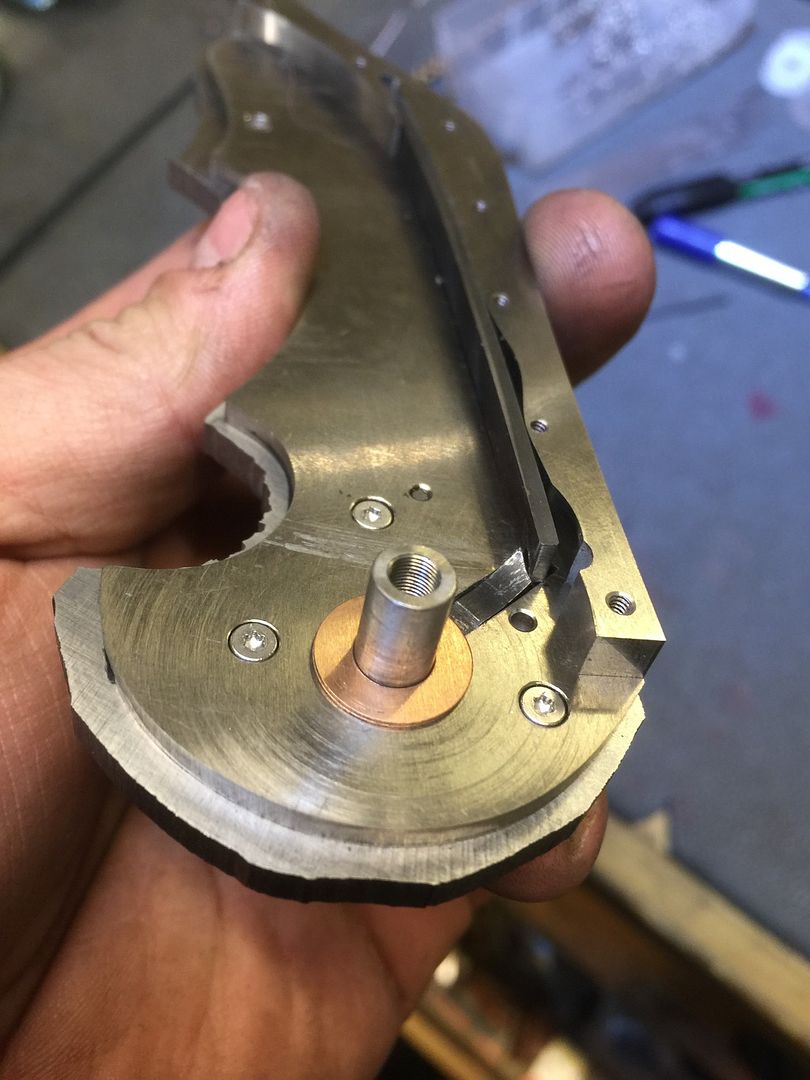
time to cut lockbar
lockbar done, next detent
finish inside lockbar, every surface all over gets same treatment on my knives
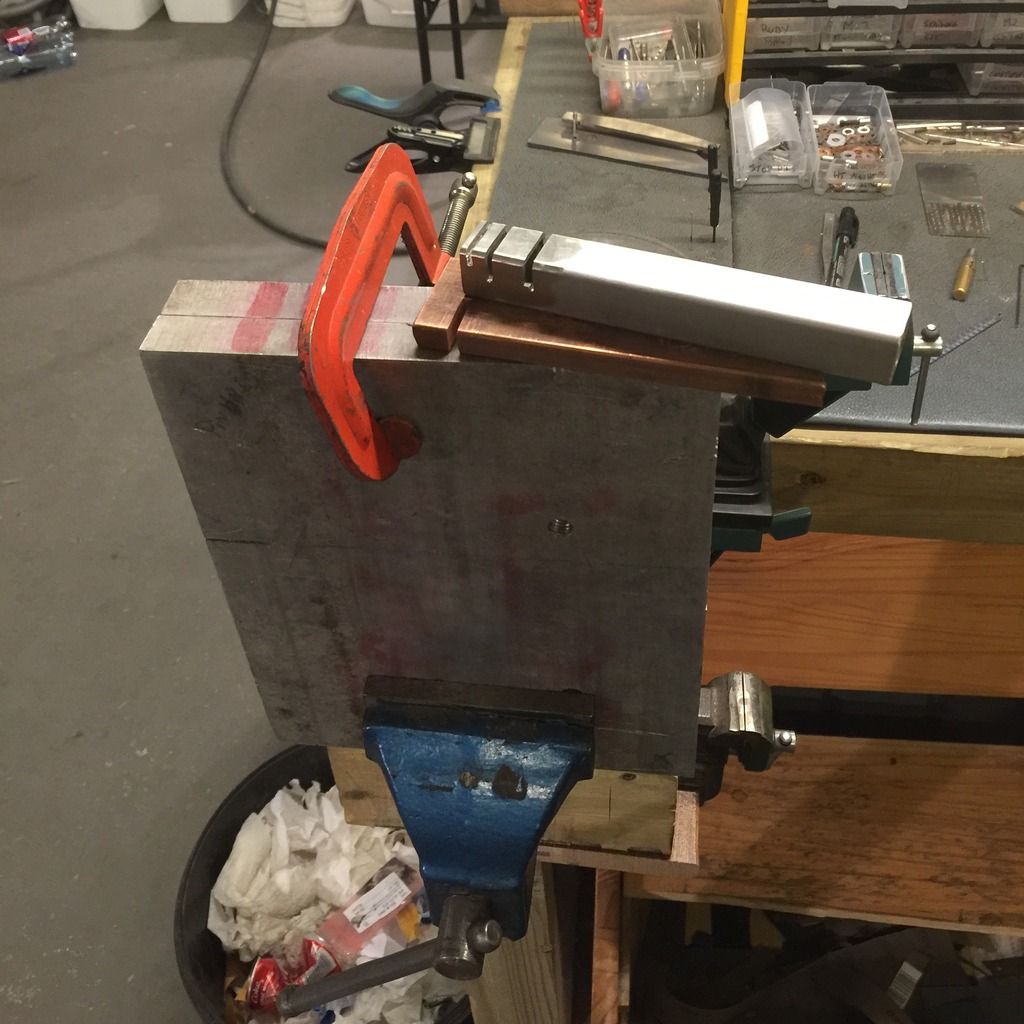
my lockbar jig for bending
-
Beklager tydelig en feil har skjedd.
Alle nye poster er borte.
Hva skjer her egentlig?
Admin?
-
Får tilbake straks deler fra herding, så kommer oppdateringer.
-
Just a short video of filework, hope quality of vid is good enough
Filework
Here's me(and ya Stan in the background)

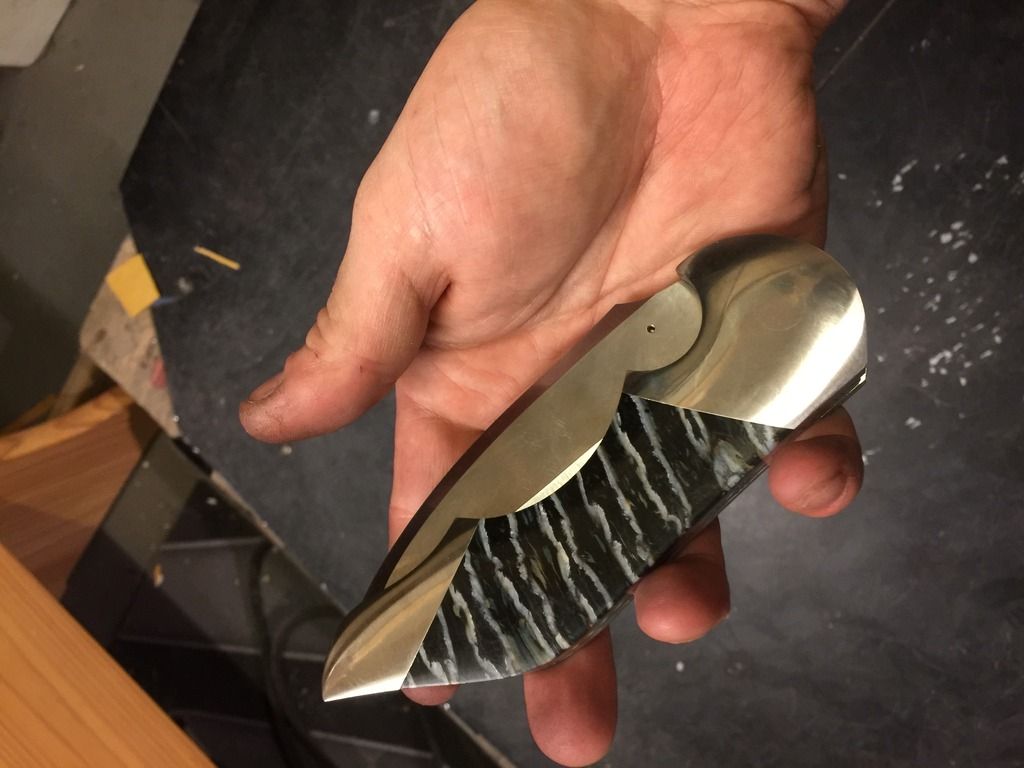
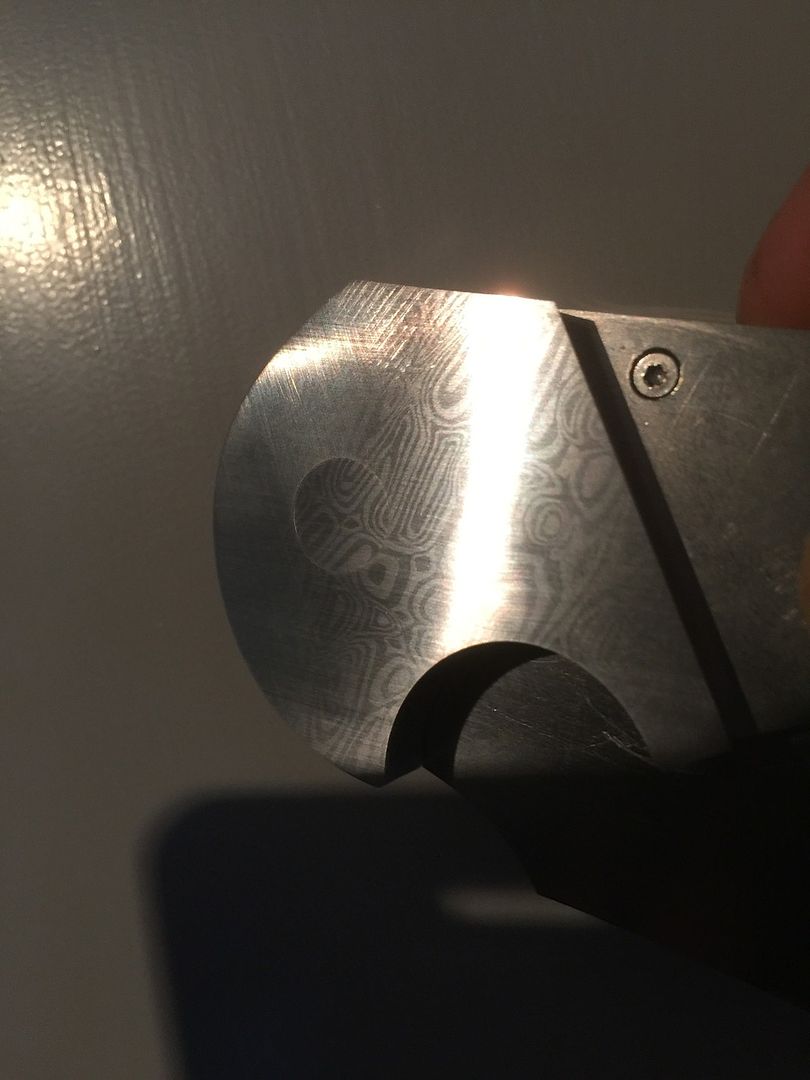
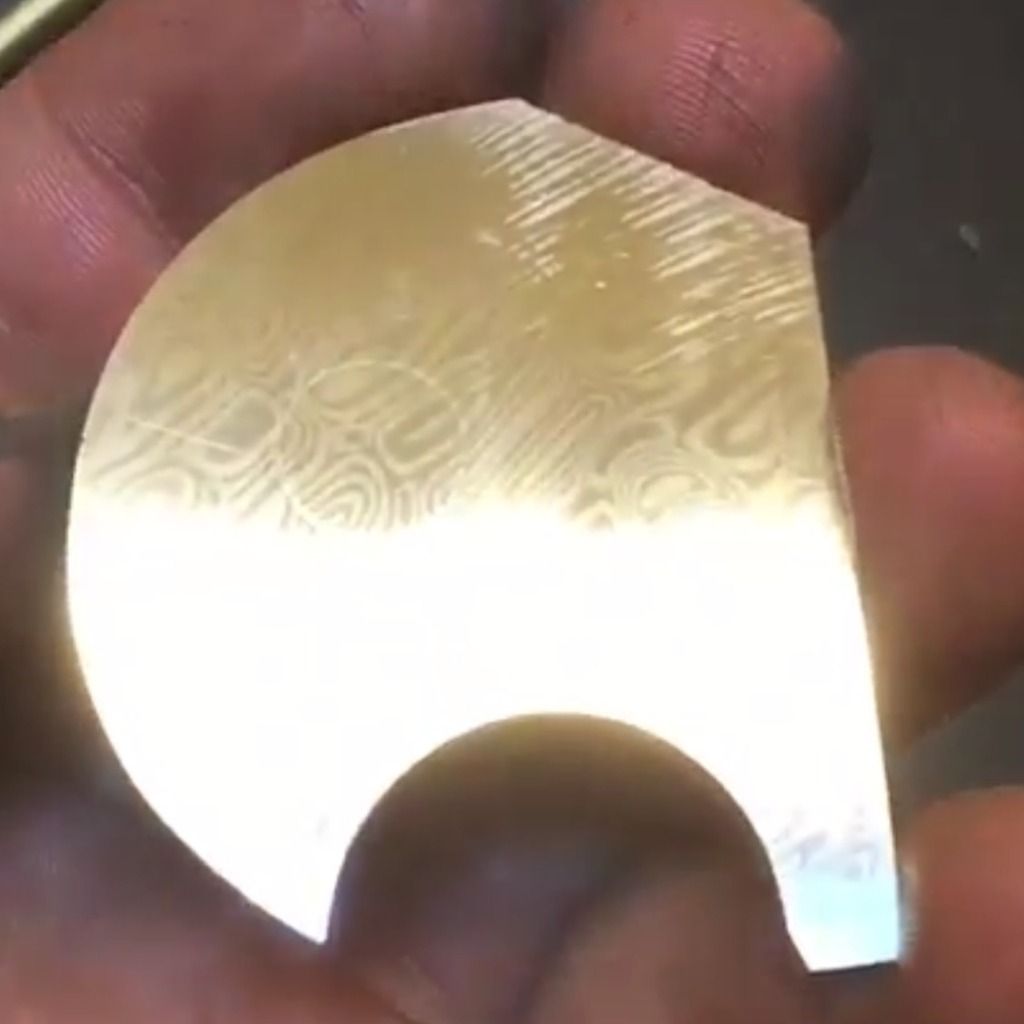
Better picture of the button, the pattern is very random so this match up was approved
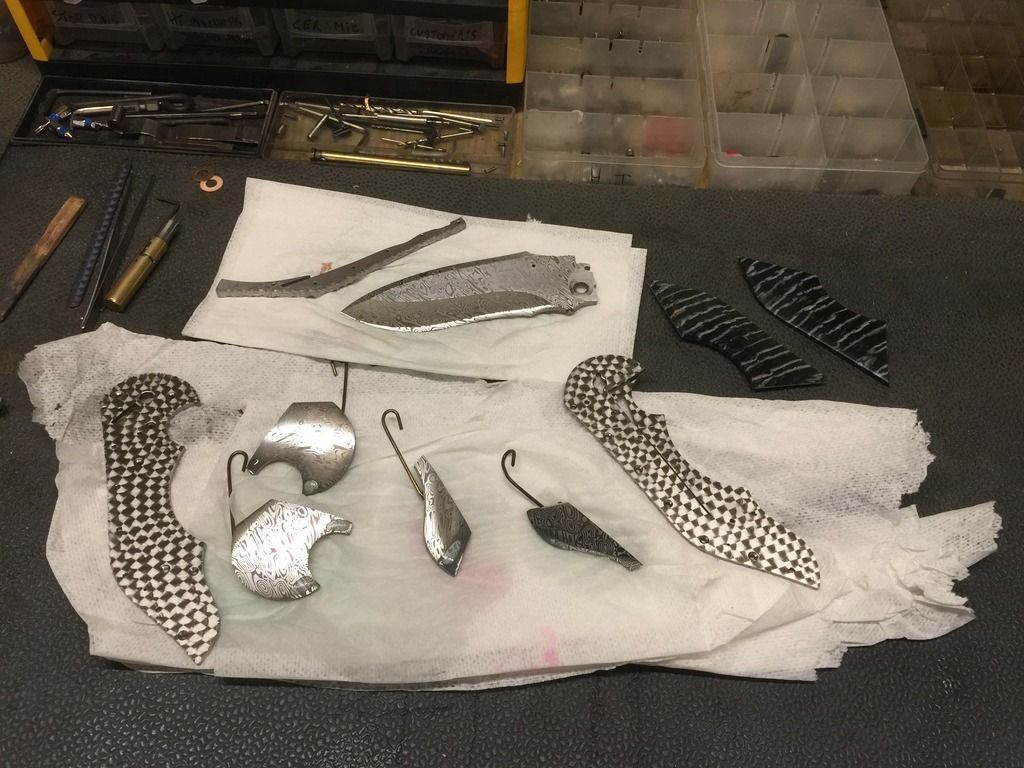
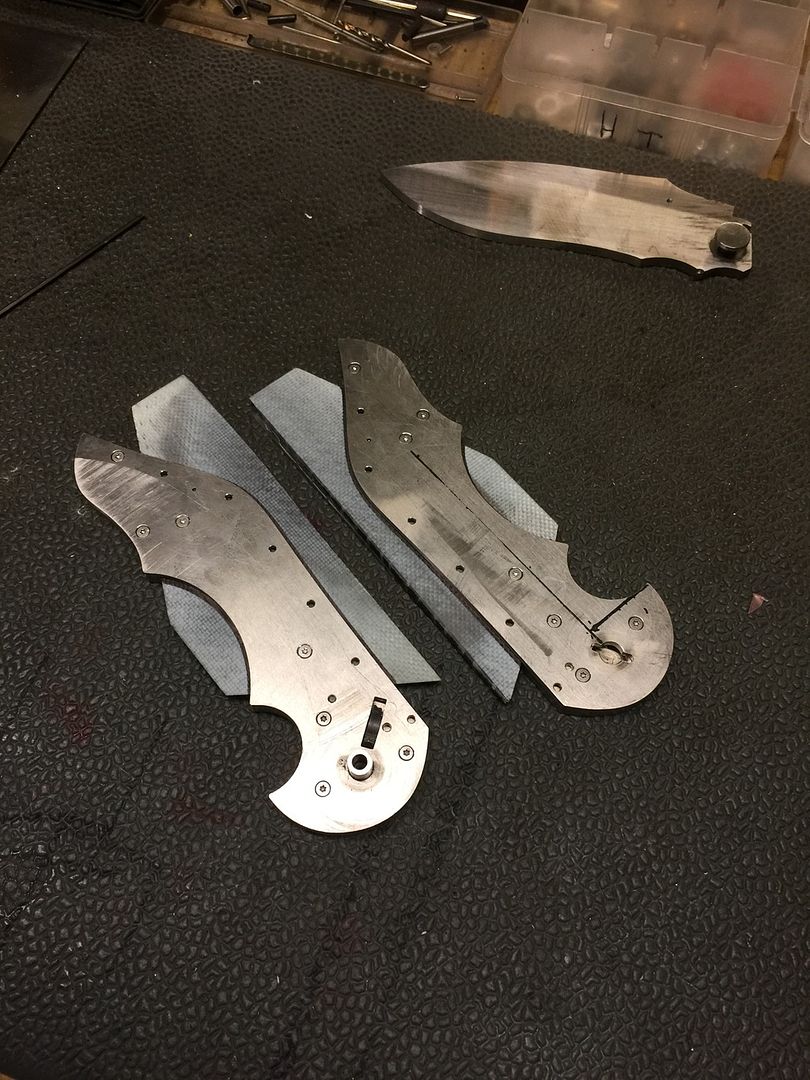
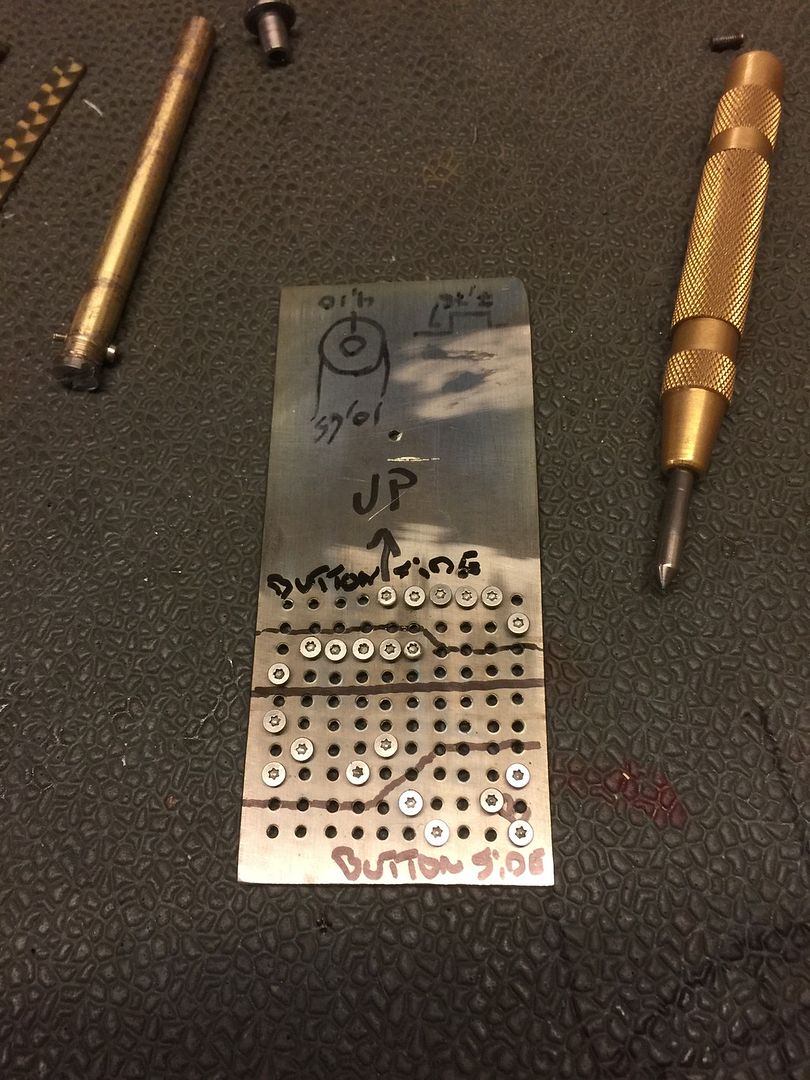
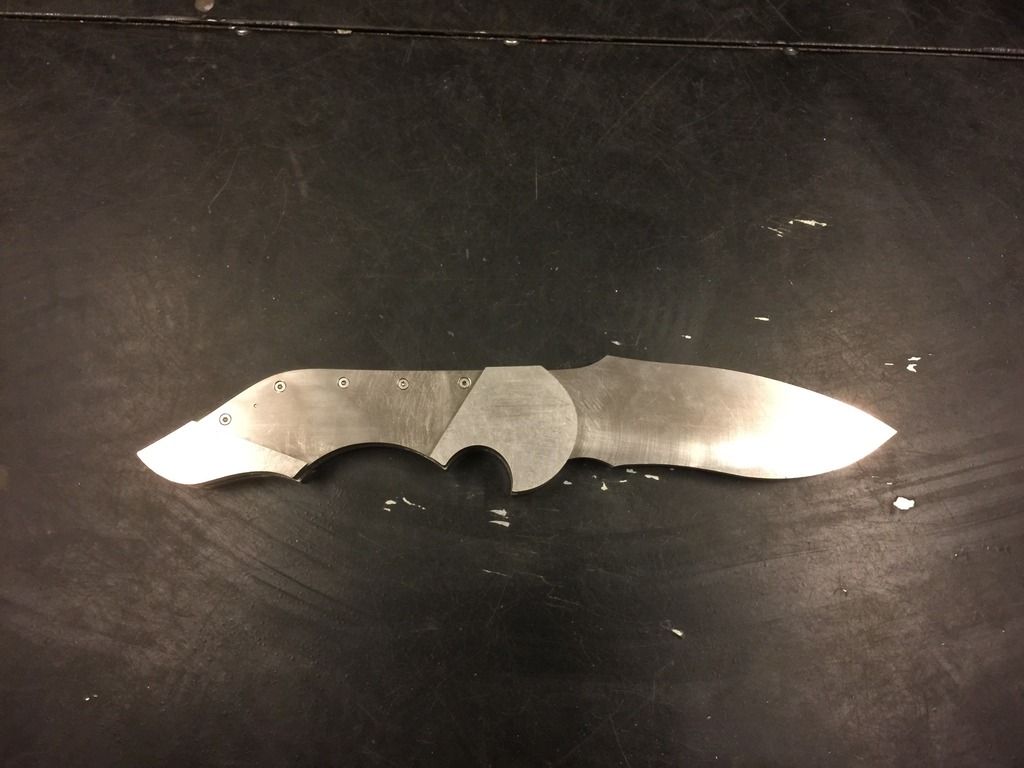
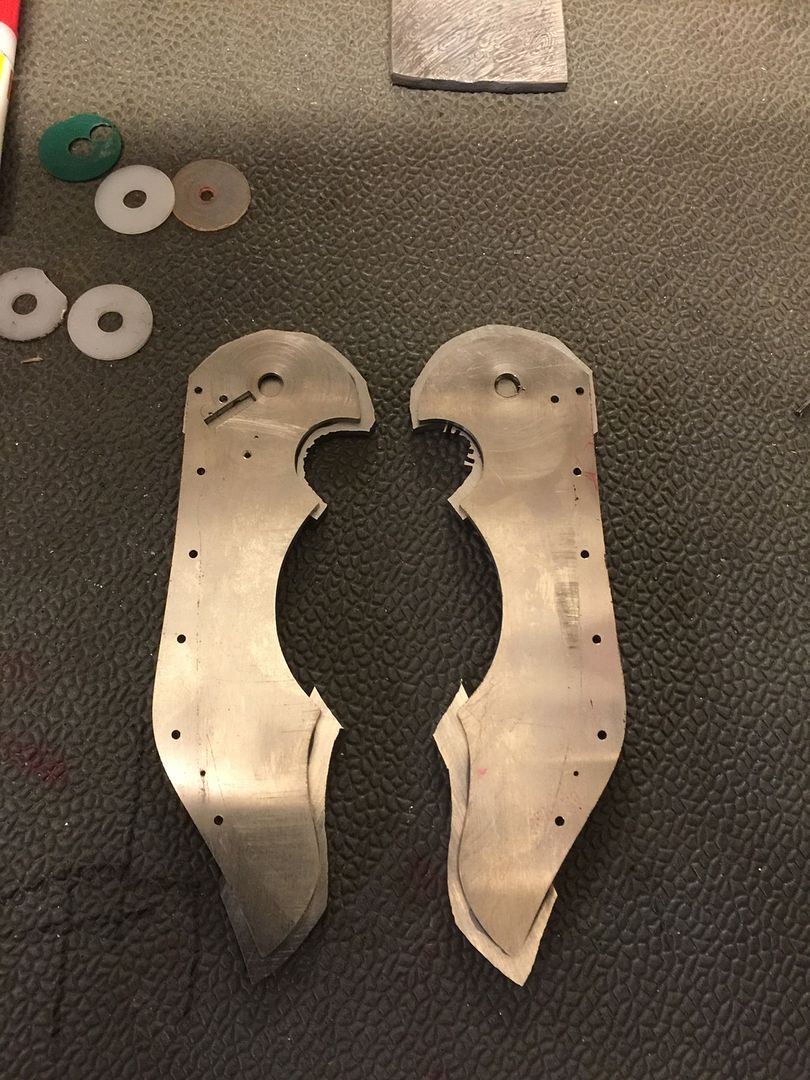
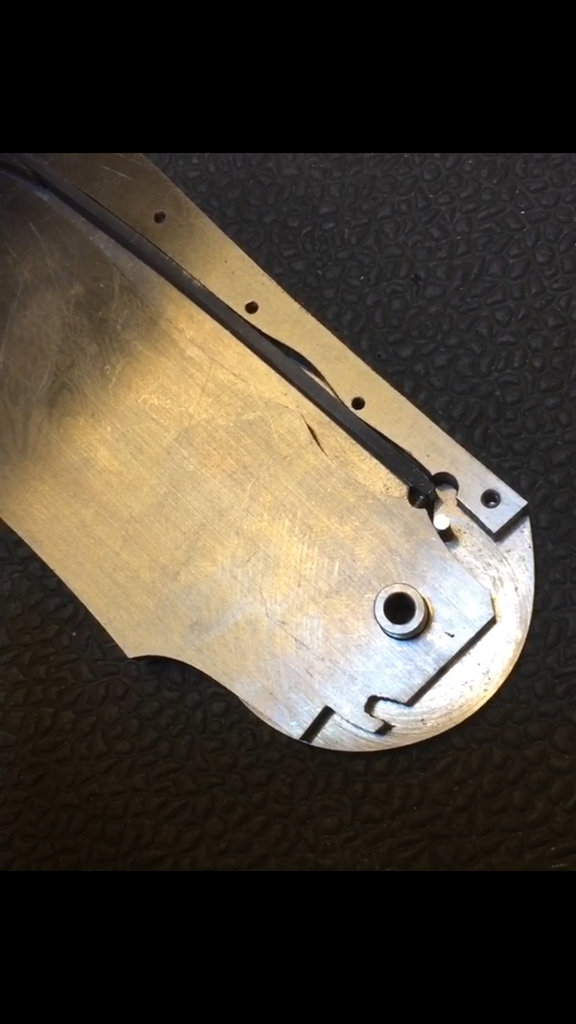
Disassembled the knife, this is a map for every screw
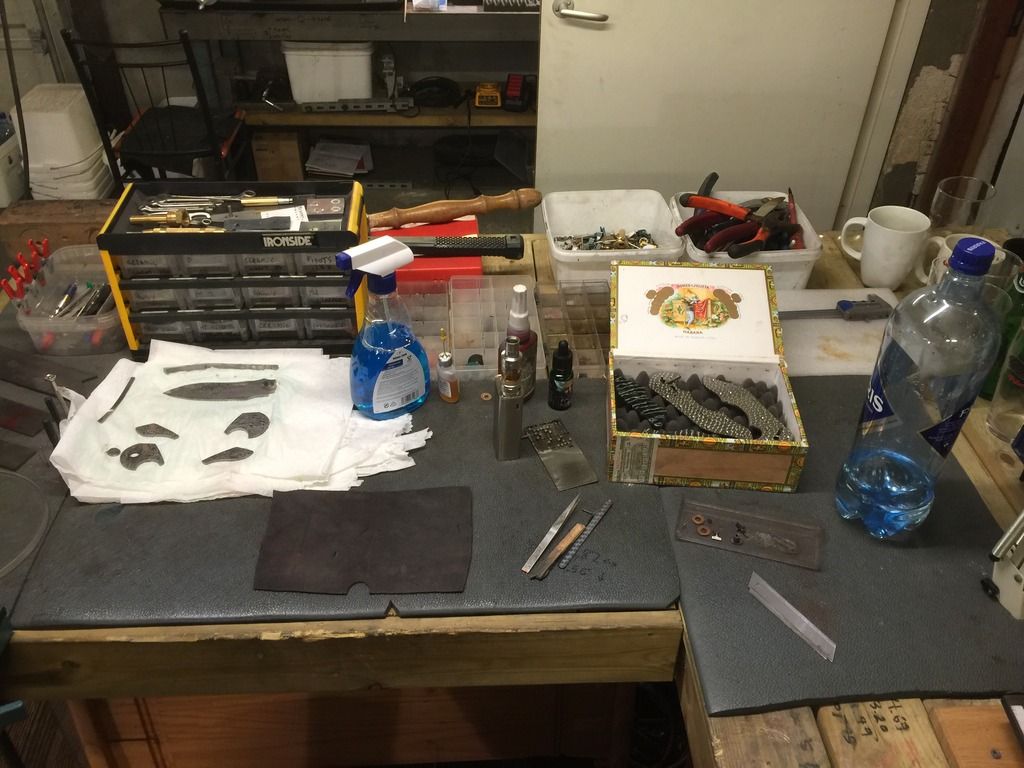
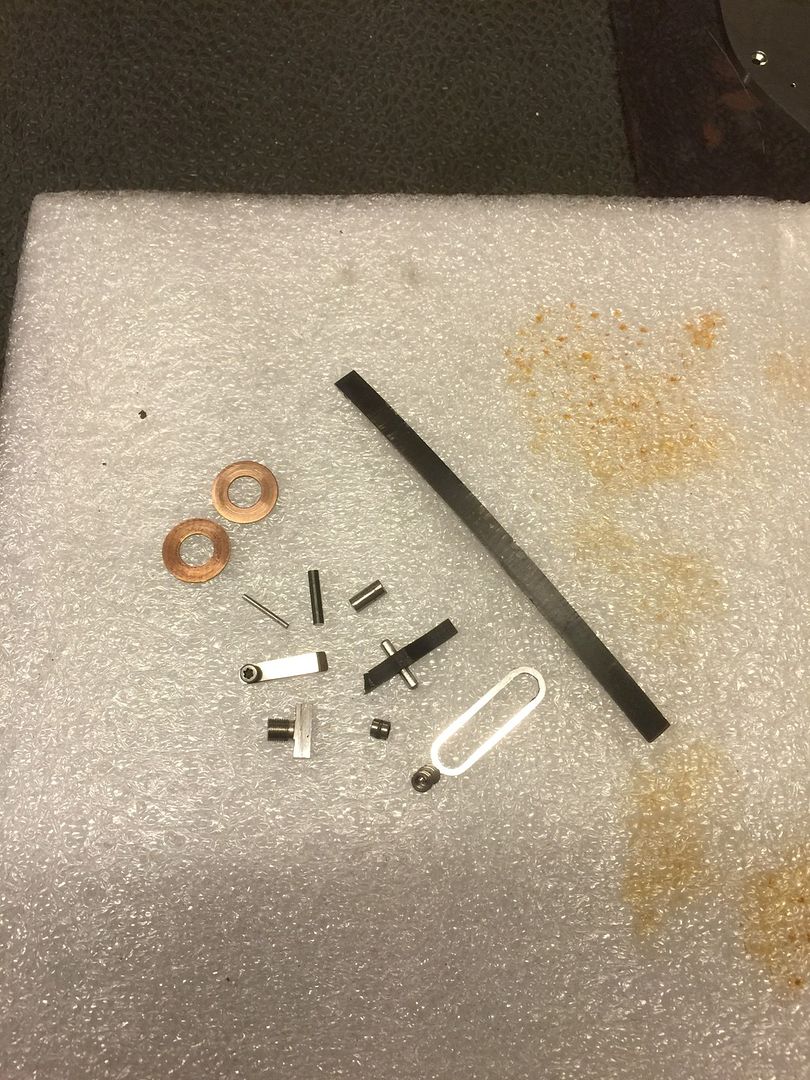
All the little parts on this build
Parts ready for HT
-
Parts is ready for HT, will come back with updates soon. I will ship the parts to Damasteel on this build cause honestly I won't risk warping on small parts like the backspacer. This is all damascus only liners that are in Titanium.
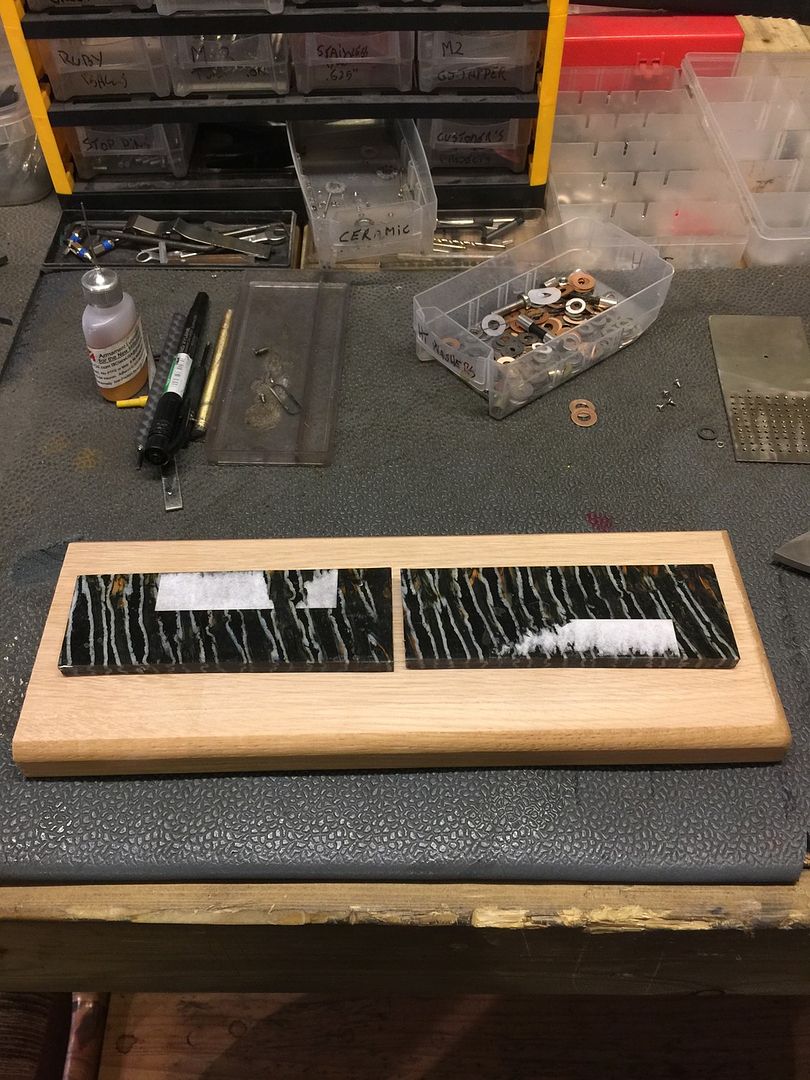
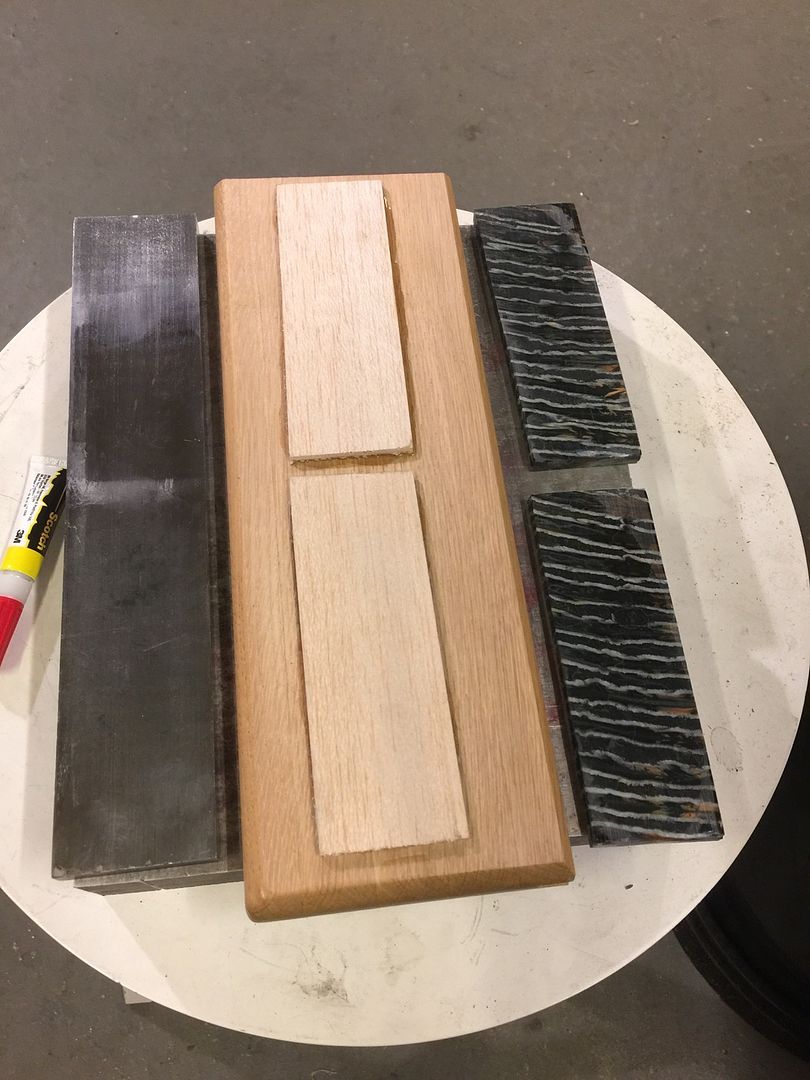
Ensured that the pattern match up also before shipment
-
Det var lekkert filarbeid, gitt.
Hvor mange timer ligger det bak en kniv som dette?
Jeg tar aldri tiden, alt tar sin tid det tar. Men ca 2 måneder på hver kniv, denne blir nok 3 måneder
-
Hei Glenn Are
Ligger låse fjæra i ryggen på håndtaket og betjenes med en knapp på bolsteret? Button Lock???
Har jeg forstått det riktig ?
Det har blitt avanserte ting fra din hånd etter hvert, moro å se!
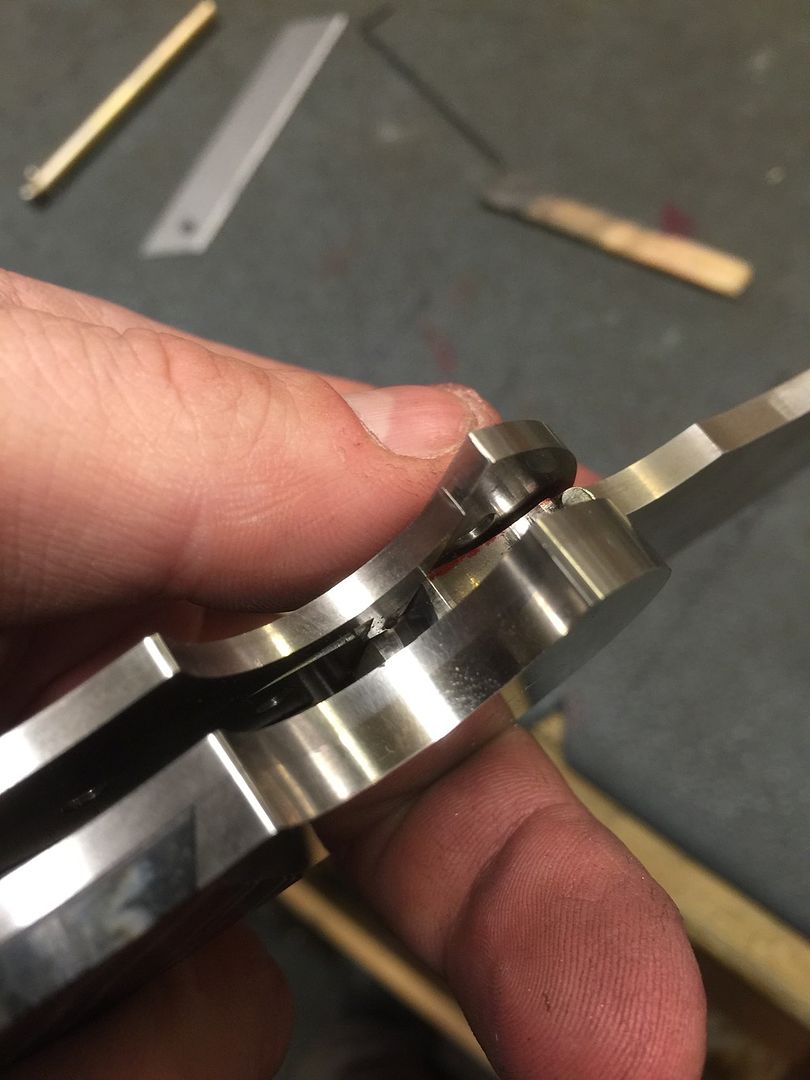
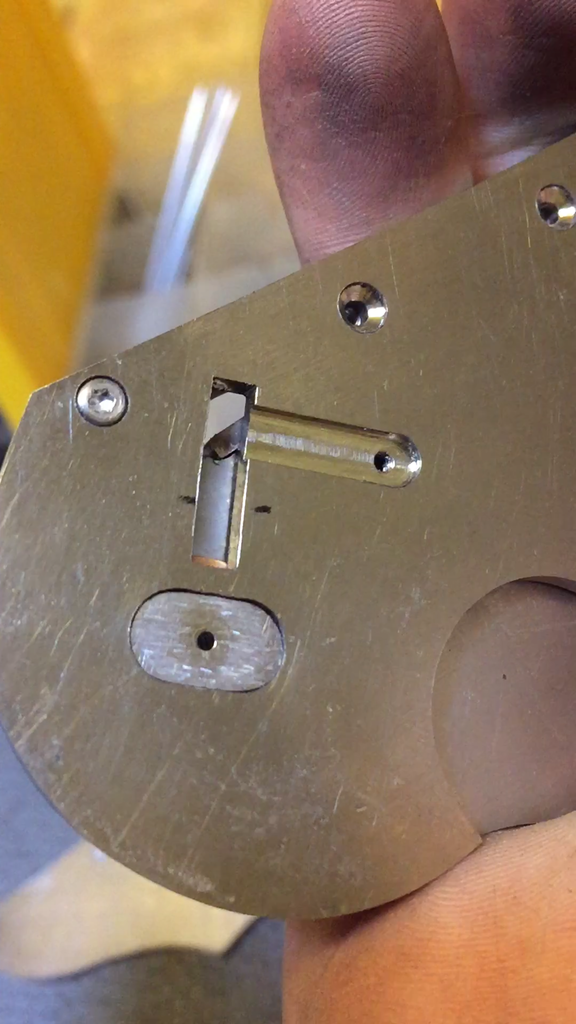
Ja kan kalles en "button lock"
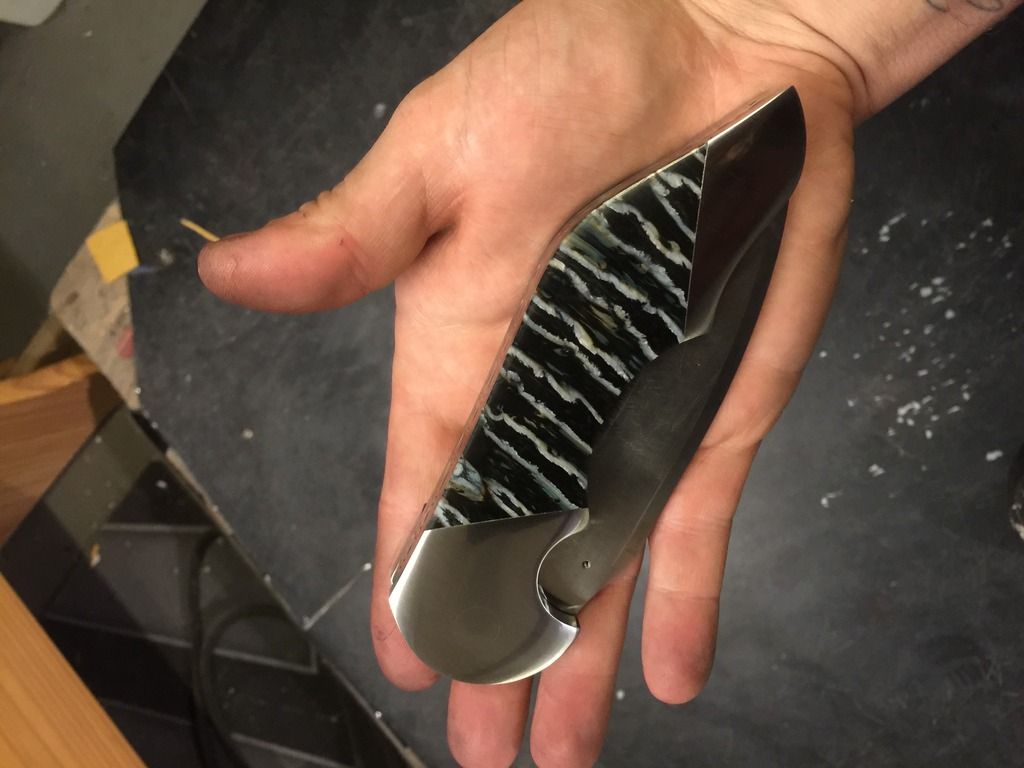
Knappen blir skjult for øyet, og mønsteret i damasken matcher mønsteret på bolster.
-
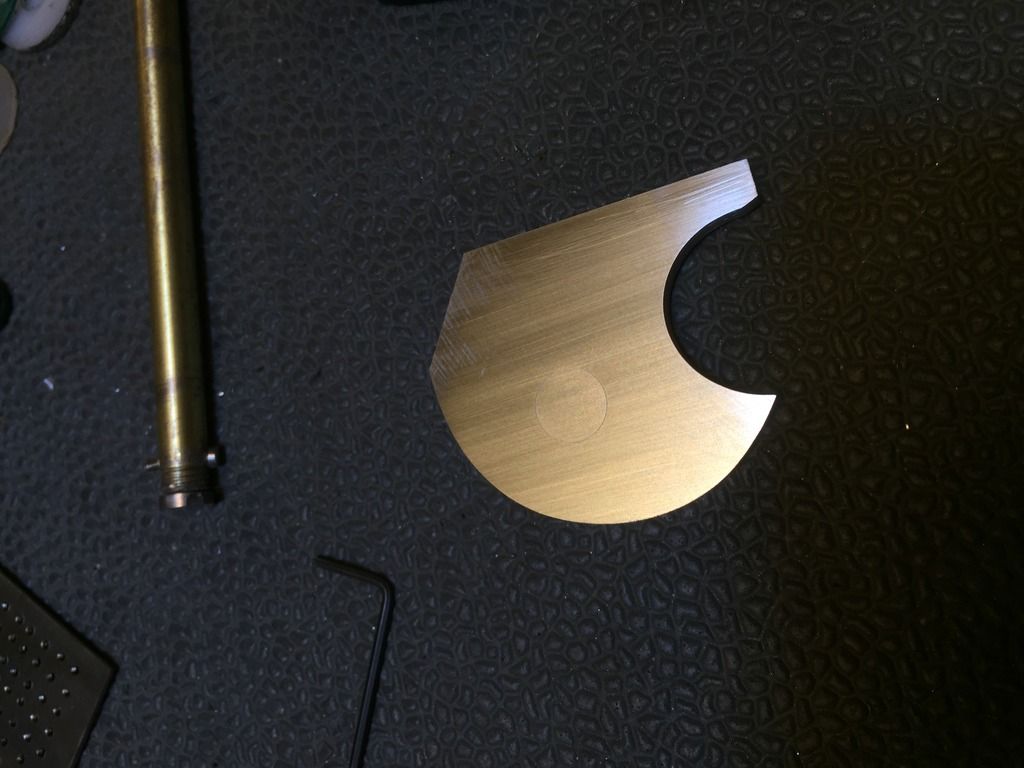
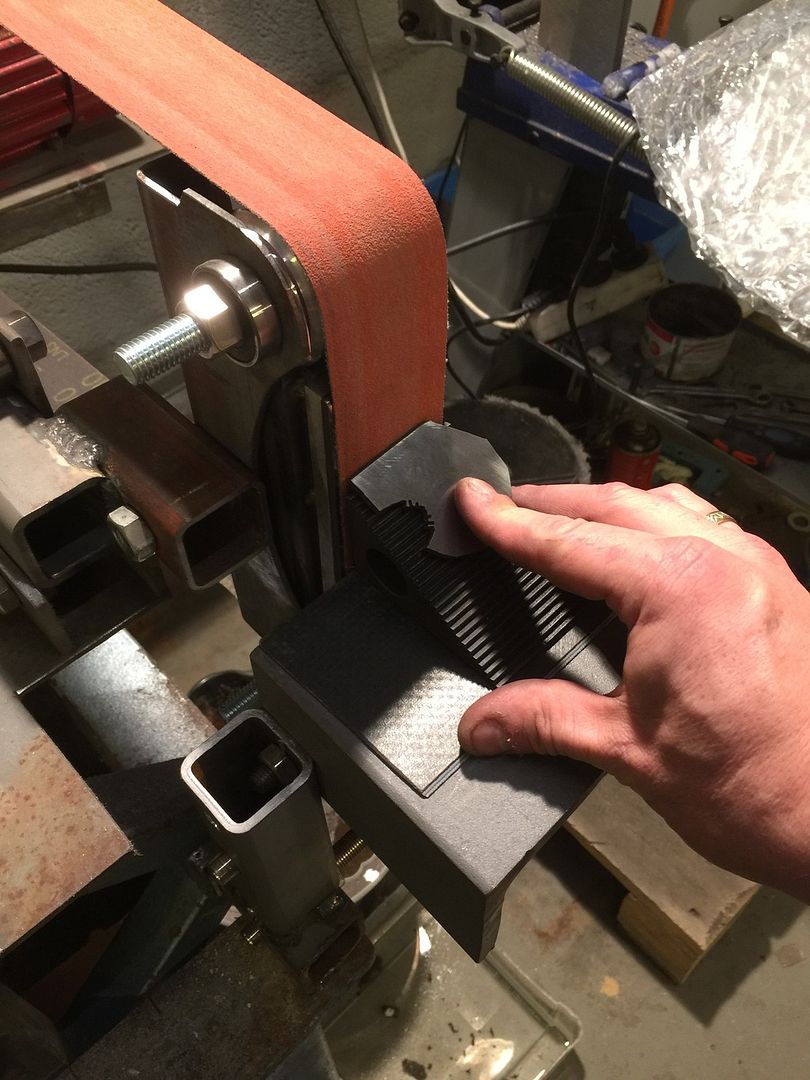
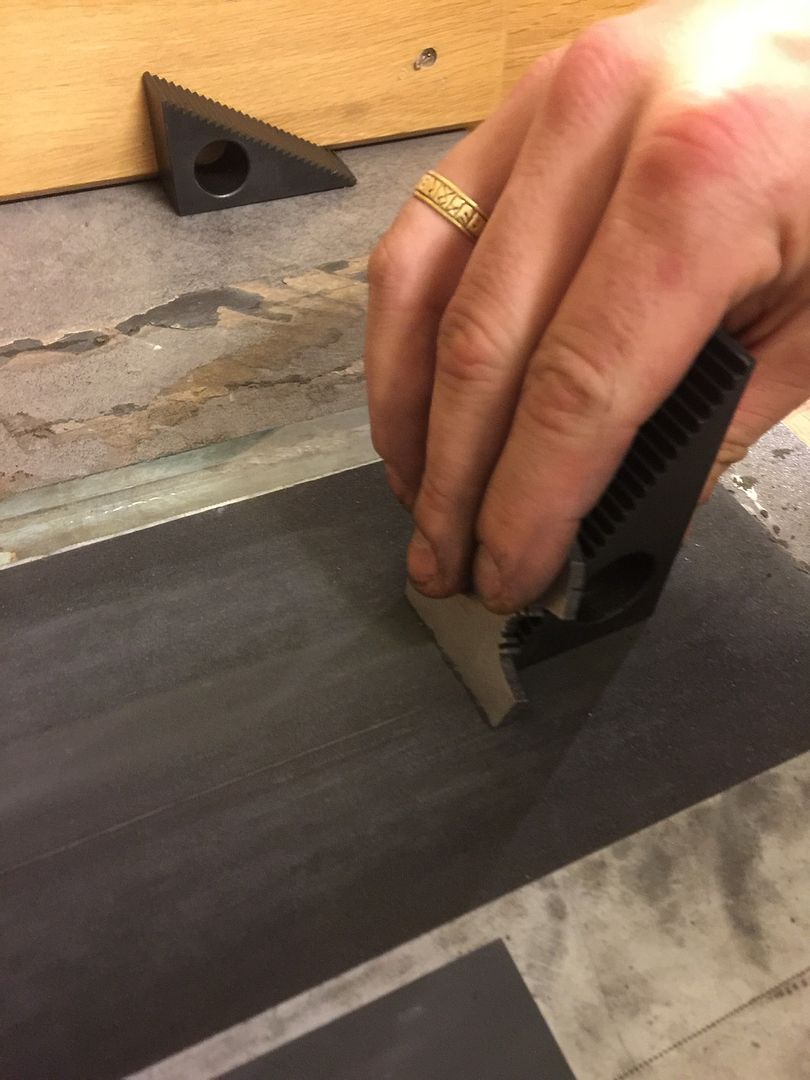
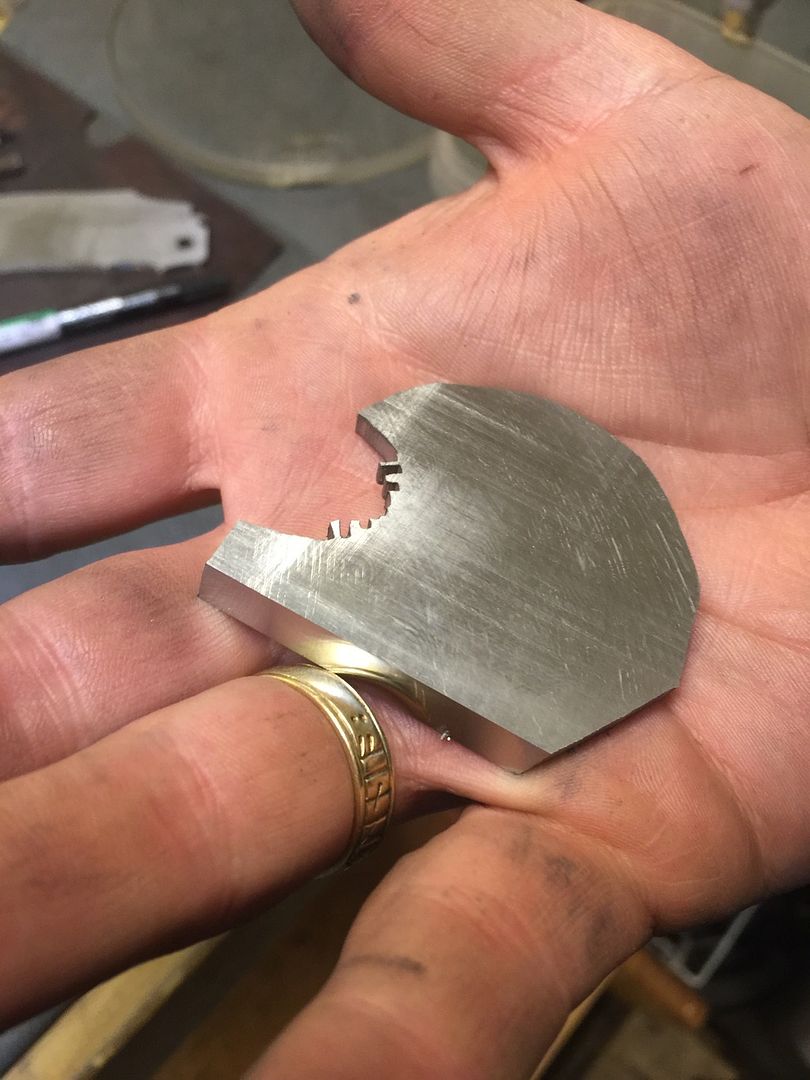
Button ready for shaping
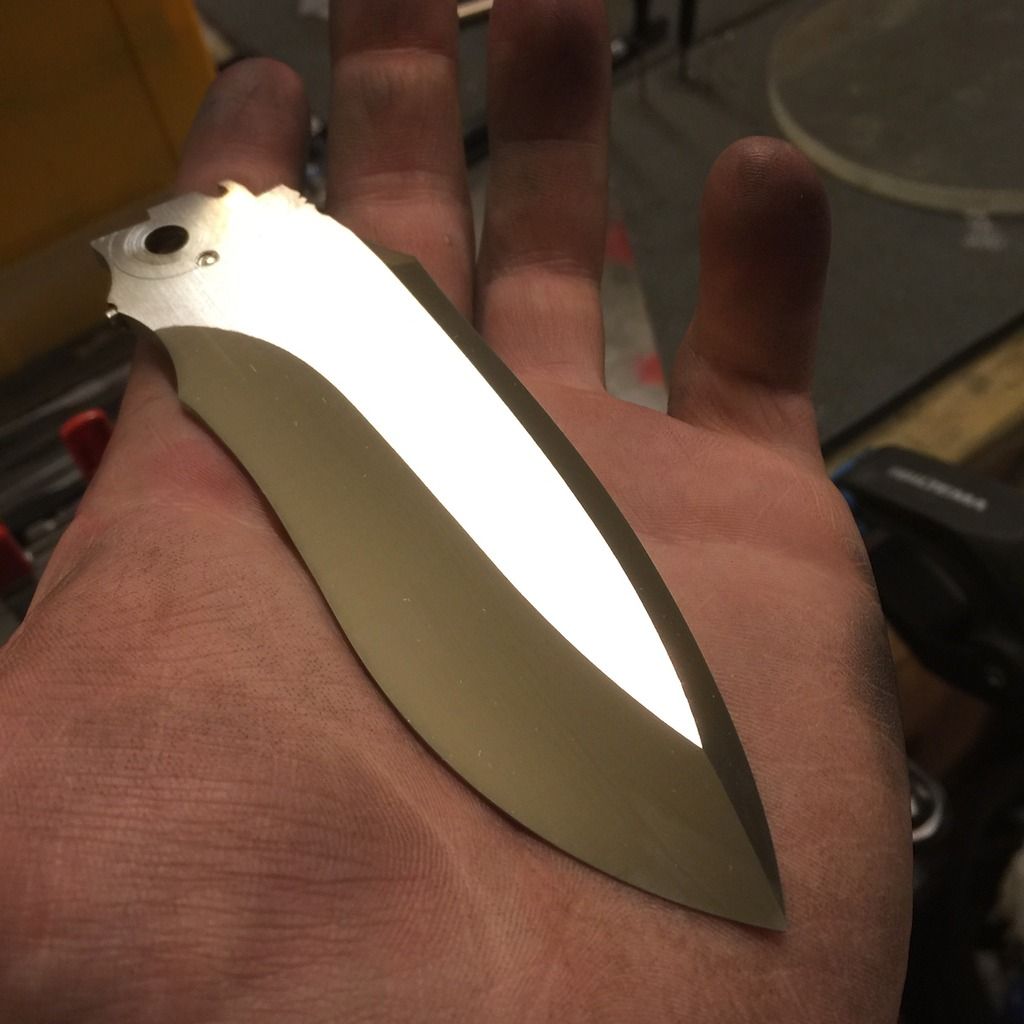
Just flat sanded to see if it holds my tolerances, seems good so far
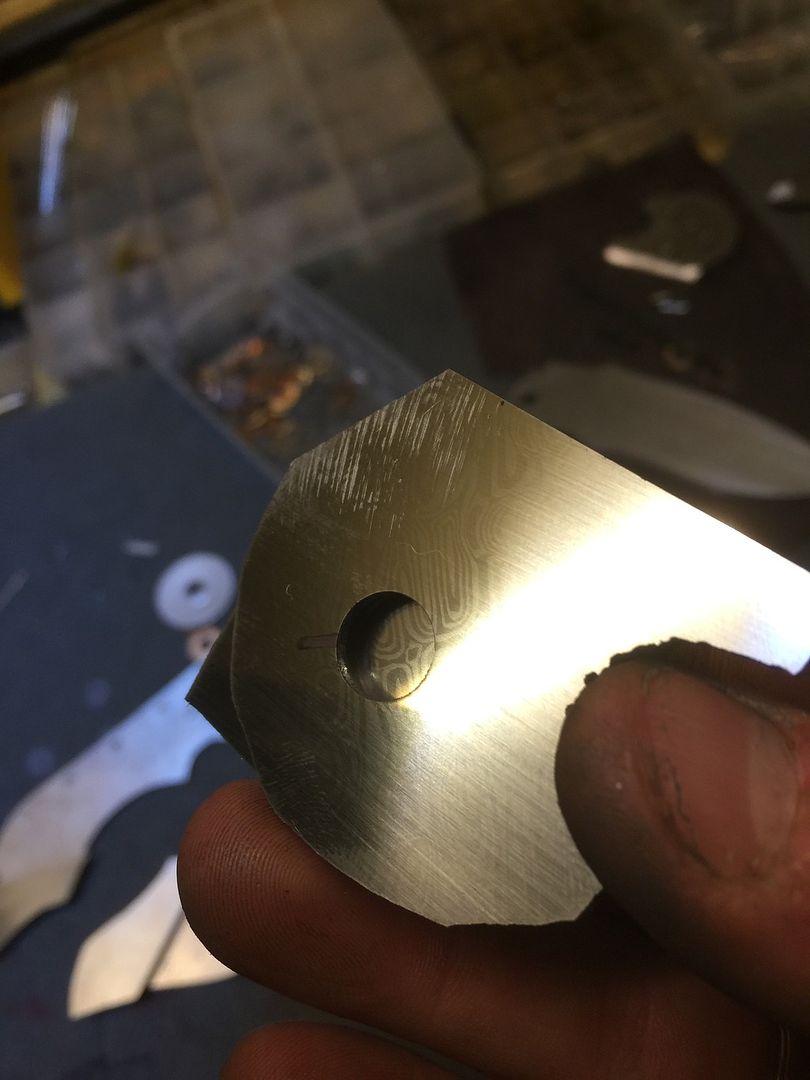
Tuned in the backside and it fit nicely against liner and mechanics.
Flush tested
Button will be flush with the contoured handle, but for now this is just for testing to show tolerances
Hides nicely

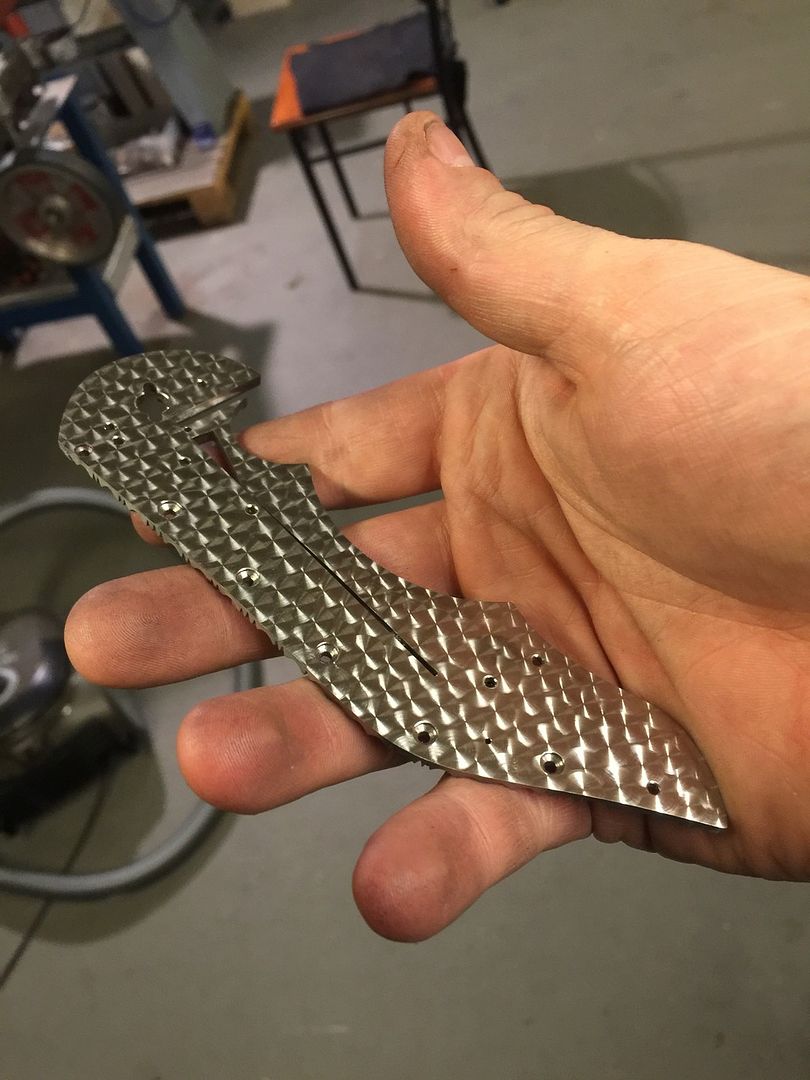
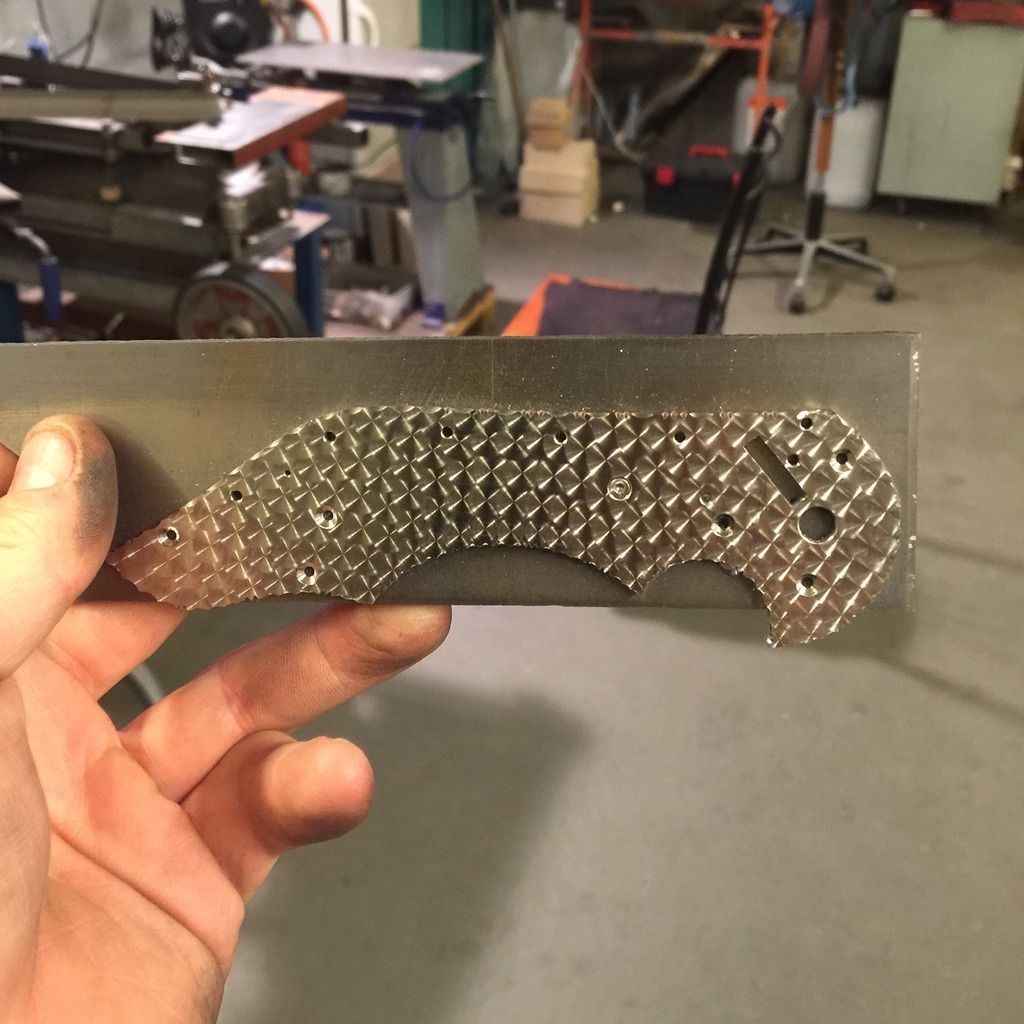
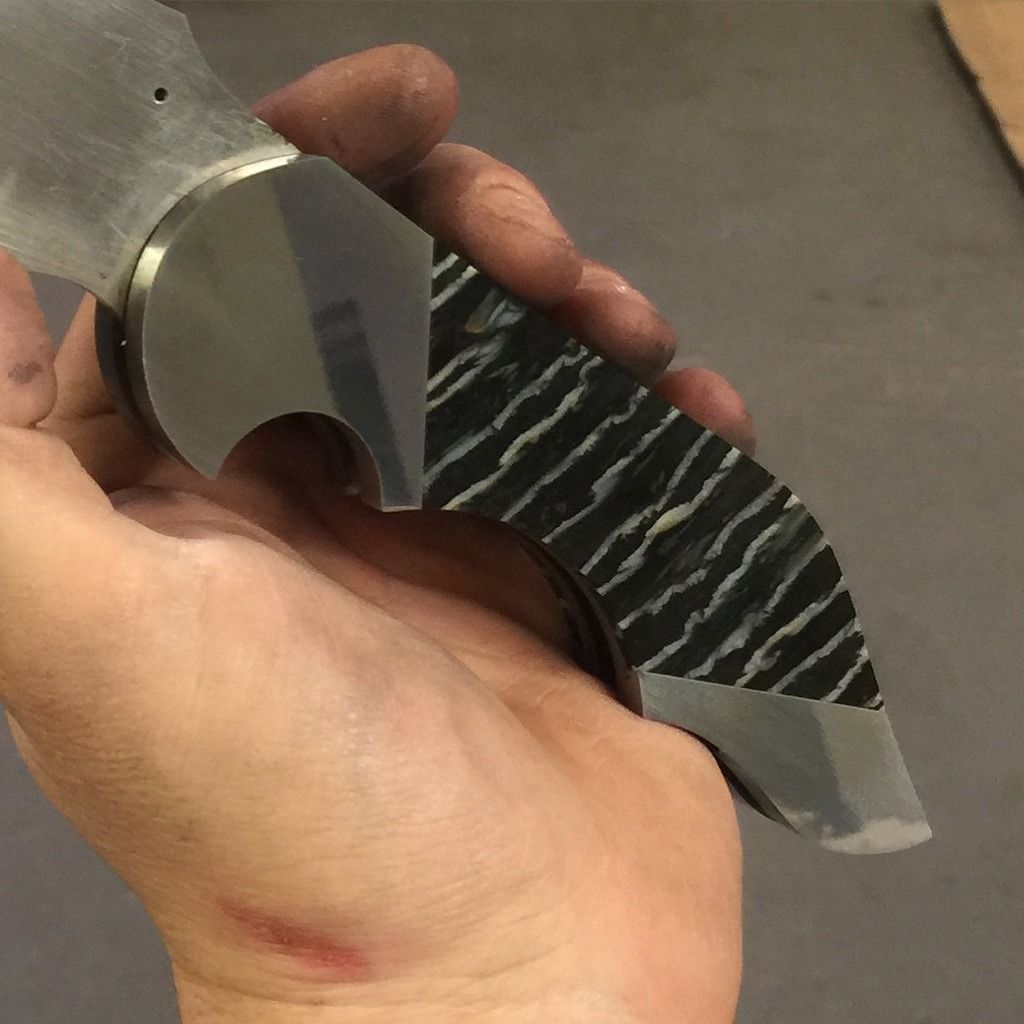
Profiling bolsters
Profiled
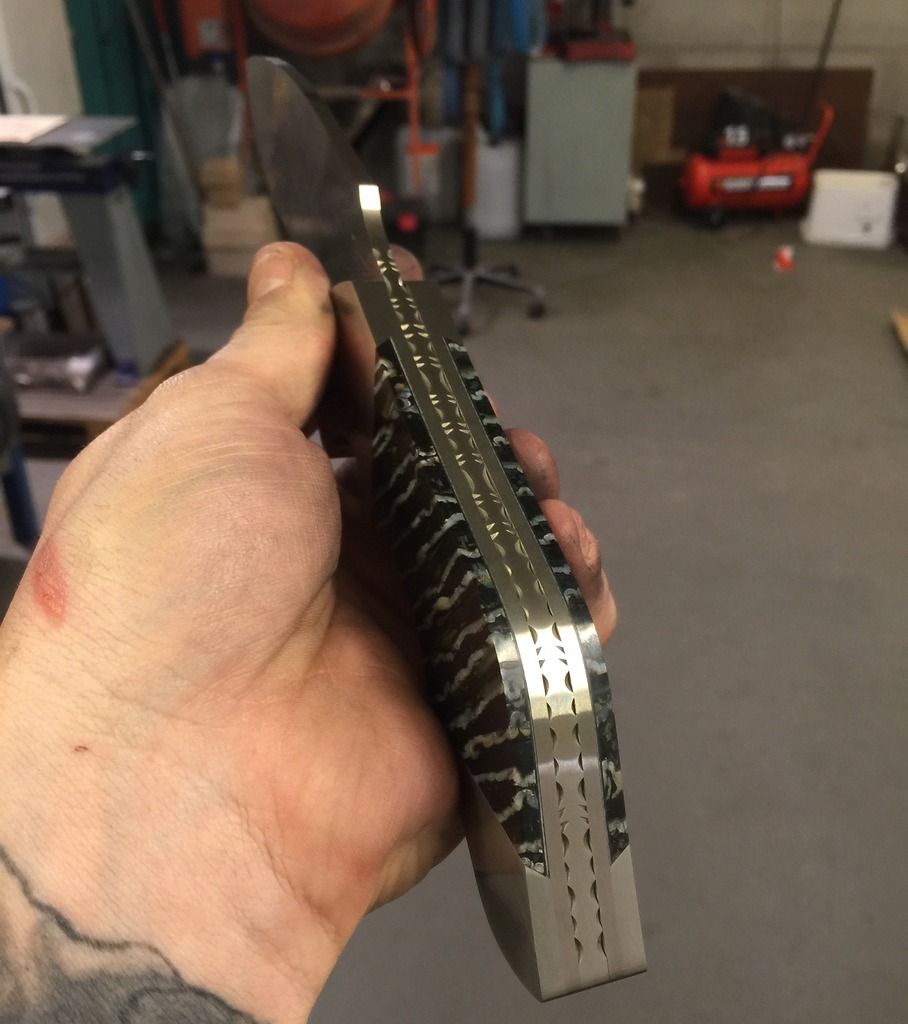
Time to filework spine and blade
Filework finished, liners get filework later in build
-
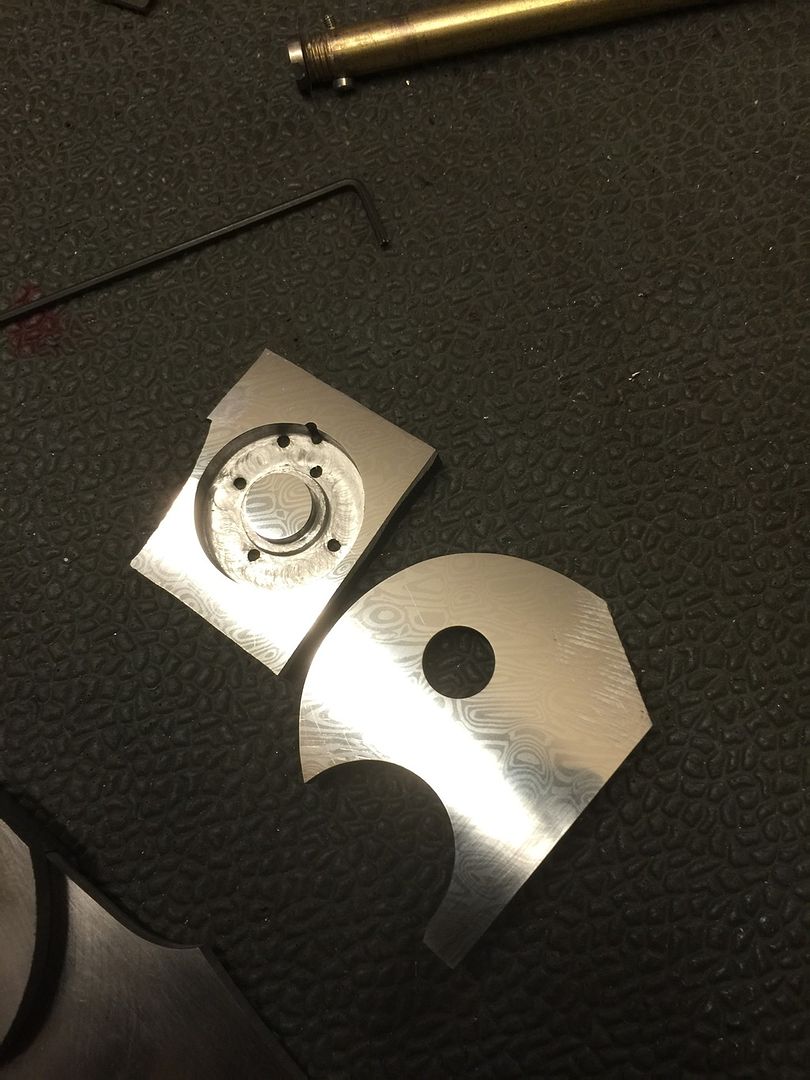
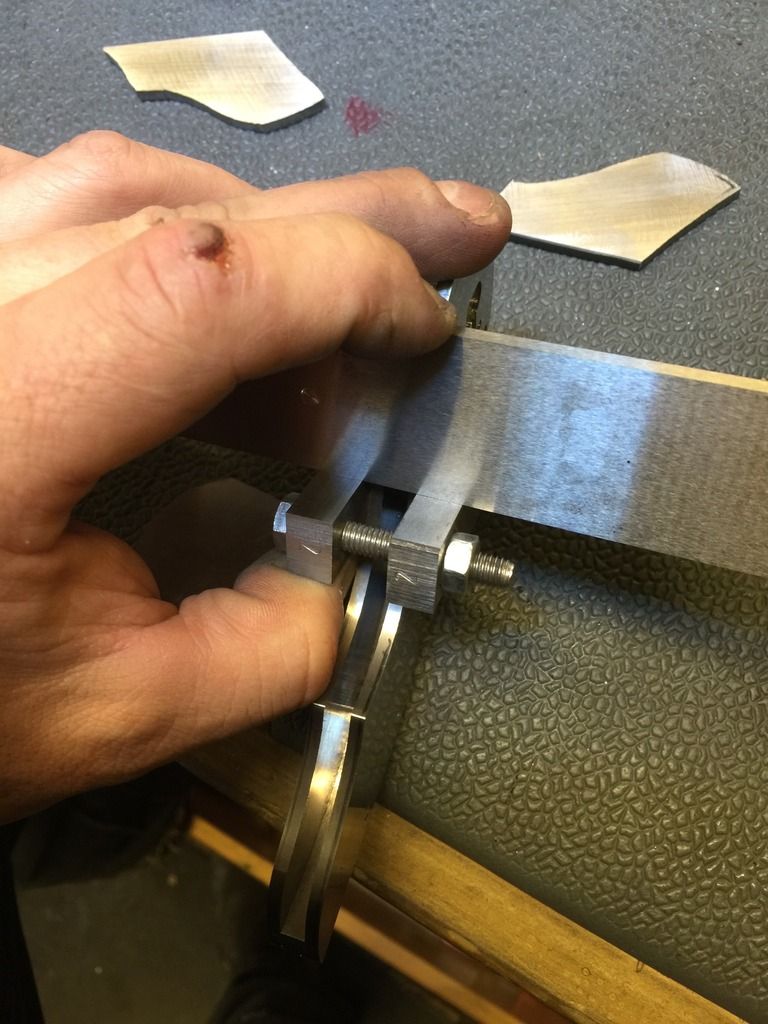
Time to make the button, revealed the pattern so I can find a similar piece.
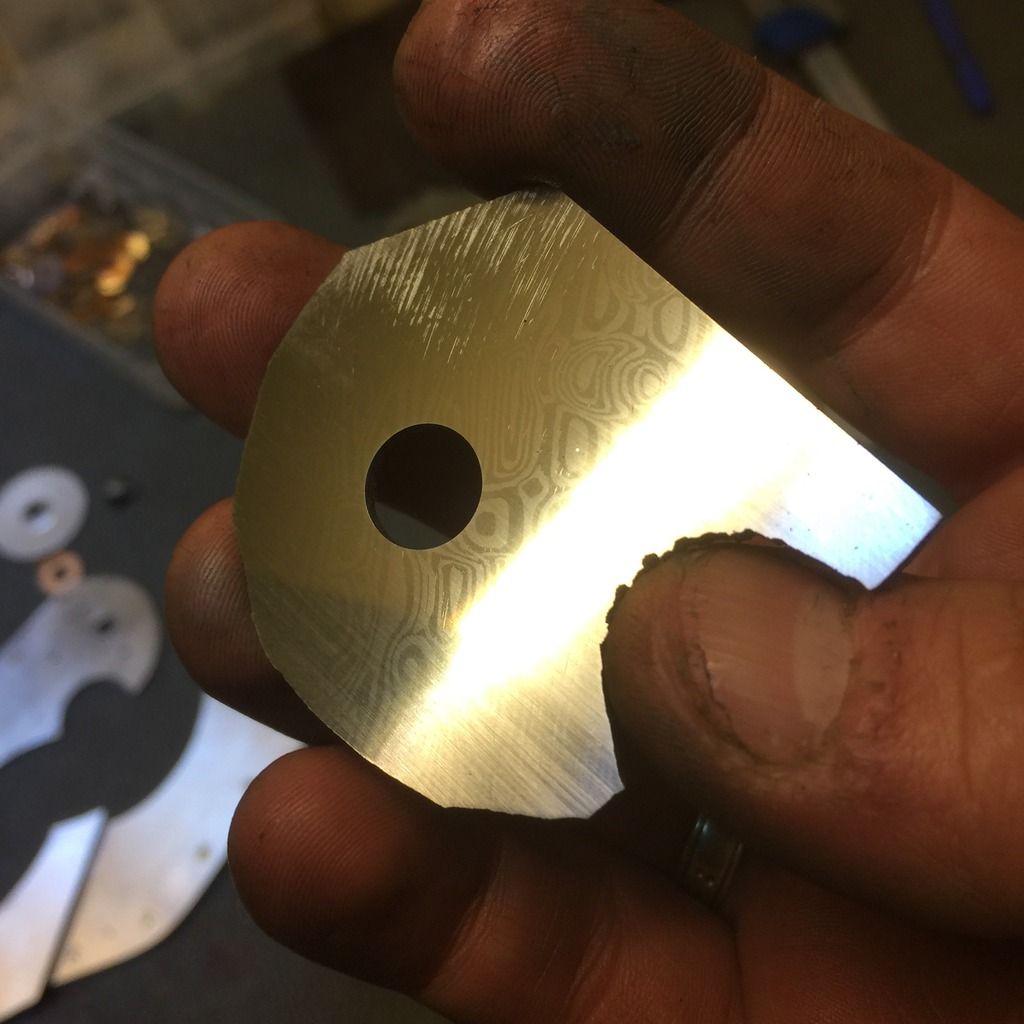
Material that match the hole found, this will be tricky but fun job.
Roughly marked and with guiding holes, ready for the roundtable.
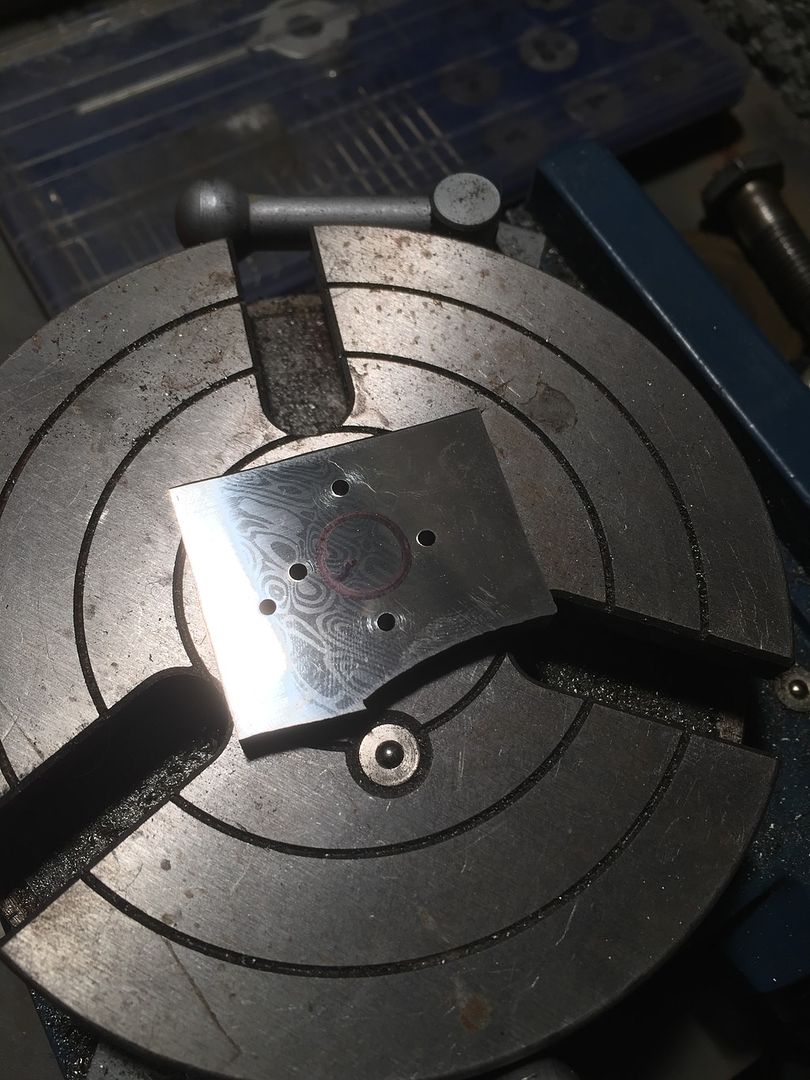
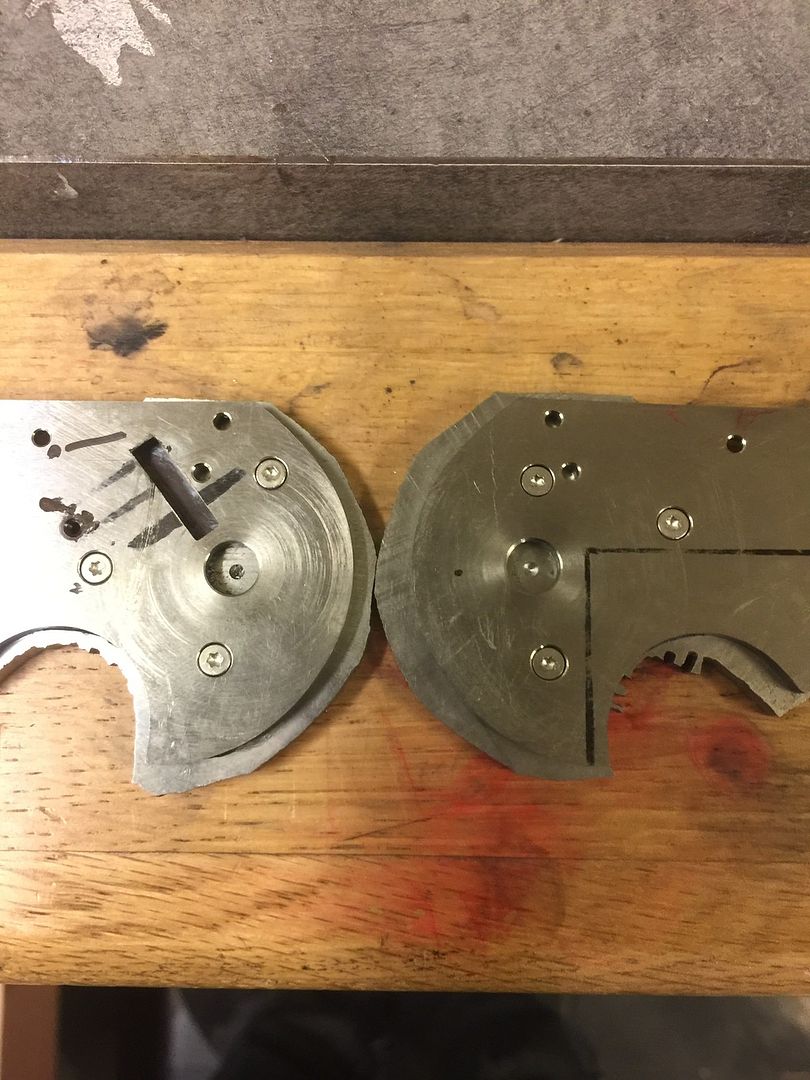
Pocket milled on the pivot screw side bolster
Shaping the pivot screw
All messy
 to be continued very soon.
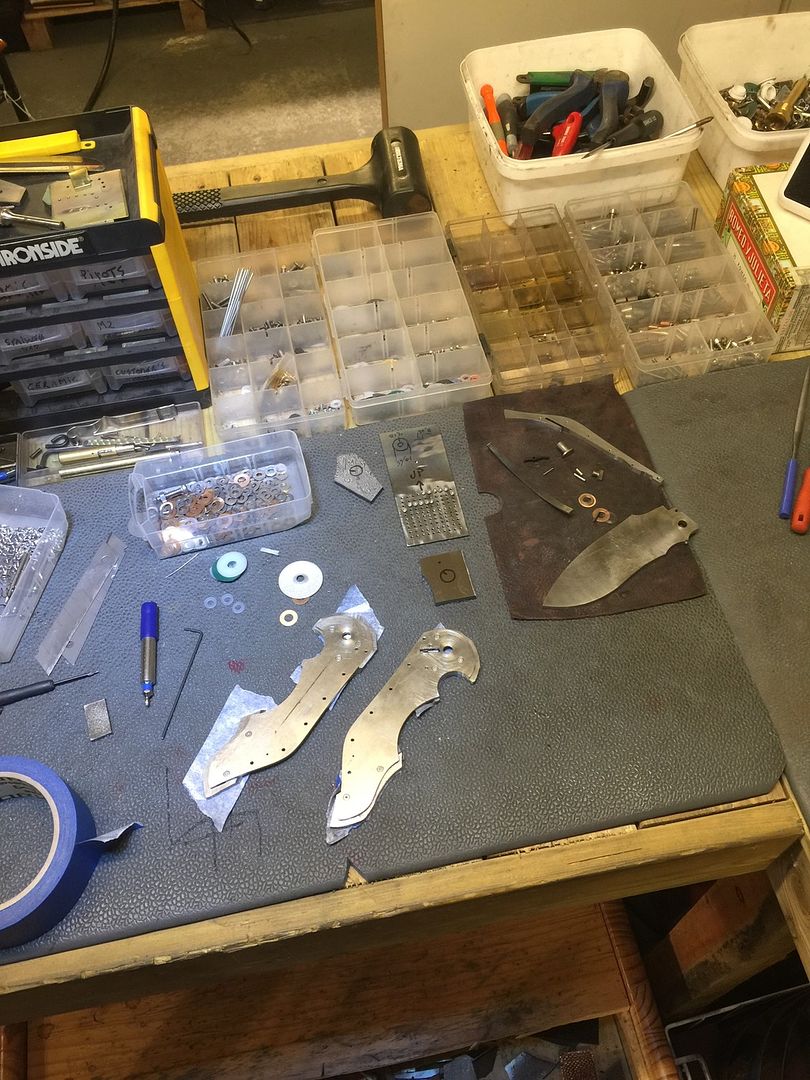
-
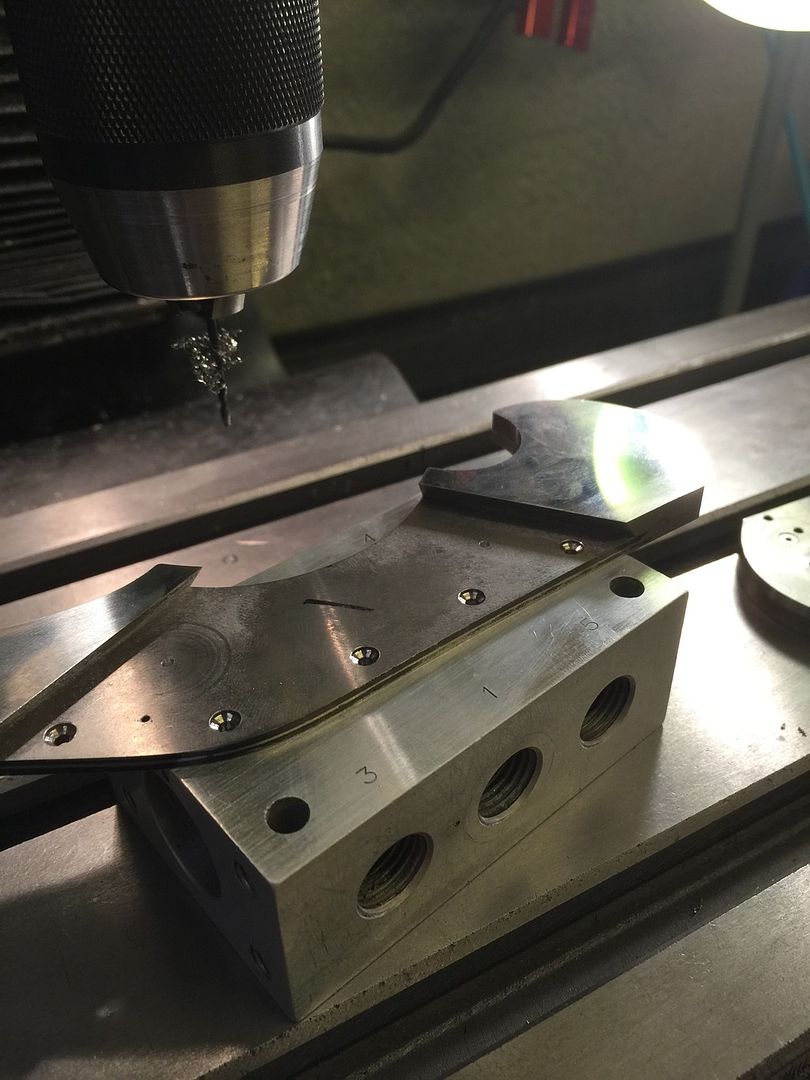
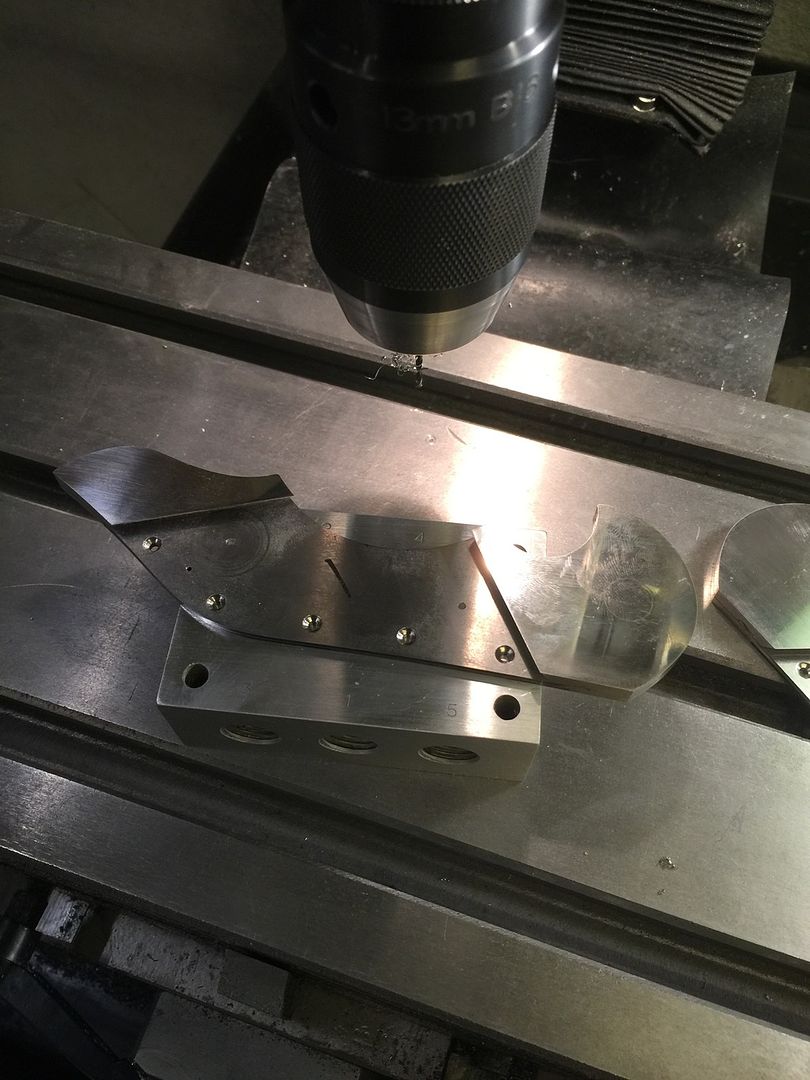
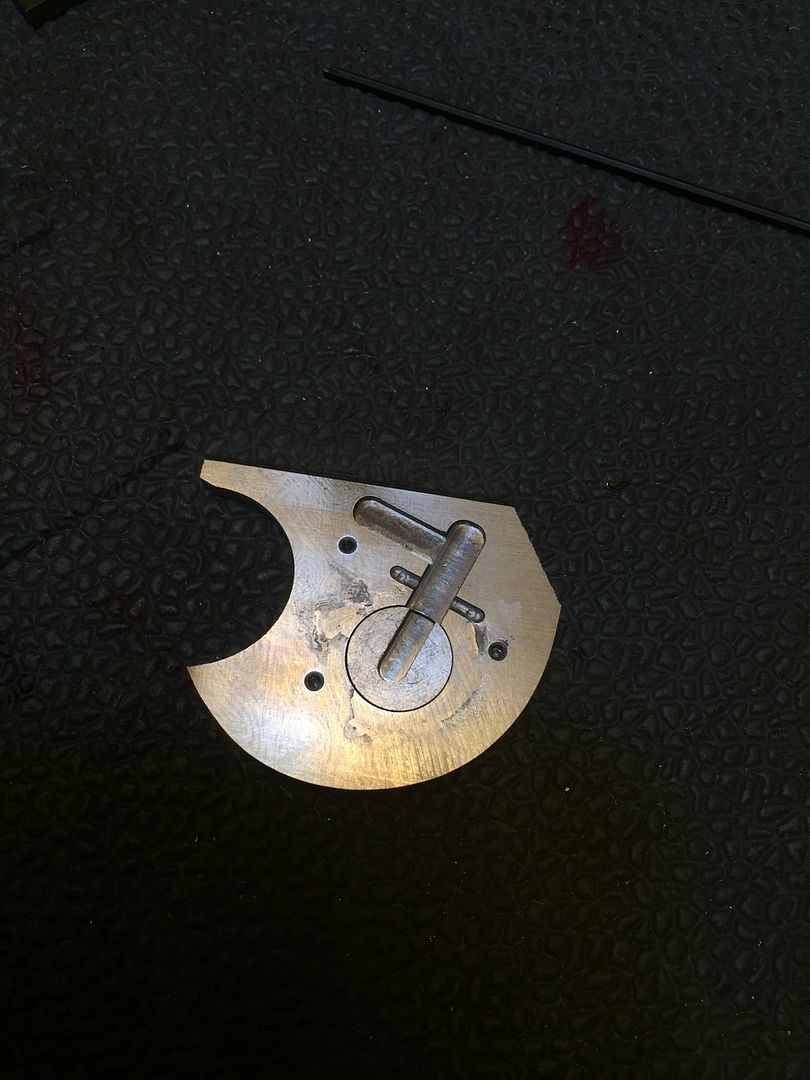
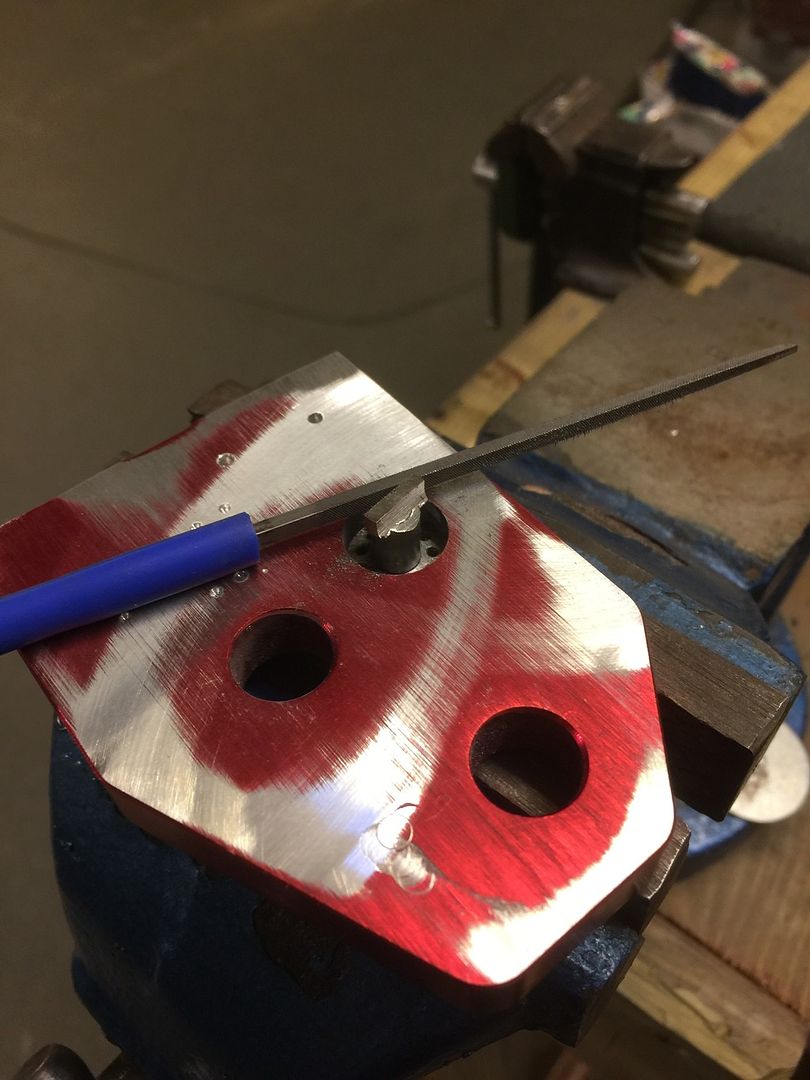
Sentered spot drill in the bolsters, next task room to lock in the mechanics.
Some small mill work for next pictures
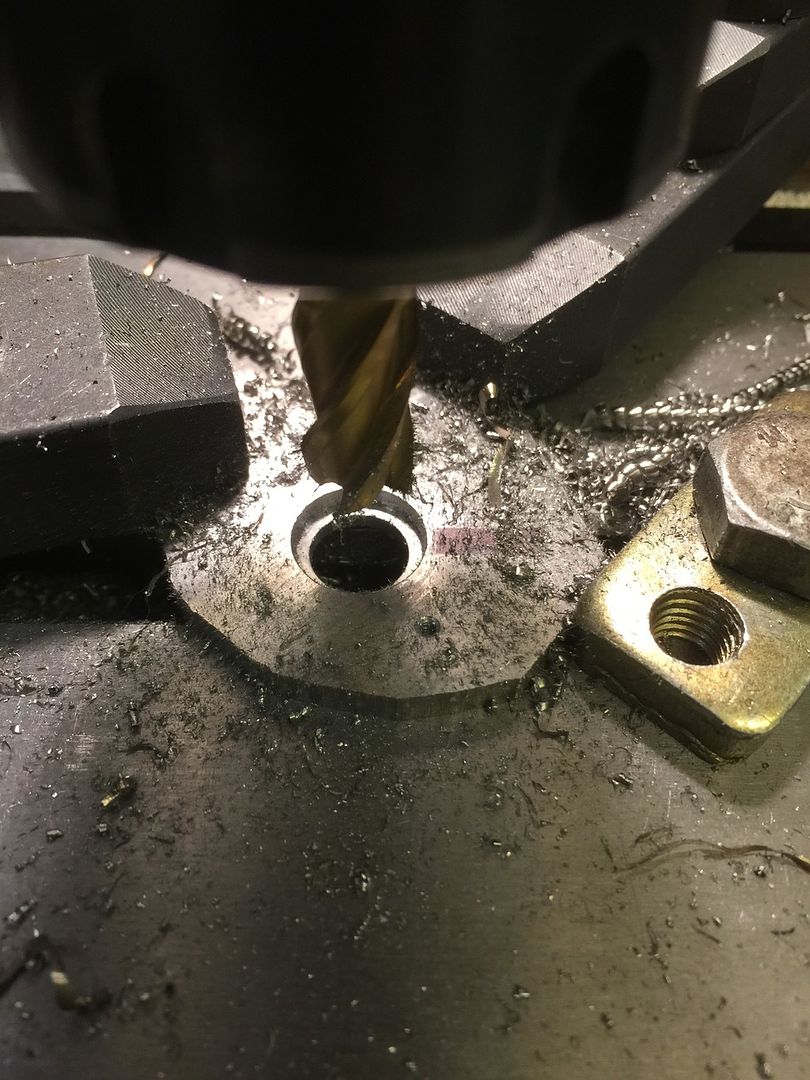

To be continued
-
Dovetails done on front bolsters

Parallel
Symmetry view
Undersized holes next, from liners to bolsters
"Starting" to look like a knife
-
Time to do bolsters

This handle will have straight dovetail lines on bolsters meeting up with mammoth scales. I use a filing guide I made for this job.

Checking the symmetry with a parallel
Here is the first stage of dovetails
Last stage for dovetail is done on a tempered 1 inch glass platten that is dead on.
Finished at 1200 grit, also the dovetail get a jeweled finish when final work coming up, every surface and dimensions of my knives gets the same attention. Inside is equally nice to the outside.
3 more to go, after this I superglue and transfer undersized holes. No screw visible on the outside
-
takk takk.
oppdateringer rundt hjørnet.
Hva er i samlingen?
-
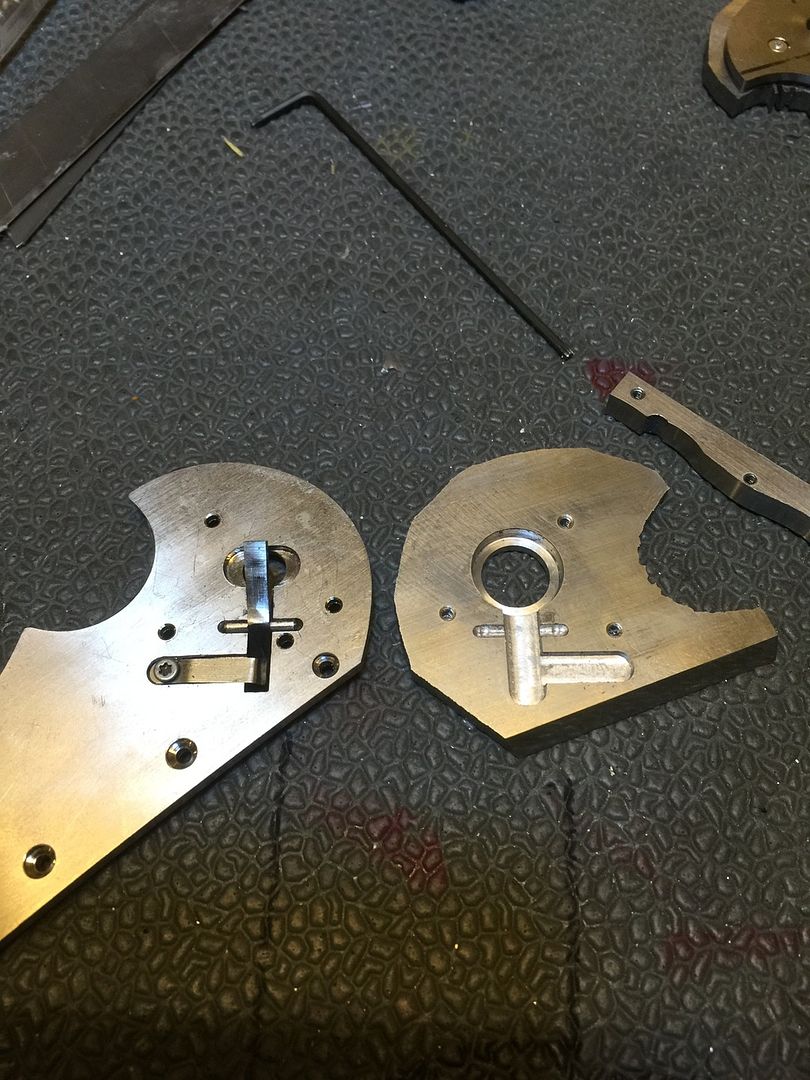
Milling down another part for the lock system
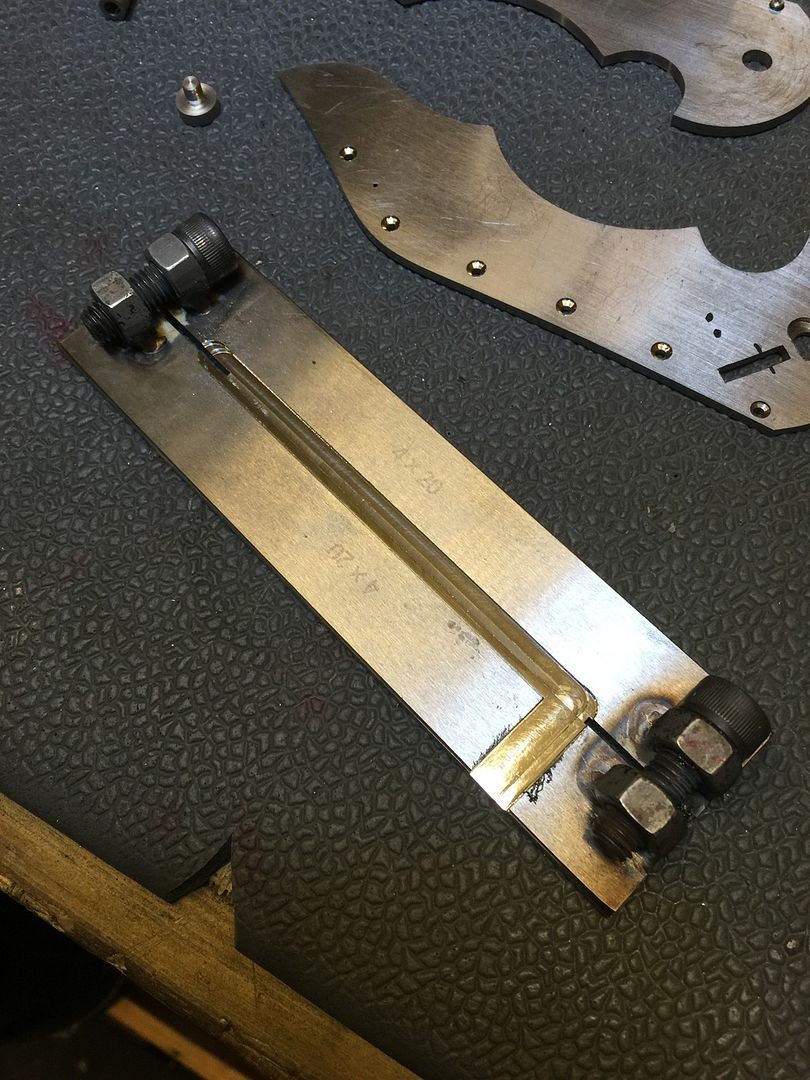
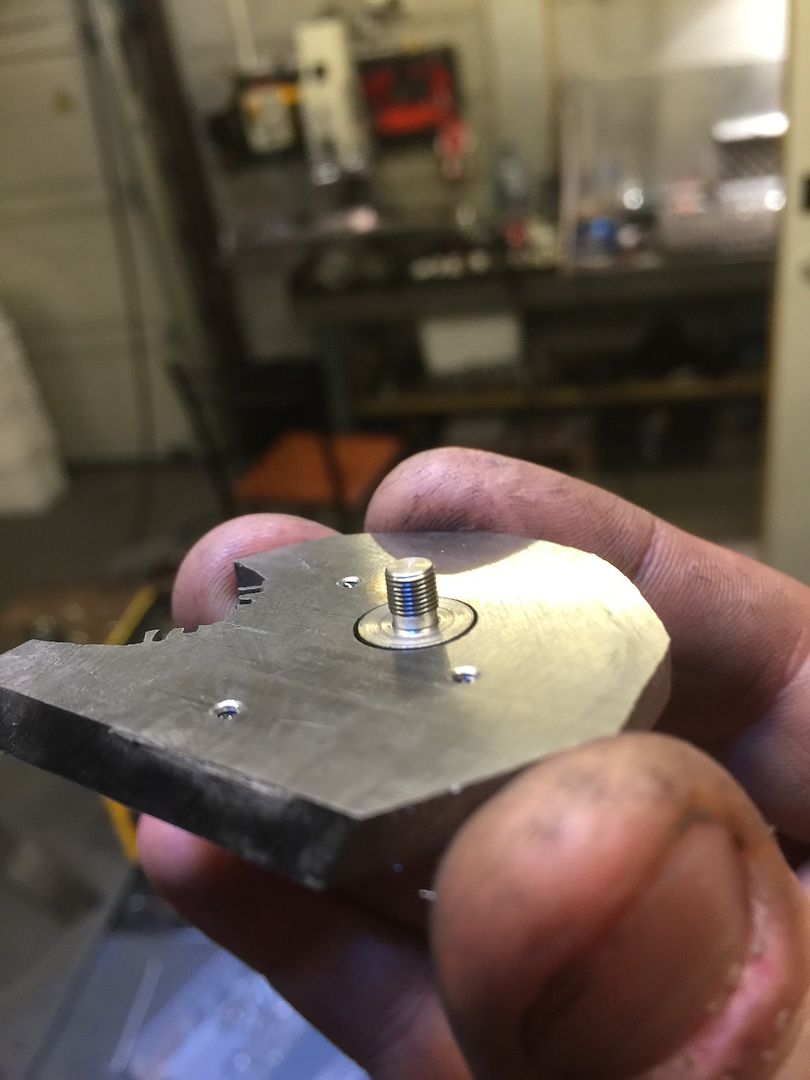
Adjusting the spring for the hidden button
A lot of geometry goes into this build and mechanics
I set my mill for repeatable operations, I believe in take things slowly and steady. One more time than ruin it on first try.
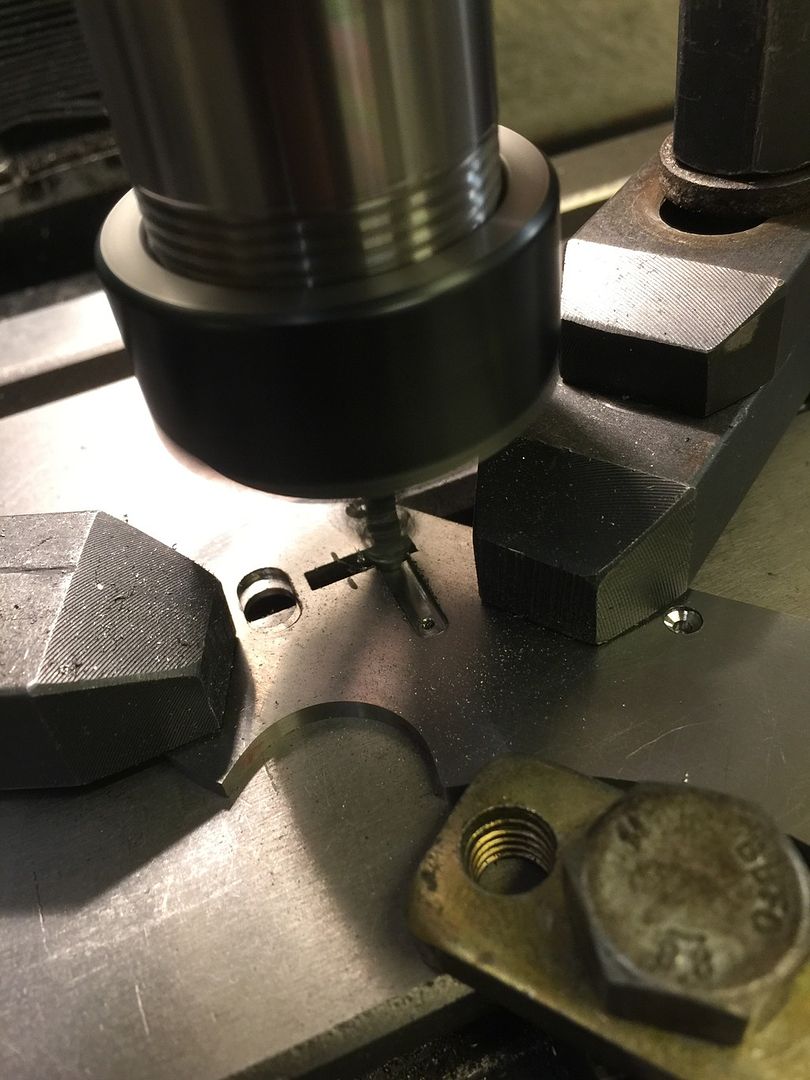
Checking for cleareance and planing next parts

Both open and closed position is now good


Foldeknivmaker Glenn Are Hovin- Nye Føniks og Storm bygg.
in Kniver
Posted